Optimizing Biomarker Validation for Clinical Application: A Strategic Framework for Researchers and Drug Developers
This article provides a comprehensive roadmap for researchers and drug development professionals navigating the complex journey of biomarker validation.
Optimizing Biomarker Validation for Clinical Application: A Strategic Framework for Researchers and Drug Developers
Abstract
This article provides a comprehensive roadmap for researchers and drug development professionals navigating the complex journey of biomarker validation. Covering the full spectrum from foundational principles to clinical implementation, it explores the statistical frameworks for distinguishing prognostic from predictive biomarkers, details advanced methodological approaches including multi-omics and AI integration, and addresses critical troubleshooting challenges in standardization and data management. With a focus on practical strategies for navigating regulatory landscapes and leveraging real-world evidence, this guide aims to enhance validation success rates and accelerate the translation of promising biomarkers into clinically actionable tools for precision medicine.
Laying the Groundwork: Biomarker Classifications, Discovery Pipelines, and Clinical Context
Biomarker Definitions and Categories
What is a Biomarker?
A biomarker is a defined characteristic that is measured as an indicator of normal biological processes, pathogenic processes, or responses to an exposure or intervention, including therapeutic interventions [1]. Molecular, histologic, radiographic, or physiologic characteristics are all types of biomarkers, which are distinct from assessments of how an individual feels, functions, or survives (known as Clinical Outcome Assessments) [2].
The Seven Biomarker Categories
The FDA-NIH Biomarkers, EndpointS, and other Tools (BEST) resource has defined seven primary biomarker categories based on their specific applications in medical product development and clinical practice [2] [1].
Table: The Seven Primary Biomarker Categories According to FDA-NIH BEST Resource
| Biomarker Category | Definition | Primary Function | Examples |
|---|---|---|---|
| Susceptibility/Risk | Indicates potential for developing a disease or condition | Identifies individuals with genetic predisposition or elevated risk | BRCA1/2 mutations for breast/ovarian cancer [3] |
| Diagnostic | Detects or confirms presence of a disease or condition | Identifies individuals with a disease or disease subtype | PSA for prostate cancer, C-reactive protein for inflammation [3] |
| Monitoring | Assesses disease status or response to therapy over time | Tracks disease progression, relapse, or treatment response | Hemoglobin A1c for diabetes, BNP for heart failure [3] |
| Prognostic | Predicts disease outcome or progression independent of treatment | Identifies disease aggressiveness and likely clinical course | Ki-67 in breast cancer, BRAF mutations in melanoma [3] |
| Predictive | Predicts response to a specific therapeutic intervention | Identifies patients likely to benefit from particular treatments | HER2 status in breast cancer, EGFR mutations in NSCLC [4] [3] |
| Pharmacodynamic/Response | Shows biological response to a drug treatment | Demonstrates mechanism of action and biological activity | LDL cholesterol response to statins, blood pressure response to antihypertensives [3] |
| Safety | Indicates potential for toxicity or adverse effects | Monitors drug-induced injury or side effects | Liver function tests, creatinine clearance [3] |
Clinical Applications and Key Distinctions
Diagnostic Biomarkers in Clinical Practice
Diagnostic biomarkers detect or confirm the presence of a disease or condition of interest, or identify individuals with a subtype of the disease [2]. These biomarkers are particularly valuable as medicine moves toward molecular-based disease classification rather than organ-based schemes.
Critical Considerations for Diagnostic Biomarkers:
- Context of Use: A diagnostic biomarker may be useful in one clinical circumstance but misleading in another [2]
- False-Positive Tolerance: Varies by disease context—low tolerance for psychologically devastating or invasive diagnoses (e.g., pancreatic cancer) versus higher tolerance for screening common diseases (e.g., hypertension) [2]
- Validation Complexity: Requires precise definition of operating characteristics across different patient populations and clinical scenarios [2]
Prognostic vs. Predictive Biomarkers: A Critical Distinction
Understanding the difference between prognostic and predictive biomarkers is essential for appropriate clinical application.
Table: Comparison of Prognostic and Predictive Biomarkers
| Characteristic | Prognostic Biomarkers | Predictive Biomarkers |
|---|---|---|
| Primary Function | Provides information about overall disease outcome regardless of therapy [4] | Informs expected clinical outcome based on specific treatment decisions [4] |
| Identification Method | Main effect test of association between biomarker and outcome [4] | Interaction test between treatment and biomarker in statistical models [4] |
| Study Design | Can be identified in retrospective studies, case-control studies, and single-arm trials [4] | Should be identified through randomized clinical trials [4] |
| Clinical Question | "What is the likely disease course?" | "Will this patient respond to this specific treatment?" |
| Examples | STK11 mutation in non-squamous NSCLC [4] | EGFR mutation status for gefitinib response in NSCLC [4] |
Research Design and Statistical Considerations
Proper identification of prognostic and predictive biomarkers requires distinct research approaches:
- Prognostic Biomarker Identification: Can be properly conducted in retrospective studies using biospecimens from cohorts representing the target population [4]
- Predictive Biomarker Identification: Requires data from randomized clinical trials with interaction testing between treatment and biomarker [4]
The IPASS study exemplifies predictive biomarker validation, demonstrating a significant interaction (P<0.001) between EGFR mutation status and treatment response to gefitinib versus carboplatin plus paclitaxel in advanced pulmonary adenocarcinoma [4].
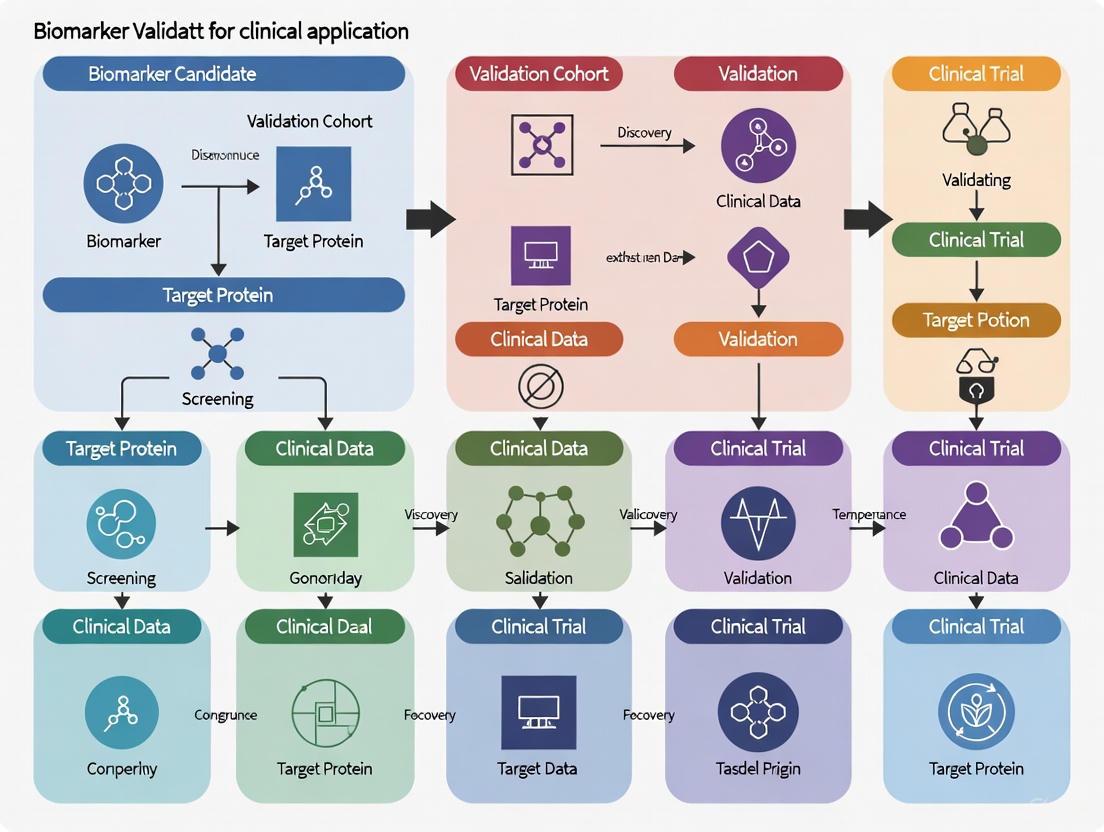
Biomarker Validation Workflow and Methodologies
Comprehensive Validation Workflow
The journey from biomarker discovery to clinical implementation follows a structured pathway with multiple validation checkpoints.
Key Validation Metrics and Performance Characteristics
Rigorous statistical evaluation is essential for biomarker validation across multiple performance dimensions.
Table: Essential Biomarker Performance Metrics and Definitions
| Validation Metric | Definition | Interpretation in Clinical Context |
|---|---|---|
| Sensitivity | Proportion of true cases that test positive [4] | Ability to correctly identify individuals with the disease |
| Specificity | Proportion of true controls that test negative [4] | Ability to correctly exclude individuals without the disease |
| Positive Predictive Value | Proportion of test-positive patients who actually have the disease [4] | Clinical utility depends on disease prevalence |
| Negative Predictive Value | Proportion of test-negative patients who truly do not have the disease [4] | Clinical utility depends on disease prevalence |
| Area Under ROC Curve | Measure of discrimination ability ranging from 0.5 (coin flip) to 1.0 (perfect) [4] | Overall performance in distinguishing cases from controls |
| Calibration | How well a marker estimates the risk of disease or event of interest [4] | Agreement between predicted and observed outcomes |
Troubleshooting Common Biomarker Validation Challenges
Pre-Analytical and Laboratory Issues
Multiple technical factors can compromise biomarker data quality during sample collection and processing.
Table: Common Laboratory Challenges and Quality Control Solutions
| Laboratory Challenge | Impact on Biomarker Data | Recommended Solutions |
|---|---|---|
| Temperature Regulation | Degradation of temperature-sensitive biomarkers (nucleic acids, proteins) leading to unreliable results [5] | Standardized protocols for flash freezing, controlled thawing, consistent cold chain logistics [5] |
| Sample Preparation Variability | Introduction of bias affecting downstream analyses (sequencing, mass spectrometry, PCR) [5] | Standardized extraction methods, validated reagents, rigorous quality control checkpoints [5] |
| Contamination | Skewed biomarker profiles through environmental contaminants, cross-sample transfer, or reagent impurities [5] | Dedicated clean areas, routine equipment decontamination, proper handling procedures [5] |
| Human Error in Data Management | Manual errors in sample processing and data recording compromising data integrity [5] | Laboratory automation, barcode systems, electronic laboratory notebooks, competency assessments [5] |
Statistical and Study Design Challenges
Many biomarker validation failures originate from methodological and statistical shortcomings rather than biological irrelevance.
Common Statistical Pitfalls and Solutions:
- Between-Group Significance vs. Classification Success: A statistically significant result in a between-group hypothesis test often does not translate to successful classification. The critical assessment should be probability of classification error (P_ERROR), not just p-values [6]
- Cross-Validation Misapplication: Standard statistical learning texts specifically identify "The wrong and the right way to do cross-validation." When misapplied, cross-validation can produce impressive performance metrics (e.g., sensitivity >0.95) even with random data [6]
- Inadequate Test-Retest Reliability: Failure to establish rigorous test-retest reliability precludes use in longitudinal monitoring. Linear correlation should not be used to quantify reliability; intraclass correlation coefficient (ICC) with proper version selection is required [6]
- Insufficient Sample Sizes: Sample size requirements for reliability studies and prodrome evaluation are far larger than those computed for hypothesis testing purposes [6]
Experimental Protocols and Research Reagents
Essential Research Reagent Solutions
Successful biomarker research requires carefully selected reagents and platforms tailored to specific biomarker classes.
Table: Key Research Reagent Solutions for Biomarker Analysis
| Reagent/Platform | Primary Function | Application Context |
|---|---|---|
| Omni LH 96 Automated Homogenizer | Standardizes sample disruption parameters, ensures uniform processing [5] | Pre-analytical sample preparation for nucleic acid, protein, and metabolite biomarkers |
| Single-Use Omni Tip Consumables | Eliminates cross-sample contamination during homogenization [5] | Maintaining biomarker integrity in high-throughput workflows |
| High-Sensitivity Troponin Assays | Detection of previously undetectable low-level troponin elevations [2] | Refined diagnosis of small episodes of myocardial necrosis |
| Liquid Biopsy Platforms (ctDNA) | Non-invasive circulating tumor DNA analysis for early disease detection [7] | Oncology applications, expanding to infectious and autoimmune diseases |
| Single-Cell Sequencing Platforms | Examination of individual cells within tumors to assess heterogeneity [7] | Identification of rare cell populations driving disease progression |
Multi-Omics Integration Workflow
Contemporary biomarker discovery increasingly relies on integrated analysis across multiple biological layers.
Frequently Asked Questions (FAQs)
Biomarker Definition and Classification
Q: What exactly distinguishes a biomarker from a clinical endpoint? A: Biomarkers are measured indicators of biological processes, while clinical endpoints are direct measures of how a patient feels, functions, or survives. Biomarkers serve various purposes including predicting clinical endpoints, but only validated biomarkers can serve as surrogate endpoints for regulatory approval [2].
Q: Can a single biomarker fall into multiple classification categories? A: Yes, many biomarkers serve multiple purposes. For example, BRCA1 expression acts as both a prognostic biomarker (indicating disease outcome) and a predictive biomarker (for chemotherapy response) in sporadic epithelial ovarian cancer [8]. However, evidence must be developed for each intended use.
Q: What is the difference between prognostic and predictive biomarkers? A: Prognostic biomarkers provide information about overall disease outcome regardless of therapy, while predictive biomarkers inform the expected clinical outcome based on specific treatment decisions. Prognostic biomarkers answer "What is my disease trajectory?" while predictive biomarkers answer "Will this specific treatment work for me?" [4].
Validation and Implementation Challenges
Q: Why do so many promising biomarkers fail in clinical validation? A: Most failures stem from statistical and methodological issues rather than biological irrelevance. Common problems include: confusion between statistical significance and classification utility, misapplication of cross-validation techniques, inadequate test-retest reliability assessment, and insufficient sample sizes for intended applications [6].
Q: What are the key considerations for diagnostic biomarker validation? A: Diagnostic biomarker validation requires careful attention to context of use, false-positive/false-negative tolerance based on disease prevalence and consequences, and demonstration that the biomarker adds substantial information to change clinical decision-making, not just statistical association with disease [2].
Q: How do regulatory agencies like FDA evaluate biomarkers? A: The FDA Biomarker Qualification Program uses a three-stage process: 1) Letter of Intent assessing potential value and feasibility, 2) Qualification Plan detailing development strategy, and 3) Full Qualification Package with comprehensive evidence. Qualification ensures the biomarker can be relied upon for specific interpretation within a stated Context of Use [1].
Technical and Analytical Considerations
Q: What are the most common laboratory issues affecting biomarker data? A: The primary technical challenges include: temperature regulation affecting biomarker stability, sample preparation variability introducing bias, contamination skewing biomarker profiles, and human errors in data management. These can be addressed through automation, standardized protocols, and rigorous quality control [5].
Q: When should multiple biomarkers be combined into panels? A: Biomarker panels are often necessary to achieve better performance than single biomarkers, despite added measurement complexity. Using each biomarker in its continuous state retains maximal information for model development, and dichotomization for clinical decisions should occur in later validation stages [4].
Q: How are emerging technologies like AI and multi-omics changing biomarker discovery? A: AI and machine learning enable analysis of high-dimensional heterogeneous data, identifying complex biomarker-disease associations traditional methods overlook. Multi-omics approaches provide comprehensive biomarker signatures by integrating genomics, proteomics, metabolomics, and transcriptomics data [9] [7].
Technical Troubleshooting Guides
This section addresses common experimental challenges in high-throughput screening (HTS) and multi-omics data integration, providing root cause analysis and actionable solutions.
HTS Troubleshooting: Addressing False Positives and Negatives
Reported Issue: High rates of false positives and negatives in HTS results, leading to wasted resources and missed opportunities [10].
| Troubleshooting Step | Key Actions | Expected Outcome |
|---|---|---|
| Investigate Variability | Standardize manual protocols; use automated liquid handlers with verification features (e.g., DropDetection) [10]. | Reduced inter-user variability and improved assay reproducibility. |
| Automate Data Handling | Implement automated data management and analytical processes to manage vast, multiparametric data [10]. | More reliable hit identification and faster insights. |
| Verify Liquid Handling | Check precision at low volumes; use non-contact dispensers to minimize cross-contamination [10]. | Confirmed dispensing accuracy and reduced experimental artifacts. |
Multi-Omics Data Integration Troubleshooting: Overcoming Technical Noise
Reported Issue: Difficulty integrating data from different omics layers (e.g., genomics, proteomics) due to technical heterogeneity, leading to misleading conclusions [11].
| Troubleshooting Step | Key Actions | Expected Outcome |
|---|---|---|
| Standardize Pre-processing | Apply tailored normalization and batch effect correction for each data type (e.g., RNA-seq, DNA methylation) [12] [11]. | Harmonized data distributions and reduced technical noise. |
| Select Appropriate Integration Method | Choose method based on data structure and biological question. Test multiple algorithms [11]. | Robust identification of shared biological signals across omics layers. |
| Ensure Metadata Completeness | Document all sample, equipment, and software details. Use domain-specific ontologies [12]. | Improved data interpretability, reproducibility, and reuse. |
Biomarker Validation Troubleshooting: Ensuring Clinical Relevance
Reported Issue: A discovered biomarker shows statistical significance in group comparisons but fails to classify individual patients accurately [6].
| Troubleshooting Step | Key Actions | Expected Outcome |
|---|---|---|
| Perform Robust Model Validation | Avoid cross-validation misapplication. Use multiple algorithms (e.g., LASSO, random forests) for model selection [6]. | A validated model with a low probability of classification error (P_ERROR). |
| Assess Clinical Utility | Move beyond p-values. Evaluate sensitivity, specificity, positive predictive value, and area under the ROC curve [6]. | Realistic assessment of the biomarker's diagnostic or predictive performance. |
| Establish Test-Retest Reliability | Quantify reliability using the appropriate Intraclass Correlation Coefficient (ICC), not linear correlation [6]. | Confidence that the biomarker can be used for longitudinal monitoring. |
Frequently Asked Questions (FAQs)
1. What are the most critical steps to ensure a successful multi-omics data integration project?
Success hinges on three pillars: First, design the resource from the user's perspective, not just the data curator's, by defining real use-case scenarios [12]. Second, rigorously preprocess data through standardization and harmonization to make different data types (e.g., transcriptomics, proteomics) compatible [12]. Third, value metadata by thoroughly documenting samples and processes, as this is essential for data interpretation and reuse [12].
2. How can we improve the reproducibility of our High-Throughput Screening (HTS) assays?
The primary strategy is to integrate automation into your workflow. Automated liquid handlers, robotic arms, and integrated systems standardize processes, thereby reducing human error and inter-user variability [10]. Tools with in-built verification, like liquid handlers with drop detection, further enhance reproducibility by documenting and correcting dispensing errors [10].
3. We have a multi-omics dataset from the same patient samples. What integration method should we use?
The choice depends on your biological question. For an unsupervised approach to find hidden sources of variation, MOFA is a powerful tool [11]. If your goal is supervised classification based on known patient groups (e.g., healthy vs. disease), DIABLO is designed for this purpose [11]. To identify shared sample similarity patterns across omics layers, Similarity Network Fusion (SNF) is a network-based method. Best practice is to try multiple methods and compare results [11].
4. Why does our biomarker panel perform well in statistical tests but fail in clinical classification?
A statistically significant p-value in a between-group test does not guarantee successful individual classification [6]. The critical metric is the probability of classification error (P_ERROR). A biomarker must undergo rigorous model validation and its clinical utility must be assessed through metrics like sensitivity, specificity, and predictive values, not just p-values [6].
5. What are the common regulatory challenges in biomarker qualification?
Key challenges include navigating the strict protocols of regulatory agencies like the FDA and managing varying requirements across different international regulators [13]. Furthermore, proving clinical relevance across diverse populations and securing resources for the often lengthy and costly longitudinal studies required for validation are significant hurdles [13].
Methodologies & Data Summaries
Quantitative Analysis of Multi-Omics Integration Methods
The table below summarizes the characteristics of common computational frameworks for integrating matched multi-omics data (where multiple omics layers are measured from the same samples) [11].
| Method | Primary Function | Model Type | Key Output |
|---|---|---|---|
| MOFA | Identifies hidden sources of variation | Unsupervised, Bayesian factorization | Latent factors explaining variance across omics layers [11]. |
| DIABLO | Integrates data for classification | Supervised, multiblock sPLS-DA | Latent components and features predictive of sample groups [11]. |
| SNF | Fuses sample similarity networks | Unsupervised, network-based | A fused network capturing shared patterns across data types [11]. |
| MCIA | Joint analysis of multiple datasets | Unsupervised, multivariate statistics | A shared dimensional space for integrated data visualization [11]. |
Experimental Protocol: Integrating DNA Methylation and RNA-Seq Data
This protocol is adapted from a research study that successfully integrated these data types to identify disease-specific biomarker genes [12].
- Data Acquisition: Retrieve standardized DNA methylation (e.g., beta values of methylated CpG islands) and RNA-seq (e.g., gene expression) data from a public repository like TCGA2BED [12].
- Data Preprocessing: Independently normalize each dataset using standard pipelines for the respective omics type to account for technology-specific noise and batch effects [12] [11].
- Data Integration: Join the two normalized datasets based on common genomic coordinates. For example, map methylation sites at single-nucleotide positions to the genomic regions of genes from the RNA-seq data [12].
- Supervised Analysis: Train multiple supervised classification algorithms (e.g., C4.5, Random Forests) on the integrated dataset to build models that discriminate between case and control samples [12].
- Validation and Documentation: Thoroughly document every step of the analysis and make the software code openly available to ensure reproducibility [12].
Research Reagent Solutions for Multi-Omics Workflows
| Essential Material / Technology | Primary Function in Discovery Workflow |
|---|---|
| Non-Contact Liquid Handler | Precisely dispenses reagents in HTS and assay preparation, reducing volume use and cross-contamination [10]. |
| Single-Cell Sequencing Platform | Enables high-resolution measurement of transcriptomic, epigenomic, and proteomic data at the single-cell level [9]. |
| Mass Spectrometry | The core technology for identifying and quantifying proteins (proteomics) and metabolites (metabolomics) [9]. |
| DNA Methylation Array | Interrogates epigenomic states by measuring methylation levels at specific CpG sites across the genome [12]. |
Workflow Visualizations
Multi-Omics Integration & Validation Workflow
High-Throughput Screening with Automated Troubleshooting
Core Concepts: Intended Use and Context of Use
In biomarker validation, Intended Use and Context of Use are foundational concepts that dictate every subsequent validation decision. Clearly defining these elements at the outset ensures that your validation efforts are targeted, efficient, and meet regulatory expectations.
- Intended Use: This is a precise statement detailing what the biomarker test measures and the specific clinical or biological question it aims to answer. It defines the test's purpose in the context of patient care or research [14].
- Context of Use: This describes the specific application and conditions under which the biomarker will be employed. It outlines the precise role the biomarker will play in drug development or clinical decision-making, including the specific patient population, clinical setting, and how the results will inform decisions [15] [16].
Why This Step is Non-Negotiable The intended use statement is the primary factor guiding the appropriate level and scope of validation required. A higher degree of validation evidence is necessary for biomarkers that pose greater patient risk or have more significant clinical consequences. The U.S. Food and Drug Administration (FDA) emphasizes that a biomarker's qualification is specific to its Context of Use, meaning a biomarker validated for one purpose cannot be assumed valid for another without further evidence [15] [16] [14].
Troubleshooting Guide: Defining Your Intended Use and Context of Use
Researchers often encounter challenges when drafting these critical definitions. The following guide addresses common scenarios to help you formulate robust and clear statements.
| Problem Scenario | Question to Ask | Recommended Action |
|---|---|---|
| Unclear Purpose | Is the biomarker for diagnosis, predicting prognosis, monitoring treatment response, or patient stratification? | Draft a single-sentence purpose. Example: "This biomarker test is intended to identify HER2-low expression status in breast cancer patients to determine eligibility for T-DXd therapy." [14] |
| Vague Population | Have I specified the disease stage, prior treatments, demographics, and exclusion criteria? | List all relevant patient characteristics. Example: "Postmenopausal women with radiographically confirmed knee osteoarthritis." [15] [14] |
| Ambiguous Application | Will the biomarker be used for go/no-go decisions in an early clinical trial, or to support a label claim in a Phase III trial? | Detail the drug development phase and decision point. Example: "For use in Phase II trials to enrich the study population for patients likely to respond to Drug X." [15] |
| Undefined Testing Model | Will testing occur in a central lab or be distributed as a kit to multiple sites? | Specify the delivery model early, as it impacts analytical validation requirements and logistics [14]. |
| Ignoring Risks/Benefits | What are the potential risks to patients if the biomarker result is incorrect? | Document potential patient risks and benefits, as this risk/benefit ratio influences the regulatory evidence required [14]. |
Detailed Experimental Protocol: Drafting and Locking Down Your Definitions
A systematic approach to defining Intended Use and Context of Use ensures no critical element is overlooked. The following protocol provides a methodology for establishing this foundation.
Objective: To create a comprehensive and definitive Intended Use and Context of Use statement that will guide all subsequent biomarker validation activities.
Materials:
- Internal team members (clinical, regulatory, biomarker scientists)
- Preclinical and early clinical data
- Draft Target Product Profile (TPP) for the associated therapeutic (if applicable)
- Regulatory guidance documents (e.g., from FDA Biomarker Qualification Program) [16]
Methodology:
- Initial Scoping Workshop: Convene a cross-functional team to brainstorm and draft an initial intended use statement. Address all elements from the table below, acknowledging any known data gaps.
- Evidence Gap Analysis: Compare the drafted statement against existing data. Identify what additional evidence is required to support the claims in the intended use (e.g., "Do we have data showing biomarker performance in the specified sub-population?").
- Stakeholder Review and Iteration: Circulate the draft to key stakeholders, including potential clinical investigators and regulatory consultants, for feedback. Refine the statement based on this input.
- Protocol Alignment: Ensure that the intended use is accurately reflected in the design of the clinical validation study protocols. The patient population, sample type, and endpoints must align perfectly.
- Final Lock-In: Before initiating full-scale validation studies, formally "lock" the intended use and context of use statements. Any subsequent changes may require significant re-validation or bridging studies, adding cost and time [14].
The Scientist's Toolkit: Essential Components for Your Intended Use Statement
A robust intended use statement is built from specific, well-defined components. The table below details the essential elements that must be established.
| Component | Description | Example / Function |
|---|---|---|
| Intended Patient Population | Precise description of the patients for whom the test is designed, including disease stage, demographics, and prior treatment history. | "Patients with metastatic non-small cell lung cancer who have progressed on platinum-based chemotherapy." |
| Test Purpose | The specific clinical or research question the test results will inform. | "To stratify patients as 'responders' or 'non-responders' based on a predefined biomarker threshold for clinical trial enrollment." |
| Specimen Type | The biological matrix required for testing (e.g., serum, tissue biopsy, plasma). | "Formalin-fixed, paraffin-embedded (FFPE) tumor tissue sections." |
| Intended User | The professional who will perform and interpret the test. | "Board-certified pathologists in a clinical laboratory setting." |
| Associated Product | The drug or therapeutic intervention linked to the biomarker, if any. | "For use with investigational drug ABC123." |
| Benefit/Risk Profile | The potential clinical benefit to the patient and the risks associated with an incorrect result. | "Benefit: Identifies patients likely to experience progression-free survival. Risk: False negative may exclude a patient from beneficial therapy." [14] |
Validation Workflow and Regulatory Pathway
The following diagram illustrates how the defined Intended Use and Context of Use influences the entire validation journey, from initial planning to regulatory submission.
Figure 1. The biomarker validation pathway, driven by the initial definition of Intended Use and Context of Use.
Frequently Asked Questions (FAQs)
Q1: Can I proceed with biomarker validation if my intended use is not fully defined? No. Attempting validation without a locked intended use statement is a high-risk strategy. The intended use dictates the validation strategy, including the patient cohort, statistical endpoints, and level of evidence required. Proceeding without it often leads to costly re-work, failed studies, and regulatory delays [14].
Q2: How specific does the Context of Use need to be for an early-phase clinical trial? Even in early phases, it should be highly specific. For a Phase I trial, you might specify: "For use in assessing target engagement of Drug X in patients with refractory Disease Y, using plasma samples collected at Cmax." This precision ensures the data you collect is fit-for-purpose and can be built upon in later phases [15].
Q3: What is the difference between a "valid biomarker" and a "qualified biomarker"? Validation primarily refers to assessing the biomarker's measurement performance characteristics (e.g., accuracy, precision) to ensure it gives reproducible and accurate data. Qualification is the subsequent evidentiary process of linking a biomarker with biological processes and clinical endpoints for a specific Context of Use. You must first have a validated measurement for a biomarker to be considered for qualification [15].
Q4: When is the right time to engage regulators about my intended use? Early engagement is strongly recommended. For manufacturers intending to market their device commercially, initiating dialogue with regulatory authorities (e.g., via the FDA's Q-Submission process) early in the development process can provide valuable feedback on the proposed intended use and validation plans, de-risking the later stages of development [14].
Frequently Asked Questions (FAQs)
FAQ 1: What are the core statistical metrics for evaluating a diagnostic biomarker, and how do they interrelate?
The core statistical metrics for evaluating a diagnostic biomarker are sensitivity, specificity, positive predictive value (PPV), and negative predictive value (NPV). These metrics help determine how well a biomarker distinguishes between diseased and non-diseased states [17].
- Sensitivity is the probability that a test result will be positive when the disease is present (true positive rate). It is calculated as:
Sensitivity = True Positives / (True Positives + False Negatives)[17] [18]. - Specificity is the probability that a test result will be negative when the disease is not present (true negative rate). It is calculated as:
Specificity = True Negatives / (True Negatives + False Positives)[17] [18]. - Positive Predictive Value (PPV) is the probability that the disease is present when the test is positive [17] [18].
- Negative Predictive Value (NPV) is the probability that the disease is not present when the test is negative [17] [18].
It is crucial to understand that PPV and NPV are highly dependent on the prevalence of the disease in the population being tested. A test will have a better PPV and a worse NPV when a disease is highly prevalent [17].
Table 1: Core Statistical Metrics for a Diagnostic Biomarker
| Metric | Definition | Formula |
|---|---|---|
| Sensitivity | True positive rate; ability to correctly identify diseased individuals | True Positives / (True Positives + False Negatives) |
| Specificity | True negative rate; ability to correctly identify healthy individuals | True Negatives / (True Negatives + False Positives) |
| Positive Predictive Value (PPV) | Probability disease is present given a positive test result | (Sensitivity × Prevalence) / [Sensitivity × Prevalence + (1-Specificity)×(1-Prevalence)] |
| Negative Predictive Value (NPV) | Probability disease is absent given a negative test result | (Specificity × (1-Prevalence)) / [(1-Sensitivity) × Prevalence + Specificity × (1-Prevalence)] |
FAQ 2: How do prognostic and predictive biomarkers differ in their clinical application and statistical validation?
Prognostic and predictive biomarkers serve distinct purposes and require different study designs for validation [4].
- A prognostic biomarker provides information about the overall expected clinical outcome (e.g., overall survival) for a patient, regardless of a specific therapy. It informs on the natural history of the disease. For example, a STK11 mutation is associated with a poorer outcome in non-squamous non-small cell lung cancer (NSCLC) [4]. A prognostic biomarker is identified through a test of association between the biomarker and the outcome in a statistical model, and can be identified in properly conducted retrospective studies [4].
- A predictive biomarker informs the likely response to a specific treatment. It helps determine which therapy a patient should receive. For example, EGFR mutation status in NSCLC predicts a better response to gefitinib compared to carboplatin plus paclitaxel [4]. A predictive biomarker must be identified in secondary analyses of data from a randomized clinical trial, specifically through a statistical test for interaction between the treatment and the biomarker [4].
Table 2: Prognostic vs. Predictive Biomarkers
| Feature | Prognostic Biomarker | Predictive Biomarker |
|---|---|---|
| Clinical Question | What is the patient's overall disease outcome? | Which treatment is the patient likely to respond to? |
| Application | Informs on disease aggressiveness and natural history | Informs treatment selection |
| Study Design for Validation | Retrospective studies from cohorts or single-arm trials | Randomized clinical trials (testing for treatment-by-biomarker interaction) |
| Example | STK11 mutation in NSCLC [4] | EGFR mutation for gefitinib in NSCLC [4] |
FAQ 3: What does "dynamic range" mean in biomarker quantification, and why is it a major technical challenge?
The dynamic range in biomarker quantification refers to the span of concentrations over which an assay can accurately and linearly measure an analyte [19]. The challenge arises because the physiological dynamic range of protein concentrations in human plasma, for example, spans over 10 orders of magnitude (from femtomolar to millimolar), while contemporary detection methods (like mass spectrometry or immunoassays) are typically limited to a quantifiable range of only 3-4 orders of magnitude [19] [20].
This mismatch means that high-abundance proteins (e.g., albumin in plasma) can dominate the analytical signal, suppressing the detection of low-abundance proteins that are often the most biologically relevant as disease biomarkers [20]. This necessitates complex sample handling like splitting samples for differential dilution or amplification, which can introduce variability and non-linear dilution effects, undermining the accuracy and reproducibility of measurements [19].
FAQ 4: How early can biomarker dynamics signal disease onset before clinical symptoms appear?
Longitudinal studies show that biomarker changes can begin decades before clinical symptom onset. In a 30-year study on Alzheimer's disease, change points for core biomarkers were identified many years prior to clinical diagnosis [21]:
- Amyloid-beta (Aβ) pathology accelerated 17.1 years before symptom onset.
- Phosphorylated tau (p-tau) pathology accelerated 15.8 years before onset.
- Neurodegeneration, measured by neurofilament light chain (NfL) and whole-brain white matter volume, accelerated 11.6 years before onset.
- Total ventricle volume acceleration was detected 9.7 years before onset [21].
This supports a temporal sequence in the disease pathological cascade, where certain biomarkers can serve as very early warning signals [21].
Troubleshooting Guides
Problem 1: My biomarker assay lacks sensitivity for low-abundance targets in complex biofluids like plasma.
Solution: This is a common problem due to the high dynamic range of biofluids. Consider these approaches:
- Implement Signal Equalization Strategies: For proximity-based assays (e.g., proximity ligation assay), use tuning mechanisms like probe loading and epitope depletion to adjust the signal output for each analyte individually [19].
- Probe Loading: Increase the concentration of detection antibodies for low-abundance analytes to shift the binding curve upward, enhancing their signal [19].
- Epitope Depletion: For high-abundance analytes, add unlabeled "depletant" antibodies to reduce the probability of signal generation, preventing assay saturation and allowing for simultaneous measurement of low- and high-abundance targets in a single sample without dilution [19].
- Use Enrichment Kits: Employ commercial sample preparation technologies designed for deep proteome analysis. These kits can use bead-based enrichment to remove high-abundance proteins, thereby compressing the dynamic range of the sample and increasing the identification of low-abundance proteins. For example, such methods have been shown to yield a 2.2-fold increase in protein identifications from plasma [20].
Diagram 1: Troubleshooting Low Sensitivity
Problem 2: My biomarker panel demonstrates poor specificity in a validation cohort.
Solution: Poor specificity, leading to false positives, can stem from various issues.
- Re-evaluate Your Biomarker Combination:
- Avoid Dichotomization: Using each biomarker in its continuous form retains maximal information for model development, which can lead to better performance than using pre-defined dichotomized (positive/negative) cut-offs [4].
- Incorporate Variable Selection: During statistical model development, use shrinkage methods (e.g., Lasso regression) or other variable selection techniques to minimize overfitting and build a more robust model that generalizes better to new data [4].
- Control for Multiple Comparisons: If you are evaluating a large number of biomarkers (high-dimensional data), it is essential to control for the false discovery rate (FDR). Methods like the Benjamini-Hochberg procedure should be implemented to reduce the chance of falsely identifying significant associations [4].
- Audit Your Cohort Design: Bias in patient selection is a major cause of failure in validation studies [4]. Ensure your validation cohort adequately represents the target population in terms of ancestry, socioeconomic status, and clinical characteristics. Underrepresentation can lead to models that perform poorly in real-world settings [22].
Problem 3: I need to establish a timeline of biomarker changes for a progressive disease.
Solution: Mapping the temporal sequence of biomarkers requires longitudinal data and specific statistical models.
- Study Design: Collect serial measurements of clinical, cognitive, and biomarker data (from imaging, CSF, or blood) from a cohort over many years. The BIOCARD study, for example, followed participants for 30 years with annual assessments [21].
- Statistical Analysis - Change Point Modeling: Use statistical models like piecewise regression (also known as breakpoint or change point analysis) to analyze longitudinal data. This model fits two or more straight lines to the data sequence and identifies the specific time point (the "change point") where the slope of the trajectory changes most significantly [21].
- Application: This method was used to identify the precise points where the rates of change for Aβ, tau, and MRI volumes accelerated in the years before the clinical onset of Mild Cognitive Impairment (MCI) [21]. Aligning these change points relative to the estimated date of symptom onset allows you to build a timeline of the disease's pathological cascade.
Diagram 2: Timeline Establishment
Research Reagent Solutions & Essential Materials
Table 3: Key Reagents and Technologies for Biomarker Research
| Item / Technology | Primary Function in Biomarker Research |
|---|---|
| Next-Generation Sequencing (NGS) | High-throughput DNA/RNA sequencing to identify genetic mutations, rearrangements, and gene expression patterns linked to diseases [4] [23]. |
| Mass Spectrometry-Based Proteomics | Precise identification and quantification of proteins in complex biological samples; central to both top-down (intact protein) and bottom-up (peptide-based) approaches [23]. |
| Lumipulse G1200 Platform | Fully automated electrochemiluminescence assay system for measuring core cerebrospinal fluid (CSF) biomarkers like Aβ40, Aβ42, and p-tau [21]. |
| Quanterix SIMOA HD-X Platform | Ultra-sensitive digital immunoassay platform for measuring very low-abundance biomarkers in blood and CSF, such as Neurofilament Light Chain (NfL) and GFAP [21]. |
| PreOmics ENRICH Technology | A sample preparation kit that uses bead-based enrichment to deplete high-abundance proteins, compressing the dynamic range of plasma and CSF for deeper proteomic coverage [20]. |
| Protein Microarrays | High-throughput tools for simultaneously detecting proteins (analytical arrays) or studying protein interactions (functional arrays) in complex samples [23]. |
| Polyclonal Antibody Pools (for PLA) | Used in proximity ligation assays (PLA) to capture and detect target proteins. Using polyclonal pools increases the likelihood of binding multiple distinct epitopes on a target [19]. |
| Unique Molecular Identifiers (UMIs) | Short DNA barcodes added to detection antibodies in sequencing-based assays (like PLA) to tag individual molecules, reducing PCR amplification bias and enabling absolute quantification [19]. |
Troubleshooting Guides and FAQs
Why does my biomarker fail to validate in independent cohorts?
A common reason is inadequate statistical power or unaddressed bias during the discovery phase.
- Solution: Conduct a priori power calculations to ensure sufficient sample size and number of events [4]. Implement randomization and blinding during specimen analysis to control for technical batch effects and observer bias [4]. Ensure your discovery cohort accurately represents the target clinical population [4].
How do I choose the right validation technology platform?
The choice depends on the biomarker's molecular nature, required sensitivity, and intended clinical use.
- Solution: For single-plex protein analysis, ELISA is a robust standard, but for greater sensitivity and multiplexing, consider Meso Scale Discovery (MSD) or LC-MS/MS [24]. For cellular biomarkers, flow cytometry is often appropriate [25]. A "fit-for-purpose" approach is recommended, where the validation level matches the biomarker's intended use [24].
What are the major regulatory hurdles for biomarker validation?
The primary hurdle is demonstrating analytical and clinical validity to regulatory standards.
- Solution: Early engagement with regulatory guidance is crucial. The FDA and EMA emphasize precision and accuracy benchmarks and require evidence of robust performance across independent sample sets [25] [24]. A review of EMA qualifications found that 77% of biomarker challenges were linked to assay validity issues, highlighting the need for rigorous analytical validation [24].
How can I improve the translational potential of a preclinical biomarker?
Many biomarkers fail due to limited generalizability from model systems to human populations.
- Solution: Use clinically relevant models such as Patient-Derived Xenografts (PDX) and organoids early in discovery [26]. Integrate multi-omics approaches to build comprehensive biomarker signatures and leverage AI-powered analytics to identify patterns with higher predictive value for human biology [7] [26].
Key Experiment Protocols
Protocol 1: Analytical Validation for a Protein Biomarker Assay
This protocol outlines key experiments to establish the analytical validity of an immunoassay, such as an ELISA or MSD, for quantifying a protein biomarker in serum.
1. Precision and Accuracy Profiling
- Method: Run the assay using quality control (QC) samples at low, medium, and high concentrations across multiple days (e.g., 5 days, 3 runs per day) with two replicates each [27].
- Data Analysis: Calculate inter-assay and intra-assay Coefficient of Variation (CV). A CV of less than 20-30% is often required for robust assays. Assess accuracy by comparing the measured mean concentration to the known spiked concentration [27].
2. Dynamic Range and Sensitivity Determination
- Method: Prepare a standard curve using a serial dilution of the purified biomarker analyte.
- Data Analysis: Fit the standard curve data using a 4- or 5-parameter logistic model. The dynamic range is the concentration between the upper and lower limits of quantification (ULOQ, LLOQ). The LLOQ is the lowest concentration that can be quantified with acceptable precision and accuracy (CV <20%) [24].
Protocol 2: Confirmatory Analysis for a Predictive Biomarker
This protocol describes the statistical analysis to confirm a biomarker's predictive value using data from a randomized clinical trial (RCT).
1. Interaction Test
- Method: In an RCT, test for a statistically significant interaction between the treatment arm and the biomarker status in a statistical model (e.g., a Cox proportional hazards model for a time-to-event outcome) [4].
- Data Analysis: The model should include terms for treatment, biomarker (as a continuous or binary variable), and the treatment-by-biomarker interaction. A significant interaction term (e.g., p < 0.05) provides evidence that the treatment effect differs by biomarker status [4].
2. Stratified Analysis
- Method: After a significant interaction is found, perform a stratified analysis to estimate the treatment effect (e.g., Hazard Ratio) separately within the biomarker-positive and biomarker-negative subgroups [4].
- Data Analysis: This illustrates the direction and magnitude of the treatment benefit in each subgroup, confirming the biomarker's predictive utility [4].
Research Reagent Solutions
Table: Essential reagents and technologies for biomarker development.
| Reagent/Technology | Primary Function in Biomarker Workflow |
|---|---|
| U-PLEX Multiplex Assay (MSD) [24] | Simultaneously measure multiple protein analytes from a single, small-volume sample. |
| Liquid Chromatography Tandem Mass Spectrometry (LC-MS/MS) [24] | High-sensitivity, high-specificity identification and quantification of proteins/peptides. |
| Next-Generation Sequencing (NGS) [23] | High-throughput profiling of DNA/RNA for genomic and transcriptomic biomarker discovery. |
| Patient-Derived Organoids [26] | Physiologically relevant 3D in vitro models for biomarker discovery and drug response testing. |
| CRISPR-Based Functional Genomics [26] | Systematically identify genetic biomarkers that influence drug response. |
Workflow Diagrams
Biomarker Development Pipeline
Validation Framework
Advanced Methodologies and Technological Platforms for Robust Biomarker Validation
Core Parameter Definitions and Benchmarks
The validation of biomarker assays relies on a framework of core parameters to ensure data is reliable and clinically meaningful. The FDA's 2025 Biomarker Guidance reiterates that method validation for biomarker assays must address the same fundamental questions as drug assays, with accuracy, precision, sensitivity, selectivity, and specificity being critical characteristics that define the method [28].
The table below summarizes these core parameters and their target performance benchmarks, which are informed by regulatory standards and industry best practices [28] [24].
| Validation Parameter | Definition | Common Performance Targets & Industry Benchmarks |
|---|---|---|
| Precision | The closeness of agreement between a series of measurements from multiple sampling. It is typically divided into within-run and between-run precision. | Both within-run and between-run precision should demonstrate a coefficient of variation (CV) of ≤20% (often ≤15% for critical biomarkers) [24]. |
| Accuracy | The closeness of agreement between the measured value and a known accepted reference value. | Mean accuracy should be within ±20% of the theoretical value (±15% is a common, more stringent goal). Recovery of spiked analytes often targeted at 80-120% [24]. |
| Sensitivity | The lowest concentration of an analyte that can be reliably distinguished from zero. Often defined as the Lower Limit of Quantification (LLOQ). | LLOQ should be measurable with defined precision and accuracy (e.g., CV ≤20% and accuracy ±20%). Signal-to-noise ratio of ≥5:1 is a common benchmark [24]. |
| Specificity/Selectivity | The ability to unequivocally assess the analyte in the presence of other components, such as matrix interferents or similar molecules. | The measured concentration should remain within ±20% of the nominal value when interferents are present. No significant signal ( |
Troubleshooting Guide: FAQs on Validation Parameter Issues
This section addresses common challenges researchers face when validating these core parameters.
FAQ 1: My precision data shows high CVs. What are the most common sources of this variability? High variability often stems from inconsistencies in pre-analytical and analytical steps [5].
- Check Sample Preparation: Inconsistent sample homogenization or extraction is a primary culprit. Solution: Implement automated homogenization systems (e.g., Omni LH 96) to standardize processing and reduce human error, which can cut manual errors by up to 88% [5].
- Review Reagent Handling: Ensure reagents are prepared and stored consistently. Variations in reagent age, temperature, or pipetting can increase CVs.
- Audit Equipment Calibration: Instrument drift or improper calibration can cause between-run variability. Adhere to a strict maintenance and calibration schedule.
- Control Environmental Factors: Temperature fluctuations in the lab or during sample storage can degrade biomarkers, leading to imprecise results [5].
FAQ 2: My accuracy (recovery) is outside the acceptable range. How can I investigate this? Poor recovery indicates a systematic error in the measurement [24].
- Assay Specificity: Investigate if matrix components (e.g., lipids, hemoglobin) or structurally similar molecules are interfering with the assay. Solution: Use more specific detection methods like LC-MS/MS, which offers superior specificity by separating analytes from interferents based on mass and charge [24].
- Standard Curve Integrity: Verify the integrity of your reference standards and the calibration curve. Prepare fresh standards and ensure the matrix for the standard curve matches your sample matrix as closely as possible.
- Protocol Deviations: Scrutinize the procedure for any deviations, such as incorrect incubation times or temperatures, that could affect the assay's binding or reaction kinetics.
FAQ 3: How can I improve the sensitivity of my biomarker assay? Improving sensitivity allows for the detection of lower-abundance biomarkers [24].
- Adopt Advanced Technologies: Move beyond traditional ELISA. Platforms like Meso Scale Discovery (MSD) that use electrochemiluminescence can offer up to 100 times greater sensitivity and a broader dynamic range [24].
- Optimize Signal Amplification: Evaluate different detection substrates or amplification systems to enhance the signal output relative to background noise.
- Sample Concentration: If possible, concentrate your sample prior to analysis, being mindful of potential effects on the matrix.
FAQ 4: My assay lacks specificity. What strategies can I use? Lack of specificity can lead to false positives or overestimation of analyte concentration [24].
- Cross-Reactivity Testing: Systematically test the assay against known related proteins or metabolites to identify cross-reactivity.
- Antibody Validation: For immunoassays, the antibody is key. Use highly specific, well-validated antibodies. For complex targets, consider switching to an LC-MS/MS-based method, which is less prone to antibody-related cross-reactivity issues [24].
- Sample Clean-Up: Incorporate a sample purification or clean-up step, such as solid-phase extraction, to remove interfering substances before analysis.
FAQ 5: What is the single biggest lab mistake that impacts all these validation parameters? The most significant overarching issue is inconsistent sample handling and preparation, which falls under pre-analytical errors. Studies indicate that pre-analytical errors account for approximately 70% of all laboratory diagnostic mistakes [5]. Inconsistent freezing/thawing cycles, variable processing times, and manual homogenization techniques introduce variability that undermines precision, accuracy, and the reliable detection of true biological signals.
Experimental Protocols for Parameter Validation
Protocol for Precision and Accuracy (Recovery)
This protocol uses Quality Control (QC) samples at low, mid, and high concentrations.
1. Materials:
- Analyte of interest (purified)
- Appropriate biological matrix (e.g., serum, plasma)
- Assay reagents and buffers
- Standard equipment (pipettes, plate reader, LC-MS/MS system)
2. Procedure:
- Prepare QC Samples: Spike the analyte into the biological matrix at three concentrations covering the dynamic range (e.g., near LLOQ, mid-range, and near the top of the range). Prepare a minimum of five replicates per QC level.
- Analyze Samples: Run all QC samples in a single batch for within-run precision. Analyze the same QC samples over at least three different days/batches for between-run precision.
- Calculate Precision: For each QC level, calculate the mean, standard deviation (SD), and coefficient of variation (CV = SD/mean × 100%).
- Calculate Accuracy: For each QC level, calculate the mean measured concentration and express it as a percentage of the nominal (theoretical) concentration: (Mean Measured Concentration / Nominal Concentration) × 100.
3. Interpretation: The assay is acceptable if the CV for precision is ≤20% and the mean accuracy is 80-120% for each QC level (with at least ⅔ of individual samples meeting this criterion) [24].
Protocol for Sensitivity (LLOQ Determination)
1. Procedure:
- Prepare Low-Concentration Samples: Prepare a series of samples at progressively lower concentrations in the relevant matrix.
- Analyze Samples: Analyze a minimum of five replicates of each low-concentration sample, including a blank (matrix without analyte).
- Evaluate Performance: The LLOQ is the lowest concentration where the analyte response is distinguishable from the blank with a signal-to-noise ratio of ≥5:1, and which can be measured with an accuracy of 80-120% and a precision (CV) of ≤20% [24].
Protocol for Specificity/Selectivity
1. Procedure:
- Prepare Interference Samples: Spike the biological matrix with potential interferents (e.g., hemolyzed blood, lipemic serum, or structurally similar molecules) at physiologically relevant high concentrations. Also, prepare control samples with only the analyte and only the interferent.
- Prepare Matrix Blank: Analyze the matrix without any analyte or interferents.
- Analyze and Compare: Analyze all samples and compare the measured values.
- The blank should show no significant signal (e.g., <20% of LLOQ).
- The sample with only the interferent should show no signal.
- The sample with analyte plus interferent should have a measured concentration within ±20% of the sample with only the analyte [24].
Visualization of Workflows and Relationships
Biomarker Validation Workflow
Precision Troubleshooting Logic
The Scientist's Toolkit: Research Reagent Solutions
The following table details key materials and technologies essential for robust biomarker validation [24] [5].
| Tool / Technology | Function in Validation | Key Application Note |
|---|---|---|
| LC-MS/MS (Liquid Chromatography-Tandem Mass Spectrometry) | Provides high specificity and sensitivity for quantifying biomarkers, especially low-abundance analytes. Superior for multiplexing. | Ideal for overcoming specificity challenges and cross-reactivity. Allows analysis of hundreds to thousands of proteins in a single run [24]. |
| MSD (Meso Scale Discovery) U-PLEX | A multiplexed immunoassay platform using electrochemiluminescence for highly sensitive, simultaneous measurement of multiple biomarkers. | Offers up to 100x greater sensitivity than ELISA and a wider dynamic range. Enables custom biomarker panels, saving sample volume and cost [24]. |
| Automated Homogenizer (e.g., Omni LH 96) | Standardizes the initial sample preparation step, reducing human error and variability in sample disruption. | Critical for ensuring precision. Reduces contamination risk and increases processing efficiency by up to 40%, directly addressing a major source of pre-analytical error [5]. |
| Validated Antibody Pairs | For immunoassays, these are critical reagents that define the assay's specificity, sensitivity, and dynamic range. | Must be rigorously tested for cross-reactivity. A primary cause of assay failure is poor antibody specificity [24]. |
Troubleshooting Guides
Guide 1: Addressing Poor Parallelism in Biomarker Assays
Problem: The measured concentration of your endogenous biomarker shows unacceptably high variability (%CV) upon dilution, and the dilution curve does not run parallel to the standard curve.
Explanation: Poor parallelism indicates that the immunoreactivity of the endogenous biomarker in the patient sample differs from that of the purified standard/calibrator in the substitute matrix [29]. This can be due to the presence of matrix effects (e.g., interfering proteins, salts, pH differences) or intrinsic molecular differences in the biomarker itself (e.g., post-translational modifications, complex formation) that affect antibody binding [29] [30].
Solution Steps:
- Confirm the Result: Repeat the experiment using a fresh aliquot of the original sample. Ensure serial dilutions are performed accurately with the appropriate diluent.
- Investigate the Sample Matrix:
- Try a Different Diluent: The standard diluent may not be compatible with your sample matrix. Test alternative diluents that more closely match the chemical composition of the natural sample matrix [29].
- Increase the Minimum Required Dilution (MRD): A higher dilution factor may reduce matrix interference to a level where it no longer impacts the assay [29].
- Verify Assay Selectivity: Investigate if specific components in the sample (like heterophilic antibodies or binding proteins) are causing interference. This may require additional experiments like spike-and-recovery with the specific sample [30].
- Re-evaluate the Standard: If the biomarker is known to have isoforms or modifications, the purified standard may not be an appropriate reference. Where possible, use a native form of the biomarker as a standard [29].
Guide 2: Recovering from Failed Spike-and-Recovery Experiments
Problem: The percentage of recovered analyte spiked into the natural sample matrix falls outside the acceptable range (typically 80-120%) when compared to spike recovery in the standard diluent [29].
Explanation: A failed spike-and-recovery indicates a significant difference between the natural sample matrix and the substitute matrix used for the standard curve. Components in the sample matrix are interfering with the antibody-analyte binding, either by masking epitopes or affecting the assay chemistry [29] [30].
Solution Steps:
- Check Spike Concentration: Ensure the analyte is spiked at a concentration within the assay's dynamic range. A concentration too high or too low can give unreliable recovery values.
- Optimize the Matrix:
- Modify the Diluent: Adjust the pH, salt concentration, or protein content (e.g., by adding BSA) of the diluent to better mimic the natural sample matrix and reduce interference [29].
- Use a Surrogate Matrix: If the natural matrix is too complex or variable, consider validating a surrogate matrix (e.g., stripped matrix or artificial buffer) for the standard curve, provided parallelism with the natural matrix is confirmed [31] [30].
- Sample Pre-treatment: In some cases, sample purification or extraction steps may be necessary to remove interfering substances before analysis.
Guide 3: Managing Variable Results from Automated Sample Preparation
Problem: Inconsistent biomarker data is generated, potentially due to errors introduced during manual or automated sample preparation.
Explanation: Variability in sample processing (homogenization, liquid handling) can introduce bias and significantly impact downstream analyses, making it difficult to detect true biological signals [5]. Temperature fluctuations during storage or processing can also degrade sensitive biomarkers [5].
Solution Steps:
- Standardize Protocols: Implement and strictly adhere to detailed Standard Operating Procedures (SOPs) for sample preparation, including precise instructions for homogenization speed/duration, extraction methods, and reagent volumes [5].
- Implement Automation: Utilize automated homogenizers and liquid handlers to reduce human error and cross-contamination. One clinical genomics lab reported an 88% decrease in manual errors after automating their workflow [5].
- Control Temperature: Standardize protocols for flash-freezing samples, maintain consistent cold chain logistics, and control thawing conditions to preserve biomarker integrity [5].
- Introduce Quality Controls: Implement rigorous quality control checkpoints, such as using barcoding systems to track samples (reducing mislabeling by up to 85%) and routine equipment calibration [5].
Frequently Asked Questions (FAQs)
Q1: Why is parallelism considered more critical than dilutional linearity for endogenous biomarkers?
A1: While both are important, parallelism directly assesses whether the endogenous biomarker in its natural matrix behaves identically to the purified standard in a substitute matrix across dilutions. Dilutional linearity often uses a sample matrix spiked with the standard, which may not fully capture the complexity of the endogenous biomarker's environment. Parallelism is therefore a more rigorous test for confirming that the standard curve is a true representative for calculating the concentration of the endogenous biomarker, ensuring accurate quantitation [29] [31].
Q2: What is an acceptable %CV for a parallelism experiment?
A2: There is no universal fixed value, as the acceptable %CV should be defined based on the assay's intended use. However, a %CV within 20-30% is generally considered to demonstrate successful parallelism [29]. The exact acceptance criteria should be justified by the researcher based on the biological variability of the biomarker and the clinical decision points.
Q3: How does the new FDA guidance on biomarker validation view parallelism?
A3: The 2025 FDA Bioanalytical Method Validation for Biomarkers guidance directs the use of ICH M10, which includes a requirement for parallelism assessments when using a surrogate matrix or surrogate analyte approach [31]. This underscores the regulatory expectation for demonstrating that the standard curve is valid for measuring the endogenous biomarker in study samples.
Q4: Our spike-and-recovery results are acceptable, but parallelism fails. What does this mean?
A4: This discrepancy suggests that while your assay can detect the pure, spiked analyte added to the matrix (good recovery), it may not be detecting the native, endogenous form of the biomarker with the same efficiency. This is a strong indicator of a difference in immunoreactivity between the native biomarker and the purified standard, potentially due to post-translational modifications or the biomarker being bound to other molecules in the sample [29]. In this case, the parallelism result takes precedence, and the assay may not be suitable for its intended use without further optimization.
Experimental Data & Protocols
Table 1: Interpretation of Parallelism and Recovery Results
| Experimental Result | Typical Acceptance Criteria | Interpretation | Recommended Action |
|---|---|---|---|
| Parallelism (%CV) | 20-30% [29] | Comparable immunoreactivity between endogenous biomarker and standard. | Proceed with assay validation. |
| Parallelism (%CV) | >30% [29] | Significant difference in immunoreactivity or matrix interference. | Investigate matrix, diluent, or standard; do not proceed. |
| Spike-and-Recovery (%) | 80-120% [29] | Minimal matrix interference. Sample matrix and standard diluent are compatible. | Proceed with assay validation. |
| Spike-and-Recovery (%) | <80% or >120% [29] | Significant matrix interference affecting antibody binding. | Optimize sample diluent or minimum required dilution. |
Table 2: Essential Research Reagent Solutions
| Reagent / Solution | Function in Biomarker Assay Validation |
|---|---|
| Sample Diluent | Dilutes samples to a concentration within the assay's dynamic range; its composition is critical for minimizing matrix effects [29]. |
| Surrogate Matrix | A substitute for the natural sample matrix (e.g., buffer, stripped matrix) used to prepare the standard curve when the natural matrix is unavailable or unsuitable [30]. |
| Reference Standard | A highly purified form of the biomarker used to create the calibration curve; its integrity and similarity to the endogenous biomarker are crucial [29]. |
| Quality Control (QC) Samples | Samples with known concentrations (high, mid, low) used to monitor the assay's precision and accuracy during validation and sample analysis [30]. |
Detailed Experimental Protocol: Parallelism Testing
Purpose: To demonstrate that the measured concentration of an endogenous biomarker is consistent across multiple dilutions and that the dilution curve is parallel to the standard curve [29].
Procedure:
- Sample Selection: Identify at least 3 individual samples that have high endogenous concentrations of the biomarker. The concentration of the neat (undiluted) sample should be within the assay's upper limit of quantification (ULOQ) [29].
- Serial Dilution: Perform a 1:2 serial dilution of each sample using the validated sample diluent. Continue diluting until the predicted concentration is at or below the lower limit of quantification (LLOQ). A typical series is: Neat, 1:2, 1:4, 1:8, 1:16 [29].
- Assay Analysis: Run all diluted samples and the standard curve in the same assay batch.
- Data Analysis:
- Calculate the observed concentration for each diluted sample.
- Multiply each observed concentration by its dilution factor to obtain the back-calculated concentration.
- For each original sample, calculate the mean and %CV of all back-calculated concentrations (using only those within the standard curve range).
- Interpretation: A %CV within the pre-defined acceptance criteria (e.g., ≤20-30%) indicates successful parallelism [29].
Workflow and Decision Diagrams
Platform Comparison Table
The following table summarizes the key characteristics of each technology platform to guide your selection.
| Platform | Key Principle | Primary Application in Biomarker Validation | Sample Volume | Multiplexing Capacity | Key Advantages | Key Limitations |
|---|---|---|---|---|---|---|
| ELISA | Antibody-based colorimetric detection [32] | Quantifying single soluble proteins (e.g., cytokines) [32] | 50-100 µL [33] | Single-plex [33] | Widely available, simple protocol | Low throughput, limited dynamic range (1-2 logs) [33] |
| MSD | Electrochemiluminescence detection on carbon electrodes [33] | Multiplex protein quantification (e.g., cytokine panels) [34] | 10-25 µL (for up to 10 analytes) [33] | Up to 10 analytes/well [34] | Broader dynamic range (3-4+ logs), low sample volume, reduced matrix effects [33] | Requires specialized instrumentation |
| NGS | High-throughput sequencing of DNA/RNA libraries [35] | Genomic, transcriptomic, and epigenomic biomarker discovery [35] | Varies by input method | Highly multiplexed (thousands of targets) | Unbiased discovery, high multiplexing | Complex data analysis, library prep artifacts (e.g., adapter dimers) [35] |
| Mass Spectrometry | Mass-to-charge ratio analysis of ions | Targeted or untargeted proteomic and metabolomic profiling [9] | Varies | Highly multiplexed (hundreds to thousands) | High specificity, can detect post-translational modifications | Expensive, requires high expertise, complex sample prep |
| Multiplex Immunoassays (Luminex) | Antibody-coupled magnetic beads with fluorescent detection [36] | Simultaneous quantification of multiple analytes in biofluids [36] | <25 µL [36] | Up to 50 analytes/well [34] | High-throughput, saves sample, comprehensive profiling | Potential bead/antibody cross-reactivity, matrix interference [36] |
Troubleshooting Guides & FAQs
ELISA
Problem: Weak or No Signal
- Cause & Solution: Reagents not at room temperature can cause this. Ensure all reagents sit at room temperature for 15-20 minutes before starting the assay [32].
- Cause & Solution: Inaccurate pipetting or incorrect dilution calculations. Check pipetting technique and double-check all calculations [32].
- Cause & Solution: Wells were scratched by pipette or washing tips. Use caution during aspiration and ensure automated washer tips are calibrated correctly [32].
Problem: High Background
- Cause & Solution: Incomplete washing is a common cause. Ensure thorough washing; invert the plate onto absorbent tissue and tap forcefully to remove residual fluid between steps [32].
- Cause & Solution: Plate sealers were not used or were reused, leading to cross-contamination. Always use a fresh sealer for each incubation step [32].
MSD (Meso Scale Discovery)
Problem: How does MSD compare directly to ELISA? MSD assays require less sample, provide greater sensitivity and a broader dynamic range, and can multiplex up to 10 analytes simultaneously in a single well. MSD protocols are typically faster with fewer wash steps, and the instruments require minimal maintenance [33].
Problem: Can I transfer an existing ELISA to the MSD platform? Yes, transferring ELISAs to the MSD platform is often straightforward and can be accomplished with minimal optimization, sometimes in less than two days [33].
NGS (Next-Generation Sequencing)
Problem: Low Library Yield After Preparation
- Cause & Solution: Degraded nucleic acid input or contaminants. Re-purify the input sample and use fluorometric quantification (e.g., Qubit) instead of absorbance-only methods for accurate measurement [35].
- Cause & Solution: Inefficient adapter ligation. Titrate the adapter-to-insert molar ratio and ensure fresh ligase and optimal reaction conditions are used [35].
Problem: High Duplicate Read Rates or Adapter Dimers
- Cause & Solution: Over-amplification during the PCR enrichment step. Reduce the number of PCR cycles and use the minimal number necessary for library generation [35].
- Cause & Solution: Inefficient cleanup and size selection. Optimize the bead-to-sample ratio during purification to effectively remove short fragments like adapter dimers [35].
Multiplex Immunoassays (Luminex/xMAP)
Problem: Low Bead Counts
- Cause & Solution: Bead aggregation. Vortex beads for 30 seconds before adding them to the plate and ensure the plate is agitated during incubations [37].
- Cause & Solution: Sample debris. Always thaw samples completely, vortex thoroughly, and centrifuge at 10,000 x g for 5-10 minutes to remove particulates before use [36].
- Cause & Solution: Instrument issues. Clean the instrument regularly and run calibration/verification beads before acquiring the plate [37].
Problem: High Background Signal
- Cause & Solution: Detection antibody or SAPE over-incubation. Adhere strictly to the recommended incubation times in the protocol [36].
- Cause & Solution: Incomplete washing. Use a handheld magnetic separator and ensure the plate is firmly attached. Soak wells for 60 seconds during wash steps to reduce non-specific binding [36].
Essential Research Reagent Solutions
This table outlines key materials and their functions for robust assay performance.
| Reagent/Material | Function | Key Considerations for Biomarker Validation |
|---|---|---|
| Plate Sealers | Prevents well-to-well contamination and evaporation during incubations [32] | Use a fresh sealer for each incubation step to ensure integrity [32] |
| Magnetic Bead Separator | Immobilizes magnetic beads during wash steps in multiplex or MSD assays [36] | Ensure the plate is firmly attached to the magnet during washes to prevent bead loss [36] |
| Wash Buffer (with Detergent) | Removes unbound proteins and reagents to reduce background [32] [37] | Always use the buffer provided with the kit. Do not substitute, as osmolarity is critical [37] |
| Assay Buffer | Diluent for standards and samples; maintains protein stability [36] | Do not confuse with Wash Buffer. Using Wash Buffer as an assay diluent can cause low analyte recovery [36] |
| Standard Curves | A series of known analyte concentrations for sample quantification [32] | Prepare fresh from stock for each assay. Qualify the curve for plateaus or abnormal fits during analysis [37] |
Experimental Workflow & Troubleshooting Diagrams
ELISA Workflow
NGS Library Prep Troubleshooting
Multiplex Assay Key Steps
Troubleshooting Common Multi-Omics Integration Challenges
FAQ: Why do my integrated results show poor correlation between omics layers, even when they come from the same samples?
This is a frequent issue often stemming from biological and technical disconnects between molecular layers. For instance, high mRNA transcript levels do not always correlate with high protein abundance due to post-transcriptional regulation, varying turnover rates, or limitations in analytical sensitivity [38]. To troubleshoot:
- Verify Technical Consistency: Ensure samples for all omics assays were collected, processed, and stored under identical conditions to minimize pre-analytical variation.
- Check Data Preprocessing: Confirm that appropriate normalization and batch-effect correction have been applied to each dataset individually before integration. A common mistake is applying the same normalization method to all data types without considering their unique statistical distributions [12] [11].
- Assess Sensitivity: Be aware that the depth of coverage or analytical sensitivity can vary greatly between platforms. A gene detected by RNA-seq might be missing in proteomic data due to the more limited spectrum of current proteomic methods [38].
FAQ: How can I handle missing data in my multi-omics dataset?
Missing data is inherent in multi-omics studies. The optimal strategy depends on whether the data is missing completely at random or for a biological/technical reason.
- For Limited Missingness: Tools like MOFA+ (Multi-Omics Factor Analysis) can handle a certain degree of missing data naturally within their model [11].
- For Mosaic Data: If your experimental design has different omics measured in different but overlapping subsets of samples, consider mosaic integration tools like StabMap or COBOLT, which are specifically designed for such scenarios [38].
FAQ: My integrated analysis reveals clusters or factors that are biologically uninterpretable. What should I do?
This can occur when the integration captures strong technical artifacts instead of biological signal, or when the biological phenomenon is too complex.
- Re-examine Batch Effects: Investigate if the identified clusters correlate with experimental batches, processing dates, or other technical covariates rather than biological phenotypes.
- Validate with Supervised Methods: Use a supervised integration method like DIABLO to explicitly model your phenotype of interest. This can help ensure the extracted components are relevant to your research question [11].
- Conduct Pathway Analysis: Move beyond individual features. Use the set of features (e.g., genes, proteins) loaded on a specific factor to perform pathway over-representation or network analysis to find higher-level biological meaning [11].
Essential Experimental Protocols for Robust Integration
Protocol 1: Standardized Sample Preparation for Multi-Omics
A consistent starting material is paramount for successful matched multi-omics integration.
- Sample Collection: Aliquot biospecimens (e.g., plasma, tissue, cells) immediately after collection. For tissue, flash-freeze in liquid nitrogen or use stabilizing reagents to halt degradation.
- Nucleic Acid & Protein Co-Extraction: Use commercial kits designed for parallel extraction of DNA, RNA, and protein from a single sample aliquot. This minimizes variation between omics analyses.
- Quality Control (QC): Rigorously QC each extract before downstream processing.
- Genomics/Transcriptomics: Use Bioanalyzer or TapeStation to assess RIN (RNA Integrity Number) and DNA quality.
- Proteomics: Perform a protein assay (e.g., BCA) and check for degradation via SDS-PAGE.
- Metabolomics: Use internal standards to assess extraction efficiency and instrument performance.
Protocol 2: Data Preprocessing and Harmonization Workflow
This protocol ensures data from different omics platforms are compatible for integration [12].
- Data Cleaning & Imputation:
- Remove features with an excessive amount of missing values (e.g., >20%).
- For remaining missing values, consider imputation methods (e.g., k-nearest neighbors, minimum value) appropriate for the data type.
- Normalization:
- RNA-seq Data: Apply methods like TMM (Trimmed Mean of M-values) to correct for library size and composition.
- Proteomics Data: Normalize by total ion current or use robust scaling methods.
- Metabolomics Data: Apply probabilistic quotient normalization or log-transformation to address heteroscedasticity.
- Batch Effect Correction:
- Use tools like ComBat or ARSyN to remove variability associated with processing batches. This is critical when samples were processed in multiple rounds [12].
- Data Formatting:
- Convert all datasets into a unified
samples-by-featuresmatrix format (e.g., CSV files) with consistent sample identifiers across all matrices [12].
- Convert all datasets into a unified
The following workflow diagram visualizes the key steps in a multi-omics integration project, from data generation to biological insight.
Multi-Omics Integration Methods: A Comparative Guide
The choice of integration method is critical and depends on your data structure and research goal. The table below summarizes key characteristics of popular tools.
Table 1: Comparison of Multi-Omics Data Integration Methods and Tools
| Method/Tool | Integration Type | Key Methodology | Best For | Considerations |
|---|---|---|---|---|
| MOFA+ [38] [11] | Matched & Unmatched | Unsupervised Bayesian factor analysis | Identifying hidden sources of variation across omics layers; exploratory analysis. | Does not use phenotype labels; interpretation of factors required. |
| DIABLO [11] | Matched | Supervised multiblock sPLS-DA | Classifying pre-defined sample groups; biomarker discovery. | Requires a categorical outcome; risk of overfitting. |
| SNF [11] | Unmatched | Similarity Network Fusion | Clustering patients/samples using multiple data types. | Computationally intensive for very large datasets. |
| Seurat (v4/v5) [38] | Matched & Unmatched | Weighted Nearest Neighbors; Bridge Integration | Single-cell multi-omics; integrating data across different technologies and modalities. | Primarily designed for single-cell data. |
| GLUE [38] | Unmatched | Graph-linked variational autoencoders | Integrating three or more omics layers using prior knowledge. | More complex setup; uses prior biological knowledge graphs. |
The following decision diagram provides a logical pathway for selecting the most appropriate integration method based on your data and research question.
The Scientist's Toolkit: Key Research Reagent Solutions
Table 2: Essential Reagents and Kits for Multi-Omics Workflows
| Item | Function in Multi-Omics Workflow |
|---|---|
| AllPrep DNA/RNA/Protein Mini Kit | Simultaneous purification of genomic DNA, total RNA, and proteins from a single tissue or cell sample, preserving the matched nature of the multi-omics data. |
| MTSEA Crosslinker | Used in cross-linking assays for epigenomics (e.g., ChIP-seq) to capture protein-DNA interactions. |
| Trypsin/Lys-C Protease Mix | The gold-standard enzyme for mass spectrometry-based proteomics, digesting proteins into peptides for LC-MS/MS analysis. |
| Stable Isotope-Labeled Internal Standards | Essential for quantitative metabolomics and proteomics; used to correct for instrument variability and quantify absolute analyte concentrations. |
| Single-Cell Multiome ATAC + Gene Expression Kit | Allows for simultaneous profiling of gene expression and chromatin accessibility from the same single cell, generating perfectly matched multi-omics data. |
| Bio-Plex Pro Magnetic Assay Kits | Enable multiplexed quantification of dozens of proteins or phosphoproteins from a small sample volume, integrating well with transcriptomic data. |
This technical support center provides troubleshooting guides and FAQs to help researchers address specific issues encountered during the validation of biomarkers for clinical application research.
Core Concepts: Troubleshooting Workflow Fundamentals
FAQ: Why is consistency in my biomarker validation results so difficult to achieve, even when using automated platforms?
Inconsistent results often stem from pre-analytical variables, not the analytical technology itself. A typical biomarker discovery and validation workflow has multiple phases where variability can be introduced [39]:
- Pre-analytical Phase: Covers specimen collection, sample processing, and storage.
- Analytical Phase: Involves the measurement of analytes using specific technologies.
- Post-analytical Phase: Includes data pre-processing, statistical analysis, and model development.
Variations in any of these steps—such as differences in collection tubes, time to sample processing, centrifugation speed, or storage temperature—can significantly impact data quality and the reproducibility of your findings [39].
FAQ: What is the primary advantage of automating our validation workflows?
Automation brings precision and consistency, which are paramount in biotech applications. While sensitivity is important, precision directly impacts data turnaround times, cost-efficiency, and the reliability of experimental repeats. Automated systems reduce human error and inter-assay variability, ensuring results are comparable across different times and operators [25].
FAQ: Should we use a batch processing or continuous workflow model?
The choice depends on your project's priorities for throughput and turnaround time. The table below summarizes the key differences:
| Factor | Batch Processing | Continuous Workflow |
|---|---|---|
| Turnaround Time | Longer | Faster |
| Equipment Utilization | Higher during batch runs | More even, potential underutilization |
| Staffing Needs | Concentrated during batches | Continuous |
| Data Handling | Delayed | Real-time |
| Flexibility | Lower | Higher |
Source: Adapted from Lab Manager [40]
Batch processing is efficient for high-volume, standardized testing, while continuous workflow is better for time-sensitive or unpredictable sample inflows [40].
Pre-Analytical & Analytical Phase Troubleshooting
FAQ: Our plasma samples for cell-free DNA (cfDNA) analysis are yielding low DNA concentrations and poor fragment integrity. What could be going wrong?
This is a common pre-analytical issue. The yield and integrity of cfDNA are highly sensitive to sample handling conditions [41]. Please verify the following in your protocol:
- Sample Collection: Ensure you are using the correct blood collection tube (e.g., K2EDTA, Streck cfDNA BCT).
- Processing Time and Temperature: The time between blood draw and plasma separation is critical. Consistently adhere to a defined processing window (e.g., within 2 hours at room temperature or 4°C).
- Centrifugation Protocol: Implement a standardized, double-centrifugation protocol to remove cells and platelets effectively (e.g., 1300× g for 10 minutes, followed by a higher-speed spin of the supernatant).
- Storage Conditions: Plasma should be aliquoted and stored at -80°C to prevent degradation.
A validated, magnetic bead-based cfDNA extraction system can provide high recovery rates and consistent fragment size distribution, minimizing genomic DNA contamination [41].
FAQ: Our high-throughput ELISA results are too variable. How can we improve reproducibility?
High variability in ELISA often comes from manual liquid handling steps and inconsistent washing. To improve reproducibility:
- Automate Repetitive Tasks: Integrate an automated microplate washer and a multi-mode microplate reader into your workflow. This minimizes human error during washing and detection [42].
- Use Validated Kits: Employ automation-compatible ELISA kits that are optimized for speed and reproducibility. For example, single-wash, 90-minute ELISA kits can reduce hands-on time by up to 60% compared to traditional protocols without compromising sensitivity [42].
- Miniaturize Assays: Transitioning from a 96-well to a 384-well format can boost throughput while reducing sample volume needs, preserving precious biological material [42].
Technology & Post-Analytical Phase Troubleshooting
FAQ: How do we choose the right technology platform for validating different types of biomarkers?
The choice of platform depends on the nature of your biomarker and the required information. Here is a comparison of common platforms:
| Biomarker Type | Platform | Key Advantages | Key Limitations | Automatability |
|---|---|---|---|---|
| Protein | ELISA | Quantitative, high specificity, commercial kits available | Limited multiplexing | High (fully automated systems available) |
| Protein | Meso Scale Discovery (MSD) | Highly sensitive, high multiplexing capabilities | Expensive, specialized reagents | High |
| DNA/RNA | qPCR | High sensitivity, quantitative results | Limited multiplexing | Moderate to High |
| DNA/RNA | Next-Generation Sequencing | High throughput, comprehensive analysis | Expensive, complex data analysis | High |
| Cellular | Flow Cytometry | High-throughput, multiparameter analysis | Compensation for spectral overlap | High |
Source: Adapted from A Biotech Perspective [25]
FAQ: Our data validation is a bottleneck, with errors often slipping through. What solutions are available?
Manual data validation is slow and prone to error. Implementing data validation automation can:
- Increase Accuracy: Automated tools check data against up-to-date sources and validation rules, reducing errors from outdated or incorrect information [43].
- Enable Real-Time Processing: Data is validated as it enters the system, allowing for instant error detection and correction, which keeps data fresh and reliable [43].
- Improve Scalability: Automated systems can easily handle large and complex datasets as your research projects grow [43]. Look for AI-powered tools that can integrate with your existing data sources and provide real-time error detection.
Detailed Experimental Protocol: Standardized cfDNA Extraction Workflow
The following protocol is adapted from a 2025 study validating a magnetic bead-based system for liquid biopsy applications [41].
Objective: To reliably extract high-quality cell-free DNA (cfDNA) from blood plasma for downstream molecular applications like next-generation sequencing (NGS).
Principle: This protocol uses a magnetic bead-based, high-throughput cartridge system to isolate and purify cfDNA from plasma, ensuring high recovery, consistent fragment size distribution, and minimal genomic DNA contamination.
Reagent Solutions & Essential Materials:
| Item | Function |
|---|---|
| K2EDTA Blood Collection Tubes | Prevents blood coagulation for plasma preparation. |
| Magnetic Bead-based cfDNA Extraction Kit | Selectively binds and purifies cfDNA. |
| Automated Nucleic Acid Extraction System | High-throughput, automated platform for consistent processing. |
| Agilent TapeStation System | Analyzes cfDNA concentration and fragment size distribution. |
| Seraseq ctDNA Reference Material | Provides a positive control for assessing variant detection. |
| Next-Generation Sequencing (NGS) Assay | For downstream validation of extracted cfDNA. |
Step-by-Step Workflow:
1. Sample Collection and Plasma Separation:
- Collect peripheral blood into K2EDTA tubes.
- Process samples within a strict time window (e.g., <2 hours of collection).
- Centrifuge at 1,300-2,000 × g for 10-20 minutes at room temperature to separate plasma.
- Transfer the supernatant to a new tube and perform a second centrifugation at a higher speed (e.g., 16,000 × g for 10 minutes) to remove any residual cells or platelets.
- Aliquot and store plasma at -80°C if not used immediately.
2. Automated cfDNA Extraction:
- Use the magnetic bead-based cartridge system according to the manufacturer's instructions. This is an automated, walk-away process.
- Include controls, such as the Seraseq ctDNA reference material, to monitor performance.
3. Quality Control and Analytical Validation:
- Concentration and Purity: Use a spectrophotometer or fluorometer to determine cfDNA concentration.
- Fragment Size Distribution: Analyze 1 µL of extracted cfDNA on the Agilent TapeStation to confirm the expected mononucleosomal (~167 bp) and dinucleosomal peak distribution and the absence of high-molecular-weight genomic DNA contamination.
- Variant Detection Performance: Perform NGS on the extracted Seraseq ctDNA reference material. Assess the concordance between the detected variants and the expected variants to validate the workflow's accuracy.
Workflow Optimization & Best Practices
FAQ: What are the best practices for implementing automation in our validation workflows?
- Start with a Pilot Program: Before full-scale implementation, run a pilot to establish robust sample handling protocols, optimize assay performance, and lay the groundwork for larger studies [25].
- Define Clear Validation Rules: Establish specific, clear criteria for what qualifies as valid data at every stage of your workflow [43].
- Choose the Right Tools: Select automation tools and reagents that are compatible with each other and fit for your purpose. Ensure they are scalable and support integration with your data analysis systems [42] [43].
- Continuously Monitor and Improve: Regularly review your automated validation processes and adapt them as your data sources and business goals change [43].
The following workflow diagram integrates automation and standardization checkpoints to enhance reproducibility across the entire validation pipeline.
Liquid biopsy has emerged as a revolutionary non-invasive diagnostic tool in oncology, providing critical insights into tumor biology through the analysis of various circulating biomarkers in blood and other bodily fluids. This technical support guide addresses the key challenges and methodologies for researchers and drug development professionals working to optimize biomarker validation for clinical application. Unlike traditional tissue biopsies, liquid biopsies enable real-time monitoring of tumor dynamics, treatment response, and disease progression through minimal invasive sample collection [44] [45].
The core analytes in liquid biopsy include circulating tumor DNA (ctDNA), circulating tumor cells (CTCs), extracellular vesicles (EVs), tumor-educated platelets (TEPs), and circulating cell-free RNA (cfRNA) [44] [45]. Each presents unique advantages and technical challenges for detection and analysis. This resource provides comprehensive troubleshooting guides, detailed protocols, and FAQs to support your research in this rapidly evolving field.
Troubleshooting Common Liquid Biopsy Experimental Challenges
FAQ: Addressing Sensitivity and Technical Issues
Q1: Our ctDNA assays struggle to detect low-frequency mutations in early-stage cancers. How can we improve sensitivity?
Low abundance of ctDNA in early-stage patients (often 0.1% of total cell-free DNA) requires enhanced detection methods [44]. Implement these solutions:
Utilize digital PCR (dPCR) or BEAMing technology: These methods partition samples into thousands of reactions, enabling absolute quantification and detection of rare mutations down to 0.1% variant allele frequency [46]. BEAMing involves DNA isolation, PCR amplification, binding to magnetic beads in water-oil emulsion droplets, followed by fluorophore staining and flow cytometry analysis [46].
Apply next-generation sequencing (NGS) with unique molecular identifiers (UMIs): UMIs reduce sequencing errors and improve detection limits. Targeted sequencing panels focusing on cancer-specific mutations provide cost-effective analysis [47] [46].
Incorporate fragmentomics analysis: Investigate fragment size patterns of ctDNA, which are often shorter than non-tumor cfDNA. This approach can detect cancer signals even at low mutant allele fractions [48].
Q2: We're obtaining inconsistent CTC yields across samples. What isolation methods are most reliable?
CTC isolation is challenging due to their extreme rarity (approximately 1 CTC per 1 million leukocytes) and heterogeneity [44] [45]. Consider these approaches:
Evaluate multiple enrichment strategies: EpCAM-based immunocapture (like CellSearch, the only FDA-cleared system) works well for epithelial cancers but may miss mesenchymal CTCs undergoing EMT [44] [45]. Size-based filtration (like ScreenCell) captures CTCs independently of surface markers [45].
Implement negative depletion methods: Remove hematopoietic cells using CD45-targeted approaches to enrich untouched CTCs [45].
Use protein corona-disguised immunomagnetic beads (PIMBs): Recent advancements show PIMBs conjugated with HSA achieve leukocyte depletion of 99.996%, significantly improving CTC purity [45].
Q3: How can we distinguish true tumor-derived signals from clonal hematopoiesis in ctDNA analysis?
Clonal hematopoiesis of indeterminate potential (CHIP) remains a significant challenge, as age-related mutations in blood cells can constitute false positives [47].
Perform paired white blood cell sequencing: Sequence matched buffy coat DNA to identify and filter CHIP-derived mutations.
Analyze mutation patterns: CHIP mutations typically occur in specific genes (DNMT3A, TET2, ASXL1), while absence of these may indicate true tumor origin.
Apply computational filtering: Bioinformatic tools can help distinguish CHIP-related mutations based on variant allele frequency and genomic context.
Q4: What sample handling protocols maximize analyte stability?
Proper pre-analytical processing is critical for reliable results:
Process blood samples within 4-6 hours of collection to prevent lysis of blood cells and release of genomic DNA that dilutes ctDNA [45].
Use specialized blood collection tubes (e.g., Streck Cell-Free DNA BCT, PAXgene Blood cDNA) that stabilize nucleated cells and prevent degradation.
Employ double centrifugation (first at 1600×g, then 16,000×g) to efficiently remove cells and debris from plasma [46].
For cfRNA analysis, add RNase inhibitors immediately after plasma separation due to RNA's short half-life (~15 seconds in plasma) [46].
Quantitative Performance Data of Liquid Biopsy Assays
Table 1: Performance Metrics of Selected Liquid Biopsy Assays in Cancer Detection
| Cancer Type | Assay Name/Study | Technology | Biomarker | Sensitivity | Specificity | PPV/NPV | Approval Status |
|---|---|---|---|---|---|---|---|
| Lung Cancer | SHOX2/RASSF1A/PTGER4 methylation test | PCR | Methylation | 86.83% | 95.59% | NA | NMPA Approved [49] |
| Lung Cancer | DELFI 1 | NGS | Whole-genome fragment features | 95% | 80% | PPV: 3.90% | Not approved [49] |
| HCC | HCCscreen | NGS/Chemiluminescence | Mutation + Methylation + Proteins | 88% | 93% | PPV: 40.90%, NPV: 99.30% | FDA Breakthrough [49] |
| HCC | 7 miRNAs HCC detection kit | PCR | miRNAs | 83.20% | 93.90% | NA | NMPA Approved [49] |
| Colorectal Cancer | Epi proColon | PCR | Septin9 methylation | 68.00% | 80.00% | PPV: 5.20%, NPV: 99.50% | FDA Approved [49] |
| Colorectal Cancer | Shield | NGS | cfDNA mutation, methylation, fragment size | 83.10% | 89.60% (for advanced tumors) | PPV: 3.20%, NPV: 99.90% | FDA Approved [49] |
| Gastric Cancer | RNF180/Septin9 methylation test | PCR | Methylation | 62.20% | 84.80% | PPV: 83.50%, NPV: 64.50% | NMPA Approved [49] |
Table 2: Comparison of Liquid Biopsy Biomarkers and Their Characteristics
| Biomarker | Abundance | Half-Life | Key Detection Methods | Primary Applications | Technical Challenges |
|---|---|---|---|---|---|
| ctDNA | 0.1-1.0% of total cfDNA [44] | ~2 hours [44] | dPCR, NGS, BEAMing | Targeted therapy selection, treatment monitoring, MRD detection [47] | Low abundance in early stages, CHIP interference [47] |
| CTCs | 1-10 cells per mL of blood in metastatic cancer [44] | 1-2.5 hours [44] | CellSearch, microfluidics, filtration | Prognostic assessment, metastasis research [44] [45] | Extreme rarity, heterogeneity, epithelial-mesenchymal transition [45] |
| Exosomes/EVs | Highly variable | Unknown | Ultracentrifugation, immunoaffinity capture | Early detection, monitoring therapy response [44] | Standardization of isolation, complex cargo analysis |
| cfRNA | Variable | ~15 seconds in plasma [46] | qRT-PCR, RNA-seq | Early diagnosis, treatment monitoring [44] | Extreme instability, requires rapid processing |
| Tumor-Educated Platelets | Abundant | 8-10 days | RNA sequencing, protein analysis | Cancer detection, therapy monitoring [46] | Complex isolation, non-tumor influences |
Experimental Protocols for Key Liquid Biopsy Applications
Protocol 1: ctDNA Analysis for Minimal Residual Disease (MRD) Detection
Background: MRD detection post-treatment identifies molecular evidence of residual cancer before clinical recurrence. The VICTORI study demonstrated ctDNA can detect colorectal cancer recurrence 6+ months before imaging [48].
Materials:
- Streck Cell-Free DNA BCT blood collection tubes
- QIAamp Circulating Nucleic Acid Kit (Qiagen)
- NEBNext Ultra II DNA Library Prep Kit
- Custom hybrid capture panel (or NeXT Personal assay)
- Illumina sequencing platform
Methodology:
- Blood Collection and Processing: Collect 10-20mL blood into cell-free DNA BCT tubes. Process within 6 hours with double centrifugation: 1600×g for 20min at 4°C, then transfer supernatant and centrifuge at 16,000×g for 10min [46].
- ctDNA Extraction: Use silica membrane-based extraction per manufacturer's protocol. Elute in 20-50μL TE buffer.
- Library Preparation: Convert 10-50ng ctDNA into sequencing libraries using enzymatic fragmentation and adapter ligation. Incorporate unique molecular identifiers (UMIs) to distinguish true mutations from PCR errors.
- Target Enrichment: Hybridize libraries with a patient-specific panel covering 20-1,800 somatic variants identified from tumor tissue.
- Sequencing and Analysis: Sequence to high coverage (>30,000x). Bioinformatic analysis includes UMI consensus building, variant calling, and tumor-informed MRD detection with sensitivity to 2 parts per million [48].
Troubleshooting Tip: Avoid sampling immediately post-surgery (within 2 weeks) as surgical stress increases background cfDNA. The optimal timepoint for post-resection MRD assessment is 4 weeks [48].
Protocol 2: CTC Isolation and Characterization Using Microfluidics
Background: CTCs provide intact cells for functional studies and are strong prognostic indicators. Enumeration via CellSearch is FDA-cleared for breast, prostate, and colorectal cancers [45].
Materials:
- CellSearch system (Menarini Silicon Biosystems) or microfluidic device (e.g., CTC-iChip)
- Anti-EpCAM coated magnetic beads
- Immunostaining antibodies (anti-cytokeratin, CD45, DAPI)
- RBC lysis buffer
- Cell culture media for CTC expansion
Methodology:
- Blood Collection: Draw 7.5-10mL blood into CellSave Preservative Tubes.
- CTC Enrichment:
- Immunoaffinity Approach: Incubate blood with anti-EpCAM ferrofluid. Place in magnetic field to capture EpCAM-positive cells [45].
- Label-free Microfluidics: Use deterministic lateral displacement or inertial focusing to separate CTCs from blood cells based on size and deformability.
- CTC Identification: Stain enriched cells with anti-cytokeratin (epithelial marker), anti-CD45 (leukocyte marker), and DAPI (nuclear stain). Identify CTCs as cytokeratin+/DAPI+/CD45- [45].
- Downstream Applications: Culture CTCs for functional studies, perform single-cell RNA sequencing, or conduct drug sensitivity assays.
Troubleshooting Tip: For cancers with mesenchymal features, include additional markers (vimentin, N-cadherin) as EpCAM expression may be downregulated due to EMT [45].
Research Reagent Solutions for Liquid Biopsy
Table 3: Essential Research Reagents for Liquid Biopsy Applications
| Reagent/Category | Specific Examples | Function | Application Notes |
|---|---|---|---|
| Blood Collection Tubes | Streck Cell-Free DNA BCT, PAXgene Blood cDNA Tubes | Stabilize nucleated cells, prevent analyte degradation | Maintain sample integrity during transport; process within 4-6 hours if using regular EDTA tubes [45] |
| Nucleic Acid Extraction Kits | QIAamp Circulating Nucleic Acid Kit, Norgen Plasma/Serum Circulating DNA Purification Kit | Isolate ctDNA/cfDNA with high purity and yield | Critical for removing PCR inhibitors; evaluate extraction efficiency with spike-in controls |
| Library Preparation Kits | NEBNext Ultra II FS DNA Library Prep, KAPA HyperPrep Kit | Prepare sequencing libraries from low-input ctDNA | Select kits with low input requirements (1-10ng) and minimal bias |
| Target Enrichment Panels | AVENIO ctDNA Targeted Kit, QIAseq Targeted DNA Panels | Enrich cancer-specific genomic regions | Panels range from focused (10-20 genes) to comprehensive (500+ genes); choose based on application |
| dPCR Assays | Bio-Rad ddPCR Mutation Assays, Thermo Fisher QuantStudio 3D Digital PCR | Absolute quantification of specific mutations | Ideal for monitoring known mutations; provides sensitivity down to 0.1% VAF without standards [46] |
| CTC Enrichment Systems | CellSearch Profile Kit, Microfluidic devices (CTC-iChip, Parsortix) | Isolate rare circulating tumor cells | CellSearch is FDA-cleared for enumeration; microfluidics enables label-free capture of heterogeneous CTCs [45] |
| Exosome Isolation Kits | ExoQuick precipitation solution, Total Exosome Isolation Kit | Concentrate and purify extracellular vesicles | Precipitation methods offer high yield but may co-precipitate contaminants; ultracentrifugation provides cleaner preparations |
Workflow Visualization
Liquid Biopsy Workflow
Liquid Biopsy Biomarkers and Applications
The field of liquid biopsy continues to evolve with several promising advancements on the horizon. Multi-omics approaches that integrate genomic, epigenomic, transcriptomic, and proteomic data from liquid biopsy samples are providing more comprehensive biomarker signatures [7] [50]. Artificial intelligence and machine learning are revolutionizing data interpretation, enabling predictive analytics for disease progression and treatment response [7] [50]. Fragmentomics - analyzing the size and distribution patterns of cell-free DNA fragments - represents a promising mutation-agnostic approach that requires only minimal blood volumes [48].
As we look toward 2025 and beyond, enhanced integration of these technologies with standardized protocols will be essential for advancing liquid biopsy from research to routine clinical practice. The ongoing development of more sensitive detection methods, combined with rigorous validation in large-scale clinical trials, will further establish liquid biopsy as an indispensable tool in precision oncology and biomarker research [7] [49].
Overcoming Implementation Challenges: Standardization, Data Management, and Clinical Translation
Troubleshooting Guides
Guide: Investigating Inconsistent Biomarker Results
Problem: Erratic or irreproducible biomarker data across sample batches.
| Possible Cause | Diagnostic Steps | Corrective Action |
|---|---|---|
| Delayed sample processing [51] [52] | - Audit time stamps from collection to centrifugation.- Correlate analyte levels (e.g., glucose, LDH) with processing delays. | - Establish and enforce a maximum processing window (e.g., within 1-2 hours for blood samples).- Implement a "significant change limit" to flag compromised samples [51]. |
| Improper sample storage or freeze-thaw cycles [51] [5] | - Review storage logs and freezer stability data.- Re-analyze control samples after multiple freeze-thaw cycles. | - Aliquot samples to avoid repeated freezing and thawing.- Define and validate stable storage conditions (temperature, duration). |
| Collection tube variability [52] [53] | - Compare results from different tube types (e.g., EDTA, heparin, SST) using split samples.- Check for anticoagulant interference. | - Validate the entire assay workflow with the selected collection tube.- Standardize tube type and lot across all collection sites. |
| Inconsistent centrifugation protocols [52] | - Audit clinical site protocols for speed, time, and temperature.- Check for gel separator integrity. | - Define and standardize precise centrifugation parameters across all sites.- Provide detailed Standard Operating Procedures (SOPs) to all partners. |
Guide: Addressing Poor Biomarker Stability
Problem: Measured biomarker levels degrade before analysis.
| Affected Biomarker Type | Key Stability Influencers | Stabilization Strategies |
|---|---|---|
| Proteins (e.g., Enzymes) [51] | - Time to processing [51].- Number of freeze-thaw cycles [51].- Storage temperature. | - Process serum/plasma within 1-2 hours of collection [51].- Limit freeze-thaw cycles to <3 [51].- Use stable, single-use aliquots. |
| Cell-Free DNA / Circulating Tumor DNA [52] | - Time to plasma separation.- Transport conditions. | - Use specialized blood collection tubes (e.g., Streck, PAXgene).- Process plasma within 4-6 hours for standard EDTA tubes.- Ensure cold chain during transport. |
| Glucose [51] | - Time in collection tube prior to processing. | - Process samples immediately; glycolysis causes concentration to drop ~1.387 mg/dL per hour at room temperature [51]. |
| Metabolites/Lipids [23] | - Enzymatic activity in whole blood.- Temperature. | - Use preservatives or immediate centrifugation.- Snap-freeze plasma/serum after processing. |
Experimental Protocols
Protocol: Evaluating Processing Time Delays
Objective: To quantitatively determine the impact of delayed processing on biomarker stability in blood samples [51].
Materials:
- Venous blood samples from consented donors.
- Standard blood collection tubes (e.g., SST, EDTA).
- Centrifuge.
- Automated chemistry analyzer or other relevant biomarker detection platform.
- Cryovials for aliquoting.
Methodology:
- Sample Collection: Collect venous blood from each donor into multiple sterile vacuum tubes.
- Time-Delay Incubation: Allow the collected tubes to stand at room temperature for varying durations (e.g., 0.5 h, 1 h, 2 h, 4 h, 24 h) [51].
- Processing: At the end of each pre-defined time point, centrifuge the tubes as per standardized protocol (e.g., 3000 g for 10 minutes) and transfer the serum or plasma into cryovials [51].
- Analysis: Measure the concentrations of your target biomarkers (e.g., Glucose, LDH, GGT) in all samples using a validated assay. Include a baseline measurement (e.g., 0.5 h) as a reference [51].
- Data Analysis:
- Express results as relative concentrations compared to the baseline.
- Use repeated-measures ANOVA to determine statistically significant changes.
- Apply the Significant Change Limit (SCL) to identify clinically relevant variations [51].
Protocol: Assessing Freeze-Thaw Cycle Effects
Objective: To establish the maximum tolerable number of freeze-thaw cycles for a specific biomarker.
Materials:
- Pooled serum or plasma samples.
- -80°C or -196°C freezer.
- Cryovials.
Methodology:
- Baseline Aliquot: Process the pooled sample and immediately analyze one aliquot to establish the baseline (Cycle 0) concentration [51].
- Cycling: Divide the remaining sample into multiple aliquots. Freeze the aliquots at the intended storage temperature (e.g., -80°C). In subsequent cycles, completely thaw an aliquot at room temperature and then re-freeze it. Repeat this process for 1, 3, 6, and 9 cycles [51].
- Final Analysis: After completing the designated number of cycles, thaw the aliquots and analyze them alongside a freshly thawed baseline control.
- Data Analysis: Calculate the percentage recovery for each cycle compared to the baseline. Determine the point at which the biomarker concentration shows a statistically and clinically significant decrease.
Frequently Asked Questions (FAQs)
Q1: What are the most critical pre-analytical factors to control for in biomarker studies? The most critical factors are time and temperature between blood collection and processing, the number of freeze-thaw cycles, and the choice of collection tube. These variables can introduce significant analytical noise and lead to irreproducible results, accounting for a large proportion of laboratory errors [51] [52] [53].
Q2: Are there any general quality control markers I can measure to assess sample quality? Yes, certain common clinical chemistry analytes are sensitive to pre-analytical conditions. Lactate Dehydrogenase (LDH) and Gamma-Glutamyl Transferase (GGT) are sensitive to both processing delays and freeze-thaw cycles. Glucose is highly sensitive to processing delays due to glycolysis, while AST and BUN are particularly sensitive to multiple freeze-thaw cycles [51]. Monitoring these can provide a useful quality check for banked serum and plasma samples.
Q3: Our assay works perfectly in our lab but fails in a multi-center clinical trial. What could be wrong? This is a classic symptom of uncontrolled pre-analytical variation. Different clinical sites likely have variations in their sample collection workflows, centrifugation protocols, sample storage times, or even the collection tubes used [52]. To fix this, implement a rigorous and standardized SOP across all sites, conduct pre-study training, and consider using controlled comparative studies to define acceptable processing windows for your specific assay [52].
Q4: How can I determine the specific processing requirements for a novel biomarker? You must perform a controlled comparative biospecimen study [52]. This involves collecting samples from the same donors and intentionally varying one pre-analytical factor at a time (e.g., processing time, storage temperature, tube type) while keeping all others constant. By measuring the biomarker's response under these different conditions, you can define its specific stability profile and establish validated SOPs.
Workflow Diagrams
Sample Integrity Assurance Workflow
Pre-Analytical Variable Impact
The Scientist's Toolkit: Essential Research Reagents & Materials
| Item | Function & Rationale |
|---|---|
| Stabilized Blood Collection Tubes (e.g., Streck, PAXgene) | Preserves cell-free DNA and RNA by preventing white blood cell lysis and nuclease activity, allowing longer processing windows [52]. |
| Serum Separator Tubes (SST) | Contains a clot activator and gel for separating serum during centrifugation. Requires validation as gel can interfere with some assays [51] [53]. |
| EDTA or Heparin Tubes | Standard tubes for plasma collection. Anticoagulant choice can impact downstream assays (e.g., heparin inhibits PCR) [52]. |
| Automated Homogenizer (e.g., Omni LH 96) | Standardizes tissue and cell disruption, reducing cross-contamination and operator-dependent variability for more reproducible biomarker extraction [5]. |
| Validated Immunoassays | Commercially available kits must be critically evaluated for specificity and precision, as many may not detect the intended target, leading to erroneous conclusions [53]. |
| Quality Control Materials | Commercial quality control sera or pooled in-house samples with known biomarker concentrations are essential for monitoring assay performance across runs [51] [53]. |
| Cryovials & Barcoding System | For consistent, traceable, and organized long-term sample storage at ultra-low temperatures, minimizing identification errors [5]. |
Data heterogeneity, the presence of varied data distributions stemming from differences in patient populations, clinical procedures, and technological platforms, is a major challenge in multi-center biomarker studies. Effectively managing this heterogeneity is critical for ensuring that your biomarker validation efforts yield robust, generalizable, and clinically applicable results. This guide provides actionable strategies and troubleshooting advice to navigate these complexities.
Troubleshooting Guides
Guide 1: Addressing Technical Heterogeneity from Analytical Platforms
Problem: Measured biomarker values vary significantly across different sites due to the use of equipment from different manufacturers or non-standardized protocols.
| Troubleshooting Step | Key Actions | Expected Outcome |
|---|---|---|
| 1. Pre-Study Assay Alignment | Conduct a method comparison study across all platforms to be used. Establish and document standardized procedures for sample collection, processing, and storage [14]. | A harmonized standard operating procedure (SOP) that minimizes technical variability from the outset. |
| 2. Implement Centralized Monitoring | Use a central laboratory for the analytical validation of a subset of key samples, or use standardized control materials shipped to all sites for periodic testing [14]. | A quality control mechanism to identify and correct for technical drift across sites over time. |
| 3. Statistical Harmonization | Perform batch-effect correction and other statistical normalization techniques on the aggregated data to adjust for inter-site technical differences. | A cleansed dataset where technical artifacts are reduced, allowing for a clearer view of biological signals. |
Guide 2: Managing Clinical and Population Heterogeneity
Problem: Differences in patient recruitment, clinical practices, and environmental factors across sites introduce biological variability that confounds biomarker signals.
| Troubleshooting Step | Key Actions | Expected Outcome |
|---|---|---|
| 1. Define Context of Use (COU) | Clearly and concisely define the biomarker's specified purpose and the population in which it will be used before study design [54]. | A solid foundation for all subsequent decisions on study population, statistical plans, and acceptable performance metrics. |
| 2. Robust Study Design | Ensure the study includes all relevant patient subgroups and clinical conditions reflected in the COU. For diagnostic biomarkers, include differential diagnosis control groups [54]. | A study population that reflects real-world heterogeneity, improving the generalizability of the validation results. |
| 3. Leverage Multi-Centric Data | Train algorithms on diverse, multi-centric datasets rather than data from a single site. This helps the model discard spurious, site-specific correlations and identify robust features [55]. | A more robust and generalizable analytical model that performs reliably across new, unseen datasets from different centers. |
Frequently Asked Questions (FAQs)
Q1: What is the single most important thing to define before starting a biomarker validation study? The Context of Use (COU) is critical. It is a concise description of the biomarker's specified use, including its biomarker category (e.g., diagnostic, prognostic) and its intended application in drug development or clinical practice. The COU directly determines the study design, statistical analysis plan, and the performance characteristics you need to evaluate [54].
Q2: What is the difference between analytical validation and clinical validation?
- Analytical Validation: This process establishes that the test or instrument used to measure the biomarker is technically reliable. It assesses performance characteristics like sensitivity, specificity, accuracy, and precision [54] [14].
- Clinical Validation: This process evaluates the biomarker's performance and usefulness as a decision-making tool for its specific Context of Use. It determines how well the biomarker identifies, measures, or predicts the clinical concept of interest [54] [14].
Q3: How can we perform multi-center studies when data cannot be pooled due to privacy or competitive concerns? Federated Learning (FL) is a privacy-preserving machine learning approach that is ideal for this challenge. In an FL setting, the data remains secure at its original institution. Instead of sharing data, machine learning models are trained locally at each site, and only the model updates (e.g., weights and parameters) are shared and aggregated to create a global model. This allows you to leverage heterogeneous data from multiple centers without moving or pooling the underlying data [55].
Q4: Our model performed well on single-site data but failed in a multi-center validation. What likely happened? This is a classic sign of overfitting to site-specific confounders. Your model likely learned spurious correlations that are specific to the initial site's data, such as associations with a particular scanner type, local patient demographics, or a specific sample handling protocol. The solution is to train the model on a more heterogeneous, multi-centric dataset from the beginning, forcing it to identify features that are truly predictive across environments [55].
Key Experimental Protocols
Protocol: Designing a Multi-Center Biomarker Validation Study
Objective: To clinically validate a predictive biomarker signature across multiple research centers, accounting for data heterogeneity.
Methodology:
- Context of Use Definition: Finalize the COU statement (e.g., "To identify patients with condition X who will respond to therapeutic Y") [54].
- Site Selection and Standardization: Select sites that represent the intended patient population and clinical settings. Develop and distribute detailed SOPs for:
- Patient recruitment and inclusion/exclusion criteria.
- Sample collection, processing, and shipping.
- Data acquisition parameters (if using digital biomarkers or imaging) [56].
- Centralized Testing and Controls: Implement a central laboratory for the biomarker assay or distribute standardized control materials to all sites for ongoing quality assurance [14].
- Data Management and Analysis Plan:
- Use a secure, centralized database for data aggregation.
- Pre-specify a statistical analysis plan that includes methods for assessing and correcting for batch effects and site-specific variances.
- For AI/ML models, employ federated learning techniques to build the model without centralizing data [55].
- Performance Evaluation: Evaluate the biomarker's performance against the pre-specified endpoints from the COU, and conduct subgroup analyses to ensure consistent performance across all participating sites [54].
Workflow Diagram for Multi-Center Validation
Conceptual Diagram of Federated Learning
The Scientist's Toolkit: Research Reagent Solutions
| Item | Function in Managing Heterogeneity |
|---|---|
| Standardized Control Materials | Commercially available or centrally characterized controls used across all sites to monitor assay performance and enable cross-site data normalization [14]. |
| Stabilization Buffers/Collection Kits | Pre-formulated, standardized kits for sample collection that minimize pre-analytical variability introduced by different site protocols [14]. |
| Reference Standards | Well-characterized biological samples with known biomarker values, used to calibrate equipment and assays across different platforms to ensure comparable results. |
| Interoperability Software | Data transformation and mapping tools that help convert site-specific data formats and coding (e.g., units, labels) into a common data model for analysis. |
| Batch Effect Correction Algorithms | Statistical software packages (e.g., ComBat, SVA) used during data analysis to identify and remove unwanted technical variance introduced by different sites or processing batches. |
Troubleshooting Guide: Biomarker Validation and Implementation
This section addresses common challenges in biomarker development and provides targeted solutions to help researchers navigate the complex journey from discovery to clinical application.
FAQ: Common Biomarker Challenges
Why do many biomarker discovery projects fail to produce clinically actionable results? Many projects fail due to a focus on achieving statistically significant between-group differences rather than ensuring successful classification of individual patients. A low p-value does not guarantee a low classification error rate. Furthermore, inadequate model validation, often through misapplied cross-validation techniques, can lead to overly optimistic performance estimates. A critical, often overlooked step is the rigorous establishment of a biomarker's test-retest reliability, which is essential for longitudinal monitoring [6].
What are the key statistical considerations when validating a predictive biomarker? The validation pathway depends heavily on whether the biomarker is intended to be prognostic (providing information on overall outcome) or predictive (informing response to a specific treatment). Prognostic biomarkers can be identified in retrospective studies, while predictive biomarkers require data from randomized clinical trials and are identified through a statistical test for interaction between the treatment and the biomarker [4]. Key performance metrics must align with the biomarker's intended use, prioritizing high sensitivity to avoid false negatives for screening, or high specificity to avoid false positives for therapeutic selection [57].
How can we ensure our biomarker model will generalize to the broader patient population? Generalizability is threatened when training cohorts over- or under-represent certain populations. To mitigate this, consider contextual factors like:
- Temporal drift: Data collected during a fixed period may not be representative over time.
- Ancestry and socioeconomic bias: Operational choices in clinical trials can bias recruitment. It is essential to design validation studies that assess performance across the full diversity of the intended real-world population [57]. Proactive engagement of diverse patient populations during research is also key to ensuring relevance [7].
What operational factors influence the adoption of a biomarker test in clinical practice? Beyond statistical performance, adoption is driven by actionability and practicality. A test with a rapid turnaround time that uses routinely collected biomaterial (e.g., fixed tissue or blood) and fits seamlessly into clinical workflows is more likely to be adopted. Furthermore, the clarity of the result—a binary yes/no is often more actionable than a continuous score—and a clear biological rationale enhance explainability and clinician trust [57].
Our integrated data is messy and inconsistent. How can we improve data quality for reliable biomarker discovery? Data heterogeneity is a major challenge. Implement a rigorous data curation pipeline including:
- Standardized Formats: Adopt foundational standards like CDASH for data collection and SDTM for data tabulation [58].
- Quality Control: Use data type-specific quality metrics (e.g., fastQC for NGS data, arrayQualityMetrics for microarrays) applied both before and after preprocessing [59].
- Data Harmonization: Resolve inconsistencies in units or value encodings and transform clinical data to standard terminologies (e.g., ICD-10, SNOMED CT) [59].
Experimental Protocol: Biomarker Discovery and Validation Workflow
The following diagram outlines the key phases for a robust biomarker development pipeline.
Biomarker Development Pipeline
Detailed Methodology:
Study Design & Planning:
- Define Intended Use: Clearly specify if the biomarker is for risk stratification, diagnosis, prognosis, prediction of treatment response, or monitoring [4]. This determines the validation pathway.
- Cohort Design: Use dedicated sample size determination methods to ensure the study is adequately powered [59]. Apply sample matching methods to control for confounders between cases and controls.
Data Acquisition & Preprocessing:
- Multi-Modal Integration: Combine data from genomics, proteomics, clinical records, and imaging. Choose an integration strategy (early, intermediate, or late fusion) suited to the data types and question [59].
- Quality Control & Standardization: Perform rigorous quality checks (e.g., with fastQC for sequencing data). Transform data into standard formats (CDISC, OMOP) and resolve value inconsistencies [58] [59].
Model Training & Validation:
- Feature Selection: Use methods like LASSO or elastic net to prevent overfitting and select the most informative features [6] [59].
- Internal Validation: Apply cross-validation correctly, ensuring the validation fold is never used in any part of the model training process to avoid optimistic bias [6] [59].
- External Validation: Validate the final model on a completely independent cohort from a different location or study. This is the gold standard for assessing generalizability [4] [57].
Research Reagent Solutions for Biomarker Research
Table: Essential Tools and Platforms for Biomarker Development
| Category | Specific Tool/Platform | Function in Research |
|---|---|---|
| Data Standards | CDISC (CDASH, SDTM, ADaM), HL7 FHIR [58] | Provides standardized structures for collecting, tabulating, and exchanging clinical and biomarker data, ensuring interoperability and regulatory compliance. |
| Multi-Omics Platforms | Single-cell sequencing, Spatial transcriptomics, High-throughput proteomics [9] [7] | Enables comprehensive molecular profiling to identify biomarker signatures that reflect complex disease mechanisms. |
| Liquid Biopsy Technologies | Circulating tumor DNA (ctDNA) analysis, Exosome profiling [7] | Provides a non-invasive method for real-time disease monitoring and detection, with applications in oncology and beyond. |
| AI/ML Analytical Tools | Machine Learning Classifiers (e.g., SVM, Random Forest), Multimodal Neural Networks [60] [59] | Facilitates the analysis of high-dimensional data for pattern recognition, feature selection, and predictive model building. |
| Single-Cell Analysis | Single-cell RNA sequencing (scRNA-seq) platforms [7] | Uncover tumor heterogeneity and identify rare cell populations that drive disease progression or therapy resistance. |
Troubleshooting Guide: Patient Recruitment & Retention
This section addresses critical bottlenecks in enrolling and retaining qualified patients in clinical trials, with a focus on technology-enhanced strategies.
FAQ: Recruitment and Retention Hurdles
How can Artificial Intelligence (AI) optimize patient recruitment, and what are its limitations? AI, including tools like Watson for Clinical Trial Matching and NLP systems, can automate the screening of Electronic Health Records (EHRs) against complex eligibility criteria, dramatically increasing efficiency and improving participant matching [60]. However, these tools face challenges including selection bias if the training data is not representative, as well as ethical concerns regarding data privacy, transparency, and potential discrimination [60]. The effectiveness of AI tools still requires further validation through rigorous studies [60].
What are the key strategies for reducing risk in patient recruitment? A proactive, multi-faceted approach is essential [61].
- Trial Design & Location: Incorporate patient journey perspectives into protocol design to minimize participant burden.
- Global Feasibility: Conduct thorough assessments that analyze epidemiology, standard-of-care differences, and—critically—gather direct feedback from both sites and patients.
- Risk Management Plan: Define key risk indicators and have a pre-aligned "Plan B" with clear decision criteria for triggering it [61].
Our recruitment is slow. How can we improve our outreach to potential patients? The core challenge is that many doctors do not present clinical trial opportunities to their patients. Moving beyond reliance on principal investigator referrals is necessary. Innovate by using a mix of online and traditional recruitment, engaging thought leaders in rare diseases, and integrating decentralized clinical trial (DCT) components like wearables and telemonitoring to reduce geographic and logistical barriers [61]. The goal is to make trial participation more accessible and visible.
How can we improve participant retention once they are enrolled? Retention requires a dedicated strategy separate from recruitment. Focus on the patient experience:
- Minimize Burden: Streamline visit frequency and procedures. Utilize ePRO/eCOA solutions and consider direct-to-patient shipment of investigational products where feasible [61] [58].
- Maintain Engagement: Ensure clear, frequent communication from the research team. Integrating patient-reported outcomes (PROs) into the study makes participants feel valued and provides critical data [7].
Workflow: AI-Enhanced Patient Screening
The following diagram illustrates how AI can be integrated into the patient pre-screening workflow to improve efficiency.
AI-Augmented Pre-Screening Process
Troubleshooting Guide: Clinical Data Integration
Seamless data integration is the backbone of modern, data-driven clinical trials, but it presents significant technical challenges.
FAQ: Data Integration Challenges
Our clinical data comes from multiple, disparate sources (EDC, ePRO, labs, EHR). How can we create a unified view? Implement a clinical data integration platform that supports open standards and APIs. The key is to aggregate and harmonize data from all sources into a unified, analysis-ready form. Utilizing standards like CDISC (for clinical trial data) and HL7 FHIR (for EHR integration) is critical for interoperability [58]. This centralization enables the use of AI and automation for data cleaning and reconciliation, reducing manual effort and providing real-time data visibility [58].
What are the biggest interoperability challenges between healthcare systems (EHRs) and clinical trial systems? The primary challenges are data heterogeneity and a lack of seamless interoperability. Even with standards, unstructured data (e.g., physician notes) requires complex NLP for context. Furthermore, industry data dictionaries may be updated at different intervals across vendors, requiring continuous reconciliation during the study lifecycle [58].
How can we effectively integrate Real-World Evidence (RWE) into our clinical trials? Integrating EHR data and other RWE sources can enhance site efficiency (e.g., pre-populating EDC forms) and provide deep patient insights. A major application is the creation of external control arms, which can reduce the number of patients needed for randomized trials in certain contexts. Success depends on the quality and standardization of the RWD sources and careful statistical design to address confounding [58].
Experimental Protocol: Clinical Data Integration Framework
Best Practices for Implementation [58]:
- Define Integration Goals Early: Specify objectives (e.g., eSource, EHR-EDC integration, decentralized capabilities) during the protocol design phase.
- Map Data Sources and Formats: Catalog all data sources (EDC, eCOA, labs, wearables, EHR) and their formats (structured, unstructured).
- Select Interoperable Platforms: Choose vendors and platforms that support open standards (CDISC, HL7 FHIR) and have robust API capabilities.
- Establish Governance and SOPs: Align sponsors, CROs, and vendors on Standard Operating Procedures (SOPs) and data transfer formats to prevent manual corrections and outdated data.
- Validate and Test Pipelines: Before study launch, rigorously test data pipelines to ensure accurate and timely data flow.
- Implement Centralized Monitoring: Use the integrated data environment to enable risk-based quality management (RBQM), moving away from 100% source data verification to a more targeted, efficient monitoring approach.
Research Reagent Solutions: Data Integration & AI
Table: Key Technologies for Data Management and Advanced Analytics
| Category | Specific Tool/Platform | Function in Research |
|---|---|---|
| Electronic Data Capture (EDC) | Modern EDC Systems [58] | Core systems for recording site, patient, and lab-reported data; automates workflows and data reconciliation. |
| Patient-Reported Outcomes (PRO) | ePRO/eCOA Solutions [58] | Electronic tools for collecting outcomes data directly from patients, improving data quality and patient engagement. |
| Remote Monitoring | Wearables and Telemonitoring Devices [58] | Enable patient-centric, continuous collection of physiological and activity data outside the clinic. |
| Data Integration & Analytics | Unified Clinical Trial Platforms (e.g., Medidata) [58] | Provide a centralized environment for integrating, standardizing, and analyzing multi-source clinical data. |
| Machine Learning for Biomarkers | AI-driven Predictive Models [60] [7] | Analyze complex datasets (e.g., multi-omics, imaging) to forecast disease progression and treatment responses. |
Fundamental Concepts: Standardization vs. Harmonization
What is the critical difference between assay standardization and harmonization?
The terms "standardization" and "harmonization" describe two distinct approaches for establishing metrological traceability to ensure comparable laboratory results [62].
| Feature | Standardization | Harmonization |
|---|---|---|
| Definition | Aligning results to an unambiguous, higher-order standard [63]. | Aligning results to a reference system agreed upon by convention [62]. |
| Basis | Traceability to the International System of Units (SI) [62]. | Traceability to a consensus reference system (e.g., a designated method or materials) [62]. |
| Applicability | Well-defined measurands (e.g., cholesterol, glucose) [63]. | Complex or poorly defined measurands (e.g., Thyroid-Stimulating Hormone) [62] [63]. |
| Prerequisites | Availability of reference measurement procedures and pure-substance reference materials [62]. | A consensus reference method or an "all-methods mean" value from a set of reference materials [62]. |
| Example | CDC's Lipid Standardization Program for cholesterol [62]. | International Consortium for Harmonization of Clinical Laboratory Results for TSH [62]. |
Implementing a Standardization Framework
What are the essential steps for establishing metrological traceability?
Achieving comparable results across sites and platforms requires a systematic process [62]:
- Establish a Reference System: Develop and validate higher-order reference measurement procedures and commutable reference materials that behave like authentic patient samples [62].
- Calibrate Measurement Procedures: Ensure all routine assays and platforms are calibrated using the established reference system [62].
- Verify Comparability: Continuously assess the uniformity of results by measuring a set of authentic patient samples across different methods and sites, often through accuracy-based proficiency testing programs [62].
The following workflow visualizes this continuous process and the role of commutability:
Troubleshooting Guide: Common Assay Harmonization Challenges
FAQ 1: Our multi-site study is showing significant inter-laboratory variance for a biomarker. How do we identify the source of the discrepancy?
High inter-laboratory variance often stems from pre-analytical, analytical, or post-analytical factors. Follow this troubleshooting guide to identify the root cause [64]:
| Phase | Potential Issue | Investigation & Corrective Action |
|---|---|---|
| Pre-Analytical | Inconsistent sample collection, handling, or storage [64]. | Audit SOPs across sites for patient preparation, sample type, anti-coagulant use, and freeze-thaw cycles. Implement uniform guidelines. |
| Analytical | Non-commutable calibrators: The calibrators used do not behave like patient samples [62]. | Use commutable reference materials for calibration verification. Participate in accuracy-based proficiency testing (e.g., CDC Hormone Standardization Program) [62]. |
| Lack of analytical specificity: The assay cross-reacts with other substances [65]. | Re-validate the assay's analytical specificity against potential interferents. | |
| Poor precision/accuracy: The assay lacks robustness [65]. | Re-assess precision (repeatability, reproducibility) and accuracy against a reference method. | |
| Post-Analytical | Inconsistent data analysis or reporting units [64]. | Standardize data processing algorithms, units of measurement, and report formats across all sites. |
FAQ 2: We are developing an assay for a novel biomarker. What are the key validation parameters we must address to meet regulatory standards?
For a novel biomarker, robust analytical validation is required to demonstrate the assay is reliable and fit-for-purpose. The table below outlines the essential parameters [65]:
| Validation Parameter | Definition & Purpose |
|---|---|
| Analytical Specificity | Confirms the assay measures only the intended analyte and does not cross-react with other substances [65]. |
| Analytical Sensitivity | Determines the lowest concentration of the analyte that can be reliably detected [65]. |
| Precision | Measures the reproducibility of results under defined conditions (e.g., within-run, between-day, between-site) [65]. |
| Accuracy | Measures the closeness of agreement between the test result and the true value. For novel biomarkers, this may involve comparison to a designated reference method [62] [65]. |
| Range & Linearity | Defines the span of concentrations over which the assay provides accurate and linear results [65]. |
| Robustness & Ruggedness | Evaluates the assay's capacity to remain unaffected by small, deliberate variations in method parameters (e.g., temperature, pH, reagent lots) [65]. |
FAQ 3: How do we approach harmonization for a complex biomarker where standardization to an SI unit is not possible?
For complex biomarkers like proteins with multiple isoforms (e.g., TSH), a harmonization approach is used [62] [63].
- Consensus Reference System: A designated comparison method is selected, or a reference material is created and assigned a consensus value (e.g., an "all-method trimmed mean") derived from multiple validated testing procedures [62].
- Calibration Hierarchy: All commercial assay manufacturers and clinical laboratories calibrate their tests against this agreed-upon reference system.
- Commutability Verification: It is critical to confirm that the reference material used is commutable, meaning it behaves in the same way as a fresh patient sample across all measurement procedures. The use of non-commutable materials will lead to inaccurate harmonization [62].
The diagram below illustrates this harmonization process centered on a commutable reference material.
The Scientist's Toolkit: Essential Research Reagent Solutions
A successful standardization project relies on high-quality reagents and materials. The following table details key components [62] [63] [65]:
| Reagent/Material | Function in Standardization & Harmonization |
|---|---|
| Primary Reference Material | A highly purified substance with values assigned by a definitive method. Serves as the primary calibrator for the reference measurement procedure [62]. |
| Commutable Secondary Reference Material | A material that behaves like a fresh patient sample in all measurement procedures. Used to transfer accuracy from reference labs to routine laboratories and manufacturers [62] [64]. |
| Quality Control (QC) Materials | Stable materials with known target values used to monitor the precision and stability of an assay over time. Should be commutable for optimal monitoring [65]. |
| Certified Reference Materials | Reference materials characterized by a metrologically valid procedure, accompanied by a certificate providing the value, uncertainty, and traceability. Often available from National Metrology Institutes [62]. |
| Panel of Single-Donor Sera | A set of individual patient samples covering a range of clinically relevant concentrations. Used as "true" patient samples to validate the commutability of reference materials and to assess method comparability [62]. |
Troubleshooting Guides and FAQs
Sample Management and Integrity
Q: Our biomarker data shows high variability between sites in a multi-center trial. What could be the cause and how can we resolve it?
A: High inter-site variability often stems from inconsistent sample handling protocols. Key steps to resolve this include:
- Implement Standardized SOPs: Develop and enforce detailed standard operating procedures for every step from sample collection to storage. This includes specifying the container, transport medium, and labeling requirements for each sample type [66].
- Control Pre-analytical Variables: Factors such as time between venipuncture and processing, nutritional state of the patient, and shipping conditions can significantly influence the integrity of biological samples like PBMCs [66]. Standardize these procedures across all sites.
- Centralize Sample Processing: Consider using an end-to-end specialty lab service provider with a network of labs that maintain consistent protocols. This can drastically reduce variability caused by differing site capabilities [66].
- Automate Where Possible: Introduce automated homogenization systems. One clinical genomics lab reported an 88% decrease in manual errors after automating their sample preparation workflow, reducing cross-contamination and improving data consistency [5].
Q: How can we prevent sample degradation during transport and storage?
A: Temperature regulation is critical, as biomarkers like nucleic acids and proteins are highly sensitive to fluctuations [5].
- Define Conditions: Establish a sample management plan that outlines the required conditions (e.g., flash freezing, consistent cold chain logistics) for each sample type at every time point [66].
- Validate Storage Impact: Understand the impact of the freeze-thaw process on cell viability and function to determine the optimal processing approach [66].
- Leverage Stable Technologies: For certain analyses, consider technologies that are less sensitive to transport conditions. For example, epigenetic immune cell quantification (Epiontis ID) can be applied to fresh, frozen, or dried blood samples, potentially reducing costs and logistical complexity [66].
Site Selection and Capability Assessment
Q: What are the most critical factors to assess when selecting a clinical trial site for a biomarker-driven study?
A: Moving beyond traditional criteria, focus on capabilities specific to biomarker research:
- Demonstrated Expertise and Infrastructure: The site must possess the clinical expertise and resources to conduct complex protocol procedures, including proper sample collection, processing, and data management [67]. Verify their experience with specific platform technologies required for your study (e.g., flow cytometry, sequencing) [66].
- Proven Patient Recruitment and Retention: The site should demonstrate a proven ability to recruit and retain eligible patients with the specific disease characteristics and demographic profiles required. High dropout rates can compromise longitudinal sample collection [67].
- Regulatory Compliance Track Record: Sites must have a consistent history of compliance with regulatory agencies concerning data integrity and patient privacy to ensure the collected biomarker data will withstand scrutiny [67].
- Geographic and Demographic Strategy: Place sites in regions with high concentrations of your target patient population to ensure timely sample acquisition and enhance the diversity and representativeness of your data [67].
Budgeting and Risk Mitigation
Q: How should we budget for the high risk of failure in early-stage biomarker R&D?
A: Budgeting for risk is a strategic necessity, not an admission of defeat.
- Create Contingency Funds: Allocate contingency funds specifically for unforeseen technical challenges, schedule slips, or the need for additional experiments. This provides financial flexibility without halting the project [68].
- Use Milestone-Based Funding: Break the project into stages with clear go/no-go decision points (e.g., proof-of-concept, technical feasibility). Link spending to quantifiable progress to avoid over-committing to unproven directions [68].
- Leverage External Funding: Explore government R&D incentives, such as the SRED program in Canada, which can help recover a portion of salaries and material costs even if the project does not reach commercial success [68].
- Promote a Culture of Calculated Risk: Dedicate a portion of the budget for exploratory, higher-risk ideas. This encourages innovation and allows teams to pursue promising leads without the fear of punitive consequences for failure [68].
Q: What are the common statistical pitfalls in biomarker validation, and how can we avoid them?
A: Statistical issues can lead to false discoveries and irreproducible results.
- Account for Multiplicity: When validating multiple biomarkers or endpoints, use statistical corrections (e.g., for false discovery rate) to account for multiple comparisons. Ignoring this inflates the risk of identifying chance correlations as significant [69].
- Control for Within-Subject Correlation: When multiple observations or specimens come from the same patient, use statistical methods like mixed-effects models that account for this correlation. Failure to do so can produce spurious findings [69].
- Address Selection Bias: Be aware that retrospective studies are susceptible to selection bias, which can skew the apparent relationship between a biomarker and a clinical outcome. Robust study design is crucial to mitigate this [69].
Quantitative Data on Common Laboratory Errors
The table below summarizes frequent lab mistakes and their impacts, underscoring the need for rigorous quality control.
Table: Common Laboratory Errors and Their Impacts on Biomarker Data
| Error Category | Specific Issue | Reported Impact / Frequency |
|---|---|---|
| Sample Processing | Pre-analytical errors (collection, handling) | Account for approximately 70% of all laboratory diagnostic mistakes [5]. |
| Sample Management | Specimen mislabeling | Occurs in ~0.2% of cases, with an average additional cost of $712 per incident [5]. |
| Human Factors | Manual errors in sequencing prep | An 88% reduction in errors achieved after implementing lab automation [5]. |
| Cognitive Factors | Staff cognitive fatigue | Research demonstrates cognitive function can decrease by up to 70% during extended periods of sustained focus without breaks [5]. |
Experimental Protocols for Key Processes
Protocol 1: Standardized Peripheral Blood Mononuclear Cell (PBMC) Processing for Immune Monitoring
Objective: To ensure consistent isolation of viable PBMCs for downstream assays like flow cytometry or epigenetic analysis across multiple trial sites.
Materials:
- Blood collection tubes (e.g., sodium heparin or EDTA).
- Sterile Ficoll-Paque PLUS density gradient medium.
- Phosphate Buffered Saline (PBS).
- Cell freezing medium (e.g., 90% FBS with 10% DMSO).
- Controlled-rate freezer and liquid nitrogen storage.
Methodology:
- Collection: Collect venous blood into appropriate anticoagulant tubes.
- Transport: Maintain samples at ambient temperature and minimize the time between venipuncture and processing. Critical Step: The time from blood draw to processing must be standardized (e.g., ≤24 hours) and documented for every sample [66].
- Density Gradient Centrifugation:
- Dilute blood 1:1 with PBS.
- Carefully layer the diluted blood over Ficoll-Paque in a centrifuge tube.
- Centrifuge at 400-500 × g for 30-35 minutes at room temperature with the brake off.
- After centrifugation, aspirate the PBMC layer from the interface.
- Washing: Wash the PBMCs twice with PBS by centrifuging at 300 × g for 10 minutes.
- Cryopreservation:
- Resuspend the cell pellet in cold freezing medium.
- Transfer to cryovials and freeze using a controlled-rate freezer.
- Store in the vapor phase of liquid nitrogen.
Protocol 2: Analytical Validation of a Novel Biomarker Assay
Objective: To establish the performance characteristics of a new biomarker test as part of the biomarker qualification process.
Materials:
- Well-characterized sample panels (including positive, negative, and borderline samples).
- Assay reagents and controls.
- Appropriate instrumentation (e.g., PCR machine, NGS platform, mass spectrometer).
Methodology:
- Precision: Assess repeatability (within-run) and intermediate precision (between-run, different days, different operators) by testing the same sample set multiple times. Calculate the coefficient of variation (%CV).
- Accuracy: Compare the test results to a reference method or a validated standard. This can include spike-recovery experiments or correlation studies with a gold-standard assay.
- Analytical Sensitivity (LoD): Determine the lowest amount of the biomarker that can be reliably distinguished from zero. This is typically done by testing serial dilutions of a known positive sample.
- Analytical Specificity: Investigate potential interference from common substances (e.g., hemolysis, lipids) and cross-reactivity with similar analytes.
- Report Range: Establish the range of biomarker concentrations over which the test provides accurate and precise results.
Data Analysis: The biological rationale, assay considerations, and characterization of the relationship between the biomarker and the outcome are all critical components for submission to regulatory qualification programs [70].
Workflow and Relationship Diagrams
Biomarker Sample Management Workflow
Site Assessment and Selection Logic
The Scientist's Toolkit: Essential Research Reagent Solutions
Table: Key Materials and Platforms for Biomarker Research and Validation
| Item / Solution | Function in Biomarker Research |
|---|---|
| Specialty Lab Services | End-to-end solution offering consistent sample processing, custom assay development, and state-of-the-art biobanking facilities across multiple countries, ensuring data quality in multi-site trials [66]. |
| Multi-Omics Platforms | Technologies for genomics, proteomics, metabolomics, and transcriptomics integration. Used to achieve a holistic understanding of disease mechanisms and identify comprehensive biomarker signatures [7] [9]. |
| Liquid Biopsy Technologies | Non-invasive methods for analyzing circulating tumor DNA (ctDNA) and exosomes. Facilitates real-time monitoring of disease progression and treatment response, with expanding applications in oncology and beyond [7]. |
| Automated Homogenization Systems | Platforms like the Omni LH 96 automate sample preparation, reducing manual variability and contamination risks, thereby enhancing the reproducibility of biomarker data [5]. |
| AI and Machine Learning Algorithms | Used for predictive analytics and automated interpretation of complex, high-dimensional biomarker datasets, accelerating discovery and validation timelines [7] [9]. |
Frequently Asked Questions (FAQs)
A: Population diversity is fundamental because a biomarker validated in a homogeneous group may not perform accurately in a different demographic, leading to misdiagnosis or inappropriate treatment. Generalizability depends on understanding and accounting for key sources of variability, which include both biological and methodological factors [71].
The total variance of a biomarker measurement can be partitioned into three main components [71]:
- Within-Individual Variance (σ²I): Natural biological fluctuations in a person's biomarker levels over time.
- Between-Individual Variance (σ²G): The inherent biological variation of the biomarker across different people in a population.
- Methodological Variance (σ²P+A): Variability introduced during the sample collection, processing, handling, and analytical assay measurement.
The Index of Individuality (II), calculated as II = (CVI + CVP+A) / CVG, helps determine a biomarker's utility. A low II (≤0.6) suggests that population-based reference intervals are less useful, and serial monitoring of an individual is more informative. A high II (>1.4) indicates that population-based reference intervals can be effectively used for interpretation [71].
Q2: How does ethnicity specifically influence biomarker reference intervals?
A: Significant research demonstrates that ethnicity can profoundly influence biomarker levels due to a combination of genetic, environmental, and lifestyle factors. Applying universal reference intervals without considering ethnicity risks misclassification [72] [73].
The table below summarizes key biomarkers with documented ethnic variations:
Table: Selected Biomarkers with Documented Ethnic Variations
| Biomarker Category | Specific Biomarker | Documented Ethnic Variation |
|---|---|---|
| Cardiovascular & Metabolic | NT-proBNP, Lipids (TC, HDL, LDL), CRP | Levels vary significantly among African, Asian, Hispanic, and Caucasian populations [72]. |
| Immunology | Immunoglobulins (IgA, IgG, IgM) | Significant differences observed between Black, Caucasian, East Asian, and South Asian children [73]. |
| Fertility & Endocrinology | Follicle-Stimulating Hormone (FSH), Anti-Müllerian Hormone (AMH) | Caucasians show different FSH levels compared to Asians; ethnic-specific RIs are needed [73]. |
| Nutritional & Minerals | Vitamin D, Ferritin, Trace Elements (Zn, Se, Cu) | Marked ethnic differences were confirmed in both Canadian and US (NHANES) pediatric studies [73]. |
| Liver Enzymes | Amylase | Asians consistently demonstrate higher amylase levels than Caucasians [73]. |
Q3: What is the "Context of Use" (COU) and why is it the first step in validation?
A: The Context of Use (COU) is a concise description of a biomarker's specified purpose. It defines both the biomarker category (e.g., diagnostic, prognostic, predictive) and its intended application in drug development or clinical practice [54].
Defining the COU first is critical because it dictates the entire validation study design, including:
- Choice of Study Populations: A predictive biomarker requires samples from patients exposed to the specific therapeutic, while a diagnostic biomarker requires relevant control groups for differential diagnosis [54].
- Statistical Analysis Plan: The acceptable variance, error rates, and decision thresholds are all dependent on the risks and benefits associated with the biomarker's intended use [54].
- Performance Criteria: The required sensitivity, specificity, and accuracy are determined by how the biomarker will inform clinical or developmental decisions [54].
Q4: What are the differences between analytical validation and clinical validation?
A: These are two distinct, sequential stages in the biomarker qualification process [54].
- Analytical Validation establishes that the test or instrument used to measure the biomarker is technically reliable. It focuses on the assay's performance characteristics, including its sensitivity, specificity, accuracy, precision, and reproducibility under specified conditions [54].
- Clinical Validation establishes that the biomarker itself acceptably identifies, measures, or predicts the concept of interest (e.g., a disease state or treatment response) for its specified Context of Use [54].
In simple terms, analytical validation ensures you are measuring the biomarker correctly, while clinical validation ensures the biomarker means what you think it means in a clinical setting.
Q5: What statistical parameters are essential for assessing biological variability?
A: To properly assess variability and its impact, researchers should calculate the following key parameters from their reliability studies [71]:
Table: Key Statistical Parameters for Biomarker Variability
| Parameter | Formula/Description | Interpretation |
|---|---|---|
| Within-Subject Variance (σ²I) | Variance of repeated measures within the same individual. | Quantifies the biomarker's natural biological fluctuation. |
| Between-Subject Variance (σ²G) | Variance of the biomarker across different individuals in the study population. | Reflects the inherent diversity of the biomarker in the population. |
| Methodological Variance (σ²P+A) | Variance from pre-analytical, analytical, and post-analytical processes. | Measures the technical noise of the measurement process. |
| Index of Individuality (II) | II = (CVI + CVP+A) / CVG | Guides whether population-based or individual-based reference values are more appropriate. |
| Coefficient of Variation (CV) | (Standard Deviation / Mean) × 100 | A standardized measure of dispersion for each variance component. |
Experimental Protocols
Protocol 1: Estimating Components of Biomarker Variability
This protocol is based on established methods used in large-scale epidemiological studies like the Hispanic Community Health Study/Study of Latinos (HCHS/SOL) [71].
1. Study Design:
- Within-Individual Variation Study: Recruit a cohort of volunteer participants (e.g., n=58). Collect biological samples (e.g., blood, urine) from each participant at two or more time points, following an identical, standardized protocol. The time between collections should be chosen to reflect the typical clinical monitoring interval for the biomarker.
- Sample Handling Study (Duplicate Measurements): Throughout the main study, collect duplicate biospecimens from a random subset of participants (e.g., 5%). These duplicates should be processed and labeled blindly so the laboratory cannot distinguish them from primary samples.
2. Sample Collection & Processing:
- Implement a standardized venipuncture and sample processing protocol across all collection sites. Key parameters (tourniquet time, centrifugation speed and time, aliquot volume, freezing temperature, shipment conditions) must be rigorously controlled and documented to minimize pre-analytical variance [71].
3. Data Analysis:
- Screen data for outliers using scatterplots (e.g., Bland-Altman plots) and exclude values where the difference from the mean is >3 standard deviations.
- For log-normally distributed biomarkers, apply a log-transformation before analysis.
- Use linear mixed models with random intercepts to partition the total variance.
- Use data from the Within-Individual Variation Study to estimate the total within-individual variance (σ²I).
- Use data from the Sample Handling Study to estimate both the between-individual variance (σ²G) and the methodological variance (σ²P+A) [71].
Protocol 2: Establishing Ethnicity-Specific Reference Intervals (RIs)
This protocol follows the framework of the Canadian Laboratory Initiative on Pediatric Reference Intervals (CALIPER) study [73].
1. Participant Recruitment & Eligibility:
- Recruit a large cohort of healthy individuals from the target ethnic groups. Health status should be confirmed via questionnaire and/or clinical examination.
- Inclusion Criteria: Participants should have self-identified ethnic background, with the same maternal and paternal ethnicity confirmed.
- Exclusion Criteria: Acute illness, history of chronic/metabolic illness, pregnancy, or use of prescription medication within a specified window of phlebotomy.
2. Sample Acquisition & Analysis:
- Collect blood samples using standardized procedures. Process serum/plasma within a strict timeframe (e.g., within 4 hours), aliquot, and freeze at -80°C until batch analysis.
- Analyze all samples using the same validated analytical platforms and kits to ensure consistency.
3. Statistical Analysis for RIs:
- Compare biomarker concentrations between ethnic groups. Assess differences based on both statistical significance (e.g., ANOVA) and biological/analytical variation.
- Establish ethnic-specific RIs only for biomarkers that show marked and clinically relevant differences.
- Calculate RIs as the central 95% range (2.5th to 97.5th percentiles) of the distribution within each ethnic group, often using non-parametric methods if data are not normally distributed [73].
Signaling Pathways & Workflows
Biomarker Validation and Generalizability Pathway
Components of Total Biomarker Variability
The Scientist's Toolkit: Research Reagent Solutions
Table: Essential Tools for Biomarker Generalizability Studies
| Tool / Solution | Function in Generalizability Studies |
|---|---|
| Next-Generation Sequencing (NGS) | Enables high-throughput genomic profiling to identify ethnicity-linked genetic variations and discover novel biomarkers across diverse populations [23] [74]. |
| Multi-omics Platforms (Proteomics, Metabolomics) | Provides a comprehensive, systems-level view of biological processes. Integrating data from multiple molecular layers helps identify robust biomarker signatures that account for biological complexity [23] [7]. |
| Liquid Biopsy Assays | Offers a non-invasive method for biomarker measurement (e.g., via ctDNA), facilitating repeated sampling for within-individual variability studies and recruitment from diverse, hard-to-reach populations [74] [7]. |
| AI & Machine Learning Algorithms | Analyzes complex, high-dimensional datasets to identify subtle patterns associated with ethnicity, disease subtypes, or treatment responses, improving predictive model generalizability [7]. |
| Standardized Sample Collection Kits | Critical for minimizing pre-analytical variance. Kits with controlled collection tubes, stabilizers, and cold-chain logistics ensure sample integrity across multiple clinical sites [71]. |
| Reference Materials & Controls | Well-characterized controls, including samples from diverse ethnic backgrounds, are essential for assay calibration, monitoring analytical performance, and ensuring consistency across batches and sites [75]. |
Statistical Frameworks, Regulatory Pathways, and Demonstrating Clinical Utility
Frequently Asked Questions (FAQs)
1. What are the key statistical metrics for evaluating a biomarker test's performance, and how do they interrelate? The core statistical metrics for diagnostic accuracy are Sensitivity, Specificity, Positive Predictive Value (PPV), and Negative Predictive Value (NPV). These metrics help determine how well a biomarker distinguishes between conditions, such as diseased and non-diseased states [4].
The relationship between these metrics and how they depend on disease prevalence is crucial for interpretation. PPV and NPV are highly sensitive to the prevalence of the disease in the target population [4]. A test will have a higher PPV in a high-prevalence population compared to a low-prevalence one, even with the same sensitivity and specificity.
2. How do I interpret an ROC curve and the AUC value for my biomarker? The Receiver Operating Characteristic (ROC) curve is a plot of a biomarker's true positive rate (sensitivity) against its false positive rate (1 - specificity) across all possible classification thresholds [4]. The Area Under the ROC Curve (AUC) is a single scalar value that summarizes the overall diagnostic ability of the biomarker.
- AUC = 0.5: Indicates discriminatory power equivalent to a coin flip [4].
- 0.5 < AUC < 0.7: Considered poor discrimination.
- 0.7 ≤ AUC < 0.8: Considered acceptable discrimination.
- 0.8 ≤ AUC < 0.9: Considered excellent discrimination.
- AUC ≥ 0.9: Considered outstanding discrimination.
The ROC curve helps you select the optimal operating point (cut-off value) for your biomarker, balancing the clinical consequences of false positives and false negatives [4].
3. My biomarker shows a strong association with the disease in my initial study, but it fails in validation. What are the common causes? This is a frequent challenge in biomarker development, often stemming from biases and analytical pitfalls introduced during the discovery phase [4] [76]. Common causes include:
- Overfitting: Using a data-driven analysis without a pre-specified plan or independent validation, especially when testing a large number of biomarker candidates without controlling for multiple comparisons [4] [76].
- Inadequate Sample Selection: Using convenience samples that do not represent the intended-use population [4].
- Lack of Blinding: Bias can be introduced if the individuals generating the biomarker data are aware of the clinical outcomes [4].
- Incorrect Study Design for the Biomarker Type: A predictive biomarker, which forecasts response to a specific treatment, must be validated using data from a randomized clinical trial by testing for a significant interaction between the treatment and the biomarker. Using a study design suitable for a prognostic biomarker is a common error [4] [77].
4. What is the difference between a prognostic and a predictive biomarker, and why does it matter for validation? Distinguishing between these two types is fundamental, as it dictates the required study design and statistical analysis for validation [4] [77] [78].
- A Prognostic Biomarker provides information about the overall likely course of the disease (e.g., overall survival), irrespective of the specific therapy received. Its effect is a main effect and can be identified in a single cohort or a case-control study [4] [78].
- A Predictive Biomarker identifies individuals who are more likely to experience a favorable or unfavorable effect from a specific treatment. Its validation requires data from a randomized controlled trial and a test for a statistically significant interaction between the treatment and the biomarker [4] [77].
Using the wrong design can lead to a biomarker being incorrectly promoted as predictive when it is merely prognostic.
5. When should I use a single biomarker versus a panel of biomarkers? A panel of biomarkers often achieves better diagnostic performance than any single biomarker alone [4]. Combining multiple biomarkers into a single model can capture complementary information about the disease pathway. When developing a panel, it is recommended to use each biomarker in its continuous form to retain maximal information; dichotomization (e.g., positive/negative) is best left for later stages of development or clinical decision-making [4]. Methods such as logistic regression or machine learning models can be used to optimally combine the biomarkers, but these models require careful validation to avoid overfitting [4] [76].
Troubleshooting Guides
Problem: Low Sensitivity and Specificity in the Validation Cohort A biomarker that performed well in discovery but shows low sensitivity and specificity in validation suggests potential overfitting or cohort differences.
| Potential Cause | Diagnostic Checks | Corrective Actions |
|---|---|---|
| Overfitting | Check if the discovery was a data-driven analysis of a large number of candidates without a pre-specified hypothesis or independent validation cohort [76]. | Apply statistical methods like cross-validation during discovery. Use variable selection techniques like shrinkage (e.g., Lasso regression) to minimize overfitting. Always validate findings in a completely independent dataset [4] [76]. |
| Spectrum Bias | Verify if the validation cohort has a different distribution of disease stages or patient demographics (age, sex, comorbidities) compared to the discovery cohort [4]. | Ensure the patient population and specimens in the validation study directly reflect the intended-use population and clinical context. Re-calibrate the model or cut-off values for the new population if necessary [4]. |
| Batch Effects | Check if the biomarker assays for the discovery and validation cohorts were performed at different times, by different technicians, or with different reagent lots [4]. | Incorporate randomization of cases and controls across testing batches during the study design phase. Use statistical methods to detect and correct for batch effects during data analysis [4] [76]. |
Problem: A Good AUC but Poor Clinical Utility Your biomarker may have an acceptable AUC (e.g., >0.75) but fails to provide clear clinical value.
| Potential Cause | Diagnostic Checks | Corrective Actions |
|---|---|---|
| Inappropriate Cut-off | The chosen operating point on the ROC curve does not align with clinical goals. | Re-evaluate the ROC curve. Select a cut-off that maximizes sensitivity for a rule-out test (high NPV) or maximizes specificity for a rule-in test (high PPV), based on the clinical context [4]. |
| Low Disease Prevalence | Calculate the PPV and NPV. In a low-prevalence population, even a test with high sensitivity and specificity can have a low PPV [4]. | Understand that test performance is population-specific. The biomarker might be more clinically useful in a high-risk, high-prevalence sub-population. |
| Lack of Comparison to Standard of Care | The biomarker's performance has not been compared to existing, cheaper, or less invasive tests. | Conduct a head-to-head comparison study with the current standard biomarker or test. Evaluate the incremental value of adding the new biomarker to existing clinical predictors [76]. |
Essential Metrics and Experimental Protocols
Table 1: Core Statistical Metrics for Biomarker Validation
This table summarizes the key metrics, their definitions, formulas, and interpretations [4].
| Metric | Definition | Formula | Interpretation |
|---|---|---|---|
| Sensitivity | The proportion of actual positives correctly identified. | True Positives / (True Positives + False Negatives) | A test with 90% sensitivity misses 10% of true patients. |
| Specificity | The proportion of actual negatives correctly identified. | True Negatives / (True Negatives + False Positives) | A test with 90% specificity incorrectly flags 10% of healthy people. |
| Positive Predictive Value (PPV) | The probability that a subject with a positive test truly has the disease. | True Positives / (True Positives + False Positives) | Highly dependent on disease prevalence. |
| Negative Predictive Value (NPV) | The probability that a subject with a negative test truly does not have the disease. | True Negatives / (True Negatives + False Negatives) | Highly dependent on disease prevalence. |
| Area Under the Curve (AUC) | The probability that the test will rank a randomly chosen positive instance higher than a randomly chosen negative one. | Area under the ROC curve. | A measure of overall discriminative power, from 0.5 (useless) to 1.0 (perfect). |
Protocol 1: Conducting an ROC Analysis
Objective: To evaluate the diagnostic accuracy of a continuous biomarker and determine its optimal cut-off value.
- Define Gold Standard: Establish a definitive diagnostic method (e.g., biopsy, clinical follow-up) to classify subjects as true "cases" or "controls."
- Measure Biomarker: Obtain continuous measurements of the biomarker for all subjects in your cohort.
- Generate ROC Curve:
- Calculate the sensitivity and specificity for every observed value of the biomarker as a potential cut-off.
- Plot sensitivity (True Positive Rate) on the Y-axis against 1 - specificity (False Positive Rate) on the X-axis.
- Calculate AUC: Use statistical software (e.g., R, SPSS) to compute the AUC along with its confidence interval.
- Select Cut-off Point: Identify the point on the ROC curve that best suits your clinical need. Common methods include:
- Youden's J Index: Maximizes (Sensitivity + Specificity - 1).
- Closest-to-(0,1) Criterion: Selects the point closest to the top-left corner of the plot.
- Cost-Benefit Analysis: Chooses a point that weighs the clinical cost of false positives versus false negatives [4].
Protocol 2: Designing a Study for a Predictive Biomarker
Objective: To validate that a biomarker predicts response to a specific treatment.
- Study Design: A randomized controlled trial (RCT) is mandatory. Patients are randomly assigned to the new treatment or a control (standard of care/placebo) [4] [77].
- Biomarker Measurement: Collect and measure the biomarker at baseline for all enrolled patients.
- Statistical Analysis:
- The primary analysis is a test for interaction between treatment assignment and biomarker status in a statistical model (e.g., Cox regression for survival, logistic regression for binary response).
- Fit a model:
Outcome = Intercept + β1*Treatment + β2*Biomarker + β3*(Treatment x Biomarker). - The key test is the null hypothesis that the interaction coefficient β3 = 0. A statistically significant p-value (e.g., p < 0.05) provides evidence that the biomarker is predictive [4] [77].
- Report Results: Report the treatment effect (e.g., hazard ratio) separately for the biomarker-positive and biomarker-negative subgroups.
Signaling Pathways and Workflows
Biomarker Validation Workflow
ROC Cut-off Selection Logic
Research Reagent Solutions
Table 2: Essential Toolkit for Biomarker Validation Studies
| Item / Concept | Function in Validation | Example / Note |
|---|---|---|
| Pre-specified Analysis Plan | A written plan, agreed upon before data analysis, that defines outcomes, hypotheses, and success criteria to avoid data-driven overfitting [4] [76]. | Protocol document. |
| Statistical Software (R, Python, SAS) | To perform advanced statistical analyses like ROC-AUC, logistic regression, interaction tests, and multiple comparison corrections [4] [76]. | R package pROC or PROC in SAS. |
| Multiple Comparison Correction | Controls the false discovery rate (FDR) when evaluating multiple biomarkers simultaneously, reducing the chance of false positives [4]. | Benjamini-Hochberg procedure. |
| Blinded Data Generation | Keeping laboratory personnel unaware of clinical outcomes during biomarker measurement to prevent assessment bias [4]. | Standard Operating Procedure (SOP). |
| Randomized Clinical Trial Data | The mandatory source for validating a predictive biomarker, enabling a test of the treatment-by-biomarker interaction [4] [77]. | Phase II or III trial data. |
| Independent Validation Cohort | A set of samples not used in the discovery phase, essential for providing an unbiased estimate of the biomarker's true performance [4] [76]. | Prospectively collected or from a different institution. |
Frequently Asked Questions (FAQs)
FAQ 1: What is the FDA's Biomarker Qualification Program and what are its benefits?
The Biomarker Qualification Program (BQP) is a formal FDA initiative that allows external stakeholders to develop biomarkers for use as drug development tools (DDTs) [16] [79]. Its mission is to advance public health by encouraging efficiencies and innovation in drug development [16]. Once a biomarker is qualified for a specific Context of Use (COU), it becomes publicly available and can be relied upon in multiple drug development programs without needing reassessment in each individual application [79]. This saves significant time and resources for the entire research community.
FAQ 2: What is the difference between biomarker qualification and having a biomarker in a drug label?
These are distinct regulatory pathways. The Biomarker Qualification Program creates biomarkers that are broadly applicable tools for drug development. In contrast, the Table of Pharmacogenomic Biomarkers in Drug Labeling lists biomarkers referenced in the labeling of specific approved drugs [80]. These drug-label biomarkers are approved for use with that particular product and do not constitute a broad qualification for use across different development programs.
FAQ 3: What are the key stages of the biomarker qualification process?
The qualification process, established by the 21st Century Cures Act, involves three main stages [81] [82]:
- Letter of Intent (LOI): An initial submission outlining the biomarker and its proposed COU.
- Qualification Plan (QP): A detailed plan for the biomarker's development and validation.
- Full Qualification Package (FQP): A comprehensive submission of all data supporting the biomarker's qualification for the stated COU.
FAQ 4: What recent updates to biomarker bioanalytical method validation should I be aware of?
In January 2025, the FDA finalized its "Bioanalytical Method Validation for Biomarkers" guidance [31]. This guidance directs researchers to use ICH M10 principles as a starting point, particularly for chromatography and ligand-binding assays. A critical consideration is that biomarker assays must be validated as "fit-for-purpose," meaning the level of validation must be appropriate for the biomarker's specific Context of Use, rather than applying a single fixed set of criteria [31].
Troubleshooting Common Submission Challenges
Challenge 1: Unpredictable and Lengthy Review Timelines
- Problem: Reviews of LOIs, QPs, and FQPs often exceed the FDA's target timelines of 3, 6, and 10 months, respectively, creating uncertainty in project planning [82].
- Solution:
- Plan for Contingencies: Build buffer time into your development timeline based on historical performance data (see Table 1).
- Engage Early: Request a Pre-LOI meeting to get informal FDA feedback on your proposal and submission requirements, which may help streamline your formal submission [81].
- Ensure Submission Completeness: A complete and well-organized submission can prevent review delays caused by the need for follow-up questions.
Table 1: BQP Process Timelines (Target vs. Observed)
| Process Stage | FDA Target Timeline | Observed Median Timeline (Post-2020 Guidance) |
|---|---|---|
| Letter of Intent (LOI) Review | 3 months | More than 6 months [82] |
| Qualification Plan (QP) Development (by Sponsor) | Not Specified | ~2.5 years (over 4 years for surrogate endpoints) [82] |
| Qualification Plan (QP) Review | 6 months | More than 12 months [82] |
| Full Qualification Package (FQP) Review | 10 months | Often exceeds target [82] |
Challenge 2: Developing a Robust Context of Use (COU) Statement
- Problem: An inadequately defined COU can lead to FDA questions, delays, or even qualification for a narrower use than intended.
- Solution: The COU must precisely describe the manner and purpose of the biomarker's use [79]. Clearly define:
- The specific drug development decision the biomarker will inform.
- The population in which it will be used.
- The type of biomarker (e.g., diagnostic, prognostic, safety).
- The analytical methods and specimen type.
Challenge 3: Navigating the Complexities of Surrogate Endpoint Qualification
- Problem: Biomarkers intended as surrogate endpoints (which predict clinical benefit) require more extensive evidence and have significantly longer development times [82].
- Solution: Recognize that surrogate endpoint qualification is a major undertaking. Prioritize gathering robust data from multiple studies that establishes a strong correlation between the biomarker and the clinical outcome. Consider exploring alternative pathways, such as qualifying the biomarker through "collaborative group interactions" during specific drug development programs [82].
Challenge 4: Selecting Appropriate Bioanalytical Methods and Reagents
- Problem: Applying drug-based bioanalytical validation standards directly to biomarkers is often inappropriate and can lead to regulatory scrutiny [31].
- Solution: Develop a Context of Use-driven bioanalytical study plan. Use the approaches outlined in ICH M10 Section 7.1 for endogenous molecules as a starting point. Key considerations include selecting the right method for your analyte and ensuring proper validation.
Table 2: Essential Research Reagent Solutions for Biomarker Assays
| Reagent / Material | Primary Function | Key Considerations for Biomarker Assays |
|---|---|---|
| Surrogate Matrix | To create calibration standards when the natural biological matrix is unavailable or variable. | Used for endogenous biomarkers. Must demonstrate parallelism to the native matrix [31]. |
| Surrogate Analyte | A structurally similar, non-endogenous analog used for quantification when the endogenous biomarker cannot be easily measured. | Helps overcome challenges in quantifying native molecules; requires demonstration of similar behavior to the endogenous biomarker [31]. |
| Reference Standards | Highly characterized materials used to calibrate assays and ensure accuracy. | Critical for establishing assay reproducibility and reliability across different labs and studies. |
| Critical Assay Reagents | Antibodies, primers, probes, enzymes, etc., that are core to the detection method (e.g., IHC, PCR, NGS). | Requires rigorous lot-to-lot validation and stability testing to ensure consistent assay performance over time. |
| Control Samples | Positive, negative, and precision controls to monitor assay performance in each run. | Essential for demonstrating that the assay is functioning as intended and for troubleshooting. |
Experimental Protocol: Biomarker Qualification Submission Workflow
This protocol details the steps for engaging with the FDA's Biomarker Qualification Program, from initial planning to final submission.
1. Pre-Submission Planning and Strategy
- Define the Unmet Drug Development Need: Clearly articulate the problem in drug development that your biomarker aims to solve [16].
- Draft a Precise Context of Use (COU): Develop a comprehensive COU statement describing how and why the biomarker will be used [79].
- Form a Collaborative Consortium: Given the resource-intensive nature of qualification, consider forming a public-private partnership to pool expertise and data [79].
2. Pre-LOI Meeting Request (Recommended)
- Action: Submit a written request via email to
CDER-BiomarkerQualificationProgram@fda.hhs.gov[81]. - Required Materials:
- A cover letter with three proposed meeting dates.
- A PowerPoint presentation with background on the biomarker, the proposed COU, and specific questions for the FDA [81].
- A draft Letter of Intent (LOI).
- Purpose: This 30-45 minute teleconference provides non-binding advice from the FDA on your qualification strategy and submission requirements [81].
3. Stage 1: Letter of Intent (LOI) Submission
- Action: Submit a complete LOI through the NextGen Collaboration Portal [81].
- Content: The LOI should succinctly describe the biomarker, its COU, the drug development need it addresses, and the available supporting evidence.
4. Stage 2: Qualification Plan (QP) Submission
- Action: After a positive LOI determination, develop and submit a detailed QP via the NextGen Portal.
- Timeline: Development of a QP typically takes a median of 2.5+ years; plan accordingly [82].
- Content: The QP is a comprehensive protocol outlining the planned studies, data analysis methods, and evidence that will be generated in the Full Qualification Package to demonstrate the biomarker's reliability for its COU. Refer to the FDA's revised Qualification Plan Content Element Outline (July 2025) for detailed instructions [79].
5. Stage 3: Full Qualification Package (FQP) Submission
- Action: Following agreement on the QP, execute the plan and compile all data and reports into the FQP.
- Content: The FQP contains the complete body of evidence supporting biomarker qualification. It must align with the agreed-upon QP.
Diagram 1: BQP Submission Workflow. This chart outlines the multi-stage process for qualifying a biomarker, highlighting key submission points and decision gates.
Experimental Protocol: Context of Use-Driven Bioanalytical Validation
This protocol aligns with the FDA's 2025 guidance on biomarker bioanalytical method validation, emphasizing a fit-for-purpose approach [31].
1. Define the Context of Use and Analytical Goals
- Objective: Link every aspect of method validation to the specific COU.
- Procedure:
- Clearly state how the biomarker data will inform a drug development decision (e.g., patient stratification, dose selection, safety monitoring).
- Define the required level of assay precision and accuracy based on the COU. The statistical criteria should reflect the magnitude of biomarker change that is biologically and clinically meaningful.
2. Select and Optimize the Bioanalytical Platform
- Objective: Choose an appropriate analytical method (e.g., LC-MS, ELISA, PCR, NGS) and optimize it for the biomarker.
- Procedure:
- Based on the biomarker's nature (protein, DNA, RNA, metabolite), select a detection platform with the necessary specificity, sensitivity, and dynamic range.
- Optimize key assay parameters (e.g., antibody pairs, primer/probe sequences, chromatography conditions) to achieve robust performance.
3. Address the Challenge of Endogenous Biomarkers
- Objective: Implement a validated strategy for accurate quantification of the endogenous biomarker.
- Procedure (Select one based on feasibility and COU requirements):
- Surrogate Matrix Approach: Use an artificial or alternative matrix to prepare calibration standards. Must include a parallelism assessment to demonstrate similar behavior in the surrogate vs. native matrix [31].
- Surrogate Analyte Approach: Use a stable isotope-labeled or otherwise modified analog of the biomarker as a standard. Must demonstrate similar behavior to the native analyte [31].
- Standard Addition Method: Spike known quantities of the biomarker into authentic sample matrices to account for matrix effects.
4. Perform Fit-for-Purpose Method Validation
- Objective: Demonstrate that the assay is reliable and reproducible for its intended COU.
- Procedure: Assess key validation parameters, understanding that acceptance criteria may be COU-dependent [31]:
- Precision and Accuracy: Evaluate intra- and inter-assay variability and trueness.
- Selectivity/Specificity: Test for interference from related molecules or the matrix.
- Stability: Establish stability of the biomarker under various storage and handling conditions.
- Parallelism: As mentioned above, critical for surrogate matrix approaches [31].
Diagram 2: Biomarker Bioanalytical Validation Workflow. This chart illustrates the key steps in developing and validating a biomarker assay, with a focus on addressing the challenge of endogenous molecule quantification.
Leveraging Real-World Evidence and Longitudinal Data for Enhanced Validation
Frequently Asked Questions (FAQs)
FAQ 1: What are the main types of Real-World Data (RWD) sources relevant for biomarker validation, and how are they used?
Real-world evidence (RWE) is derived from the analysis of real-world data (RWD), which encompasses a variety of sources beyond traditional clinical trials [83]. These sources provide insights into how treatments and biomarkers perform in routine clinical practice, capturing a wider range of patient experiences and outcomes [83].
- Electronic Health Records (EHRs): A digital version of a patient's medical history that includes data such as demographics, progress reports, medications, vital signs, medical history, immunizations, and lab results [83]. These records can be shared across different healthcare settings.
- Claims and Billing Data: Provides valuable insights into healthcare utilization, costs, and economic outcomes, making them essential for health economics and outcomes research [83].
- Patient Registries: Systems that collect data related to specific diseases or conditions, enabling long-term follow-up studies and comparative effectiveness research [83].
- Data from Digital Health Technologies (DHT): Includes data from wearable devices (e.g., smartwatches that measure step count, heart rate, ECG) and mobile health applications that facilitate continuous, real-time health data collection outside conventional clinical settings [83].
- Pharmacy Data: Prescription fulfillment records that help track medication usage, adherence, and patterns of drug utilization [83].
- Patient-Generated Data and Social Media: Platforms that allow individuals to share their experiences with treatments, side effects, and outcomes, fostering patient engagement and generating valuable datasets [83].
FAQ 2: What are the most common challenges when using RWD for biomarker validation, and how can they be addressed?
Using RWD comes with significant challenges related to data quality, integration, and regulatory acceptance. The following table summarizes key issues and potential mitigation strategies.
| Challenge | Description | Potential Solutions |
|---|---|---|
| Data Quality & Standardization | RWD sources often lack the controlled environment of clinical trials, leading to inconsistencies, missing data, and varying formats [84]. | Implement rigorous data curation and standardization processes; use established clinical data standards like CDISC or OMOP [76]. |
| Analytical Validity | Concerns about the robustness, reproducibility, and accuracy of biomarker measurements from RWD [24]. | Apply "fit-for-purpose" validation, ensuring the level of evidence matches the intended use; use advanced analytical platforms like LC-MS/MS or multiplex immunoassays for better precision [85] [24]. |
| Regulatory Acceptance | A biomarker's journey to regulatory qualification is complex, with only about 0.1% of potentially relevant cancer biomarkers progressing to routine clinical use [24]. | Early engagement with regulators (e.g., via FDA's Biomarker Qualification Program); generating robust clinical validity data that consistently correlates the biomarker with clinical outcomes [85] [24]. |
FAQ 3: How do I define a "Context of Use" for a biomarker, and why is it critical for validation?
The Context of Use (COU) is a concise description of the biomarker's specified use in drug development or clinical practice [85]. Defining the COU is the foundational step in validation because it determines the type and level of evidence required.
- What it includes: The COU specifies the biomarker's category (e.g., diagnostic, prognostic, predictive, safety) and its intended purpose [85]. For example, a biomarker could be used for patient selection, dose selection, or as a safety monitor.
- Why it's critical: The validation process is "fit-for-purpose" [85] [86]. The performance metrics, cohort design, and level of analytical and clinical validation needed are all dictated by the COU. A biomarker used for therapeutic eligibility decisions will require much more robust validation than one used for exploratory research [85] [86].
FAQ 4: What performance metrics should I focus on during biomarker validation?
The choice of performance metrics depends entirely on the biomarker's Context of Use and the consequences of false results [86].
- High Sensitivity (Recall) is prioritized when the cost of a false negative is high (e.g., a screening biomarker used to triage patients for a more rigorous test) [86].
- High Specificity (Precision) is prioritized when the cost of a false positive is high (e.g., a biomarker used to determine administration of a toxic therapy) [86].
- Overall Performance Metrics like accuracy, area under the receiver operating characteristic curve (AUC), or F1 statistic may be appropriate when a balance between sensitivity and specificity is needed [86].
FAQ 5: How can artificial intelligence (AI) and multi-omics approaches enhance biomarker validation?
- Artificial Intelligence and Machine Learning: AI and ML are revolutionizing biomarker analysis by enabling more sophisticated predictive models that can forecast disease progression and treatment responses [7]. They also facilitate the automated analysis of complex datasets, significantly reducing the time required for biomarker discovery and validation [7].
- Multi-Omics Approaches: Integrating data from genomics, proteomics, metabolomics, and transcriptomics provides a holistic understanding of disease mechanisms [7]. This allows for the identification of comprehensive biomarker signatures that reflect the complexity of diseases, leading to improved diagnostic accuracy and treatment personalization [7]. Effective data integration strategies (early, intermediate, or late integration) are crucial for success [76].
Troubleshooting Guides
Problem: Your RWD is messy, inconsistent, and contains missing values, leading to unreliable biomarker analysis.
Solution:
- Implement Quality Control Checks: Apply data type-specific quality metrics using established software packages (e.g., fastQC for NGS data, arrayQualityMetrics for microarray data) [76].
- Curate and Standardize: Ensure data values fall within acceptable ranges, resolve inconsistencies in units or encodings, and transform data into standard formats like OMOP or CDISC [76].
- Address Missing Data: For attributes with a large proportion of missing values (e.g., >30%), consider complete removal. For features with smaller numbers of missing values, use appropriate imputation methods [76].
- Filter Uninformative Features: Remove features with zero or small variance to reduce noise in the dataset [76].
Issue 2: Failure to Demonstrate Clinical Validity to Regulators
Problem: Your biomarker is analytically sound but lacks evidence to prove its correlation with clinical outcomes, leading to regulatory pushback.
Solution:
- Strengthen Cohort Design: Ensure your validation cohort is representative of the real-world population for which the biomarker is intended, considering diversity in ancestry, socioeconomic status, and practice patterns to ensure generalizability [86].
- Plan for Clinical Utility: Demonstrate that your biomarker provides an added value for decision-making compared to existing standard of care or traditional clinical markers [76]. This often requires comparative evaluations.
- Engage Regulators Early: Utilize pathways like the FDA's Biomarker Qualification Program (BQP) or Critical Path Innovation Meetings (CPIM) to discuss biomarker validation plans and evidence requirements early in the development process [85].
Issue 3: Inefficient and Costly Analytical Validation
Problem: Traditional validation methods like ELISA are slow, expensive, and lack the sensitivity for novel biomarkers.
Solution:
- Adopt Advanced Platforms: Consider transitioning to more advanced technologies such as Liquid Chromatography Tandem Mass Spectrometry (LC-MS/MS) or Meso Scale Discovery (MSD), which offer superior precision, sensitivity, and a broader dynamic range [24].
- Use Multiplex Assays: Platforms like MSD's U-PLEX allow researchers to measure multiple analytes simultaneously from a single sample, enhancing efficiency and reducing costs per data point compared to running multiple single-plex ELISAs [24].
- Consider Outsourcing: Partner with specialized Contract Research Organizations (CROs) to gain access to cutting-edge technologies and expertise without major upfront investment in infrastructure [24].
The Scientist's Toolkit: Essential Reagents & Materials
The following table details key reagents and platforms used in modern biomarker validation workflows.
| Item | Function in Validation |
|---|---|
| U-PLEX Multiplex Assay Platform (MSD) | Allows custom biomarker panels to measure multiple analytes simultaneously in a single, small-volume sample, enhancing throughput and reducing costs [24]. |
| Liquid Chromatography Tandem Mass Spectrometry (LC-MS/MS) | Provides high specificity and sensitivity for detecting and quantifying low-abundance biomarkers, often surpassing the capabilities of traditional immunoassays [24]. |
| Validated Antibody Panels | Crucial for immunoassay-based detection (e.g., ELISA, MSD); specificity and lot-to-lot consistency are paramount for reproducible results [24]. |
| Reference Standards and Controls | Certified biological materials used to calibrate instruments, normalize data across batches, and ensure analytical accuracy and precision [14]. |
| Biobanked Biospecimens | Well-annotated, high-quality samples (e.g., serum, tissue, CSF) that are essential for retrospective clinical validation studies [14]. |
Experimental Workflows and Data Relationships
RWD Integration Workflow for Biomarker Validation
The diagram below illustrates the key stages for integrating and validating biomarkers using real-world data.
Biomarker Context of Use (COU) Categories
This diagram outlines the primary categories of biomarkers as defined by the FDA-NIH BEST Resource, which are central to defining the Context of Use.
Troubleshooting Guide: Common Biomarker Validation Challenges
This guide addresses frequent issues encountered during the validation of established and emerging biomarkers for immune checkpoint inhibitor (ICI) response.
Problem 1: Inconsistent Predictive Power of a Single Biomarker
- Potential Cause: Reliance on a single biomarker like PD-L1, which has a low negative predictive value (up to 20% of patients with PD-L1-negative tumors still benefit from ICIs) [87]. Tumor biology is complex, and response is influenced by multiple factors.
- Solution: Explore composite biomarker signatures. For example, a 2024 study identified a 5-feature signature (CD3G, NCAM1, and three pathway activation levels) that demonstrated high reliability (AUC 0.73-0.87) in predicting ICI response in lung cancer, outperforming single biomarkers [87].
Problem 2: Pre-analytical Sample Degradation
- Potential Cause: Biomarkers, especially nucleic acids and proteins, are highly sensitive to temperature fluctuations during sample collection, storage, or processing. Degradation leads to unreliable data [5].
- Solution: Implement standardized, temperature-controlled protocols for sample handling. This includes immediate flash-freezing of tissue biosamples, maintaining consistent cold chain logistics, and careful thawing procedures to preserve molecular integrity [5].
Problem 3: Technical Variability in Tumor Mutational Burden (TMB) Measurement
- Potential Cause: TMB results vary significantly between different next-generation sequencing (NGS) panels due to differences in panel size (e.g., 0.8 Mb to 2.4 Mb), genes covered, bioinformatic pipelines, and the types of mutations included in the calculation [88]. This lack of standardization makes consistent clinical application elusive [89].
- Solution: When designing studies or interpreting data, explicitly state the technical platform and bioinformatic methods used. Acknowledge that a universal TMB cutoff (e.g., 10 mut/Mb) may not be optimal for all cancer types, and cancer-specific thresholds should be considered [89] [88].
Problem 4: Failure to Account for Statistical Biases
- Potential Cause: Common statistical issues in biomarker validation include:
- Multiplicity: Conducting multiple statistical tests on numerous candidate biomarkers without proper correction increases the probability of false-positive discoveries [69].
- Within-Subject Correlation: Analyzing multiple tumors or samples from the same patient without accounting for non-independence can inflate type I error rates and lead to spurious significance [69].
- Solution: For multiplicity, use statistical methods that control the false discovery rate (FDR). For within-subject correlation, employ mixed-effects linear models that account for dependent data structures, providing more realistic p-values and confidence intervals [69].
Frequently Asked Questions (FAQs)
Q1: What is the critical first step in designing a biomarker validation study? A: The most critical step is defining the Context of Use (COU). The COU is a concise description of the biomarker's specified purpose, including its biomarker category (e.g., predictive, diagnostic, prognostic) and its intended application in drug development or clinical practice. The COU dictates the study design, statistical analysis plan, and the level of evidence required for validation [54].
Q2: What is the difference between analytical validation and clinical validation? A: These are two distinct but essential stages:
- Analytical Validation: Establishes that the test or assay itself is technically reliable. It evaluates performance characteristics like sensitivity, specificity, accuracy, and precision using a specified technical protocol [54].
- Clinical Validation: Establishes that the biomarker measurement acceptably identifies, measures, or predicts the clinically relevant concept of interest (e.g., response to a specific therapy) for its defined Context of Use [54].
Q3: Why does PD-L1 have limitations as a standalone predictive biomarker? A: PD-L1 expression has several key limitations:
- Spatial and Temporal Heterogeneity: Its expression can vary across different parts of a tumor and change over time or in response to prior therapies [87].
- Low Diagnostic Accuracy: It has a particularly low negative predictive value, meaning a negative test does not reliably rule out potential benefit from ICI treatment [87].
- Technical Variability: Differences in immunohistochemistry assays, antibodies, and scoring criteria contribute to inconsistent results [90].
Q4: What emerging technologies are improving biomarker discovery? A: Several technologies are transforming the field:
- Spatial Biology: Techniques like spatial transcriptomics and multiplex immunohistochemistry allow researchers to study biomarker expression within the intact tissue architecture, revealing critical spatial relationships in the tumor microenvironment [91].
- Artificial Intelligence (AI) and Machine Learning: AI can pinpoint subtle biomarker patterns in complex, high-dimensional datasets (e.g., multi-omics, imaging) that conventional methods may miss, enabling the development of more powerful predictive models [50] [91].
- Multi-omics Integration: Combining data from genomics, transcriptomics, proteomics, and epigenomics provides a holistic view of tumor biology, facilitating the identification of novel, clinically relevant biomarker signatures [91].
Comparative Analysis of Key Immuno-Oncology Biomarkers
Table 1: Characteristics and Validation Status of PD-L1, MSI, and TMB
| Biomarker | Mechanism & Measure | FDA-Approved Context of Use | Key Strengths | Key Limitations & Validation Gaps |
|---|---|---|---|---|
| PD-L1 | IHC measurement of PD-L1 protein expression on tumor and/or immune cells. | Predictive biomarker for ICIs in multiple cancer types (e.g., NSCLC). [87] | Intuitive biological mechanism; widely available IHC tests. | Low negative predictive value; expression is heterogenous and dynamic; multiple scoring systems and assays create confusion. [87] [90] |
| MSI/dMMR | Measures genomic instability from defective DNA mismatch repair. | Predictive biomarker for pembrolizumab in any solid tumor. [87] | A tissue-agnostic biomarker; strong predictive power in MSI-H tumors. | Relatively rare in common cancers like lung cancer; not a relevant biomarker for all tumor types. [87] |
| TMB | Number of somatic mutations per megabase of sequenced genome. | Predictive biomarker for pembrolizumab in TMB-H (≥10 mut/Mb) solid tumors. [88] | Pan-cancer application; quantifies potential neoantigen load. | Lack of standardization across NGS panels; optimal cutoff may vary by cancer type; prospective validation data is limited. [89] [88] |
Table 2: Emerging Multi-Factor Biomarker Signatures
| Biomarker Signature | Components | Proposed Context of Use | Reported Performance |
|---|---|---|---|
| 5-Feature Signature [87] | Gene expression (CD3G, NCAM1) and pathway activation levels (Adrenergic, Growth hormone, Endothelin). | Predictive biomarker for ICI response in Lung Cancer (better for adenocarcinoma). | AUC 0.73 (experimental data); AUC 0.76-0.87 (independent validation datasets). [87] |
| Composite Predictor [90] | TMB combined with critical variables like MHC and T-cell receptor repertoire. | Predictive biomarker for ICI response (proposed). | Acknowledged as a needed future direction to improve upon TMB alone. [90] |
Experimental Protocols for Key Methodologies
Protocol 1: Validating a Predictive Gene Expression Signature
This protocol is based on a study that identified and validated a 5-feature signature for ICI response in lung cancer [87].
- Cohort Establishment: Prospectively enroll a cohort of patients (e.g., with lung cancer) scheduled to receive PD-1/PD-L1 targeted ICIs. A published study used a cohort of 85 patients [87].
- Biosample Collection: Obtain tumor biosamples prior to the start of ICI treatment.
- Molecular Profiling: Perform RNA sequencing (RNA-Seq) on the tumor samples to obtain genome-wide gene expression data.
- Clinical Data Collection: Collect robust clinical endpoint data, specifically progression-free survival (PFS) and treatment response assessed by RECIST criteria.
- Biomarker Screening & Model Building: Statistically screen a large number of putative biomarkers (e.g., gene expression, pathway activations) for association with clinical outcomes. Use machine learning or similar techniques to build a multi-feature predictive model from the most significant biomarkers.
- Independent Validation: Validate the final signature's performance on one or more independent, publicly available datasets (e.g., from GEO database) annotated with ICI response and/or PFS data [87].
Protocol 2: Analytical Validation of a TMB Assay
This protocol outlines key steps for establishing a reliable TMB measurement. [88]
- Platform Selection: Choose a targeted NGS panel. Note the size of the panel and the specific genomic region covered, as this critically impacts variability [88].
- Wet-Lab Testing:
- Ensure adequate tumor content (>20-30%) in samples.
- Use validated reagents and strict contamination control protocols, potentially employing automation for sample preparation to reduce human error [5].
- Bioinformatic Analysis:
- Define the specific mutation types that will be counted towards the TMB score (e.g., non-synonymous only, or including synonymous).
- Apply a validated bioinformatic pipeline for somatic variant calling.
- Normalize the total number of mutations to the size of the coding region effectively sequenced to report a final value in mutations per megabase (mut/Mb).
- Performance Characterization: Establish the assay's sensitivity, specificity, precision, and reproducibility. Compare the panel-based TMB estimates against whole exome sequencing (the gold standard) to determine concordance [88].
Signaling Pathways and Experimental Workflows
Diagram 1: Biomarker validation workflow.
Diagram 2: Multi-omics data integration for biomarker discovery.
The Scientist's Toolkit: Essential Research Reagent Solutions
Table 3: Key Tools and Reagents for Biomarker Research
| Tool / Reagent | Function in Biomarker Research | Application Example |
|---|---|---|
| Targeted NGS Panels (e.g., FoundationOne CDx, MSK-IMPACT) | High-throughput sequencing of a defined set of cancer-related genes to estimate TMB and detect MSI. | Profiling solid tumors to identify patients with high TMB (≥10 mut/Mb) who may be candidates for immunotherapy [88]. |
| RNA Sequencing Kits | Comprehensive profiling of gene expression from tumor tissue. | Discovering and validating gene expression biomarkers (e.g., CD3G, NCAM1) associated with response to immune checkpoint inhibitors [87]. |
| Automated Homogenization Systems (e.g., Omni LH 96) | Standardized, high-throughput disruption of tissue samples for nucleic acid and protein extraction. | Ensuring consistent, contamination-free sample preparation for downstream molecular assays, reducing variability and human error [5]. |
| Humanized Mouse Models | Mouse models engrafted with a human immune system to study human-specific tumor-immune interactions. | Validating the functional role of predictive biomarkers and investigating response/resistance mechanisms to immunotherapies in an in vivo context [91]. |
Troubleshooting Guide: Common Biomarker Validation Challenges
This guide addresses frequent issues encountered during the biomarker validation pipeline, from analytical experiments to clinical application.
1. Problem: Biomarker Fails to Translate from Preclinical to Clinical Models
- Question: "My biomarker shows excellent predictive value in our patient-derived xenograft (PDX) models, but it fails to correlate with clinical outcomes in human trials. What could be wrong?"
- Answer: This is a common translational challenge. The issue often lies in biological differences between models and human populations. To address this:
- Re-evaluate Model Relevance: Ensure your preclinical models, such as PDX or organoids, capture the heterogeneity of the human patient population [26].
- Incorporate Multi-omics Early: Integrate genomics, transcriptomics, and proteomics during the discovery phase to build a more comprehensive biomarker signature that is more likely to hold up in clinical validation [9] [26].
- Use Humanized Models: For immunology-focused biomarkers, consider using humanized mouse models to better mimic the human tumor microenvironment [26].
2. Problem: Inconsistent Assay Results During Analytical Validation
- Question: "We are getting high variability and poor reproducibility in our biomarker assay results. How can we improve robustness?"
- Answer: Inconsistent results often stem from issues with assay validity, including problems with specificity, sensitivity, and detection thresholds [24].
- Move Beyond ELISA: While ELISA is a common gold standard, consider advanced platforms like Meso Scale Discovery (MSD) or Liquid Chromatography-Tandem Mass Spectrometry (LC-MS/MS). These offer greater sensitivity, a wider dynamic range, and can be more robust [24].
- Robust Analytical Validation: Ensure your validation process includes independent sample sets and cross-validation techniques. Regulators demand comprehensive data on accuracy and precision [24].
- Standardize Protocols: Implement and rigorously adhere to standardized operating procedures for sample handling, processing, and analysis to minimize technical variability.
3. Problem: Insufficient Statistical Power in Validation Cohort
- Question: "How can I determine the right sample size for my validation cohort to ensure the results are statistically sound?"
- Answer: A scarcity of standards for sample size calculation is a known gap in the field [92].
- Conduct Power Analysis: Pre-specify your target effect size and conduct a formal statistical power analysis to determine the cohort size needed to detect that effect.
- Leverage Public Data: Use existing public datasets or prior studies to estimate variability and effect sizes for your power analysis.
- Consider Consortium Data: For rare diseases or biomarkers, explore integrating multiple retrospective cohorts to achieve a sufficient sample size, though this requires careful harmonization of data [92].
4. Problem: High Cost of Multiplexed Biomarker Analysis
- Question: "We need to validate a panel of several biomarkers, but running individual assays is prohibitively expensive. Are there cost-effective solutions?"
- Answer: Multiplexing technologies can dramatically reduce costs.
- Adopt Multiplex Panels: Platforms like MSD's U-PLEX allow you to measure multiple analytes simultaneously in a single sample. For example, measuring four inflammatory biomarkers via individual ELISAs costs approximately $61.53 per sample, whereas a multiplex assay reduces the cost to $19.20 per sample—a saving of 69% [24].
- Outsource to CROs: Consider outsourcing biomarker testing to specialized Contract Research Organizations (CROs). They provide access to cutting-edge technologies like LC-MS/MS without the need for large upfront capital investment [24].
5. Problem: Patient Stratification Strategy Does Not Improve Treatment Outcomes
- Question: "We stratified patients using a promising biomarker, but the treatment response in the identified subgroup was not significantly better. What are potential reasons?"
- Answer: The stratification strategy itself may need refinement.
- Check for Heterogeneity: Stratification is most beneficial when addressing a known factor causing significant population heterogeneity. Ensure your biomarker truly captures a biologically distinct subgroup [93].
- Use AI/ML for Complex Stratification: Move beyond single biomarkers. Artificial Intelligence and Machine Learning can analyze complex, multimodal data (e.g., clinical biomarkers, omics data) to identify non-linear patterns and define more robust patient strata [9] [94].
- Validate in a Separate Cohort: Always validate your stratification algorithm in a separate, independent cohort of patients to ensure its robustness and generalizability before deploying it in a clinical trial [92].
Experimental Protocols for Key Validation Stages
Protocol 1: Analytical Validation of a Protein Biomarker Using a Multiplex Immunoassay
This protocol outlines the steps to analytically validate a protein biomarker panel using electrochemiluminescence-based technology.
- Objective: To determine the precision, accuracy, sensitivity, and dynamic range of a biomarker assay.
- Materials:
- Meso Scale Discovery (MSD) U-PLEX assay plates
- Sample diluent
- Calibrators and quality controls
- Read Buffer T
- MSD MESO QuickPlex SQ 120 instrument
- Methodology:
- Plate Preparation: Add 150 µL of Wash Buffer to each well of a U-PLEX plate to rehydrate the spot. Decant.
- Assay Assembly: Pipette 25 µL of calibrators, controls, or samples into the appropriate wells.
- Incubation: Cover the plate and incubate for 2 hours at room temperature with shaking.
- Washing: Wash the plate 3 times with 150 µL of Wash Buffer.
- Detection Antibody Addition: Add 25 µL of the prepared detection antibody solution to each well. Cover and incubate for 1 hour with shaking.
- Washing: Wash the plate 3 times as before.
- Reading: Add 150 µL of Read Buffer to each well. Read the plate immediately on the MESO QuickPlex SQ 120 instrument.
- Data Analysis: Generate a standard curve for each biomarker using the calibrators. Calculate the concentration of unknowns from the standard curve. Determine inter- and intra-assay precision (CV%).
Protocol 2: Developing an AI/ML Model for Patient Stratification from Clinical and Omics Data
This protocol describes the workflow for creating a machine learning model to stratify patients based on disease severity or treatment response.
- Objective: To build a robust model that stratifies patients into distinct risk groups using multimodal data.
- Materials:
- Curated clinical dataset (e.g., patient vitals, lab results, comorbidities)
- Omics dataset (e.g., transcriptomics from RNA-seq)
- Python/R environment with ML libraries (e.g., scikit-learn, TensorFlow)
- Methodology (based on a COVID-19 case study [94]):
- Data Acquisition & Curation: Collect and harmonize data from all available sources. Clean the data, handle missing values, and normalize features.
- Descriptor Analysis & Selection: Evaluate all features (patient condition, biomarkers, comorbidities) to discern their relative importance to the target outcome (e.g., survival, disease severity) using feature importance scores from the ML pipeline.
- Model Training: Split data into training and testing sets. Deploy classification models (e.g., Random Forest, Support Vector Machines). Use the selected features to predict the target outcome.
- Model Evaluation: Evaluate model performance on the held-out test set using metrics like accuracy, AUC-ROC, precision, and recall. In the referenced study, model accuracy for predicting COVID-19 severity and survival was 98.1% and 99.9%, respectively [94].
- Data Analysis: The output is a predictive model that can assign a new patient to a specific risk stratum, enabling targeted therapeutic selection.
Essential Research Reagent Solutions
The following table details key reagents and technologies essential for biomarker validation.
| Item | Function/Benefit |
|---|---|
| MSD U-PLEX Assays | Multiplex immunoassay platform allowing simultaneous measurement of multiple analytes from a single small sample volume, enhancing efficiency and reducing costs [24]. |
| LC-MS/MS | Provides superior sensitivity and specificity for detecting low-abundance proteins and metabolites, surpassing traditional methods like ELISA [24]. |
| Patient-Derived Organoids | 3D in vitro models that replicate human tissue biology, enabling biomarker discovery and drug response testing in a clinically relevant, controlled system [26]. |
| Patient-Derived Xenografts (PDX) | In vivo models created from patient tissues that provide clinically relevant insights for validating cancer biomarkers and assessing drug resistance [26]. |
| AI/ML Platforms (e.g., BIOiSIM) | AI-driven modeling platforms that can generate virtual patient cohorts for stratification strategy development, mitigating data privacy issues and integrating complex omics data [94]. |
Biomarker Validation Workflow
The following diagram illustrates the complete pathway for biomarker development, from initial discovery to clinical application for patient stratification.
Biomarker Types and Data Integration
This diagram categorizes different types of biomarkers and shows how they are integrated to build a multi-modal profile for patient stratification.
Conclusion
Successful biomarker validation requires an integrated, strategic approach that spans from rigorous analytical methods to demonstrated clinical utility. The future of biomarker development is being shaped by several key trends: the integration of artificial intelligence and machine learning for enhanced predictive analytics, the rise of multi-omics approaches for comprehensive biological understanding, and an increased focus on patient-centric methodologies and real-world evidence. Furthermore, advancements in liquid biopsy technologies and single-cell analysis are expanding non-invasive monitoring capabilities and revealing previously inaccessible disease mechanisms. As regulatory frameworks evolve to accommodate these innovations, researchers must prioritize standardization, robust statistical design, and clear clinical context from the outset. By adopting this comprehensive framework, the scientific community can accelerate the development of reliable, clinically impactful biomarkers that truly advance the field of precision medicine and improve patient outcomes.
References
- 1. About Biomarkers and Qualification [https://www.fda.gov/drugs/biomarker-qualification-program/about-biomarkers-and-qualification]
- 2. Biomarker definitions and their applications - PMC [https://pmc.ncbi.nlm.nih.gov/articles/PMC5813875/]
- 3. 7 Types of Biomarkers [https://www.atlasantibodies.com/knowledge-hub/blog/7-types-of-biomarkers/]
- 4. Biomarker Discovery and Validation: Statistical Considerations [https://pmc.ncbi.nlm.nih.gov/articles/PMC8012218/]
- 5. Common Lab Issues That Impact Biomarker Data [https://blog.omni-inc.com/blog/common-lab-issues-that-impact-biomarker-data]
- 6. Biomarkers in Clinical Practice: Challenges & Opportunities [https://esmed.org/biomarkers-in-clinical-practice-challenges-opportunities/]
- 7. Challenges and Future Trends in Biomarker Analysis for ... [https://blog.crownbio.com/challenges-and-future-trends-in-biomarker-analysis-for-clinical-research-whats-ahead-in-2025]
- 8. What Is A Biomarker? Definition, Types, Applications [https://bitesizebio.com/26559/biomarkers-explained/]
- 9. Applications and challenges of biomarker-based predictive ... [https://pmc.ncbi.nlm.nih.gov/articles/PMC12399543/]
- 10. How Automation Overcomes Variability & Limitations in ... [https://dispendix.com/blog/how-automation-overcomes-variability-limitations-in-hts-troubleshooting]
- 11. Multi-Omics: Challenges and Solutions [https://bigomics.ch/blog/key-challenges-in-multi-omics-data-integration/]
- 12. Ten quick tips for avoiding pitfalls in multi-omics data ... [https://pmc.ncbi.nlm.nih.gov/articles/PMC10325053/]
- 13. Understanding biomarker validation, qualification challenges [https://www.techtarget.com/pharmalifesciences/feature/Understanding-biomarker-validation-qualification-challenges]
- 14. A Guide to Biomarker Validation [https://sonraianalytics.com/a-guide-to-biomarker-validation/]
- 15. A Pathway and Approach to Biomarker Validation ... [https://pmc.ncbi.nlm.nih.gov/articles/PMC3261486/]
- 16. Biomarker Qualification Program [https://www.fda.gov/drugs/drug-development-tool-ddt-qualification-programs/biomarker-qualification-program]
- 17. Diagnostic Testing Accuracy: Sensitivity, Specificity, Predictive ... [https://www.ncbi.nlm.nih.gov/books/NBK557491/]
- 18. Diagnostic test evaluation - Free MedCalc online statistical ... [https://www.medcalc.org/en/calc/diagnostic_test.php]
- 19. Extending the dynamic range of biomarker quantification ... [https://pmc.ncbi.nlm.nih.gov/articles/PMC10344875/]
- 20. Biomarker Discovery in High-Dynamic Range Biofluids [https://www.preomics.com/blog/biomarker-discovery-high-dynamic-range-biofluids]
- 21. Change points for dynamic biomarkers in the Alzheimer's ... [https://pmc.ncbi.nlm.nih.gov/articles/PMC12311614/]
- 22. Navigating biomarker validation [https://www.tempus.com/resources/content/articles/navigating-biomarker-validation/?srsltid=AfmBOor0IU8Ja8vCMhrs7kzaqGR4qv-S84rbix_oB8tzI9G450-ABu0t]
- 23. Biomarker discovery and validation: Bridging research and ... [https://www.abcam.com/en-us/knowledge-center/immunology-and-infectious-disease/biomarker-discovery-and-validation]
- 24. Beyond ELISA: the future of biomarker validation [https://www.drugtargetreview.com/article/154316/beyond-elisa-the-future-of-biomarker-validation/]
- 25. Precision-Driven Biomarker Validation: A Biotech ... [https://www.criver.com/eureka/precision-driven-biomarker-validation-biotech-perspective-part-i]
- 26. Preclinical vs. Clinical Biomarkers: Understanding Their ... [https://blog.crownbio.com/preclinical-vs-clinical-biomarkers-understanding-their-distinct-roles-in-drug-development]
- 27. Biomarker Validation - an overview [https://www.sciencedirect.com/topics/biochemistry-genetics-and-molecular-biology/biomarker-validation]
- 28. The 2025 FDA Biomarker Guidance: Understanding ... [https://www.linkedin.com/pulse/2025-fda-biomarker-guidance-understanding-lxoke]
- 29. Dilutional Linearity, Parallelism, Spike-and-Recovery in ... [https://www.enzo.com/note/dilutional-linearity-parallelism-spike-and-recovery-in-elisa-how-to-qc-your-results/]
- 30. A Practical Guide to Immunoassay Method Validation - PMC [https://pmc.ncbi.nlm.nih.gov/articles/PMC4541289/]
- 31. FDA Guidance for Industry on Bioanalytical Method ... [https://labs.iqvia.com/blog/fda-guidance-bioanalytical-method-validation-biomarkers]
- 32. ELISA Troubleshooting Guide [https://www.thermofisher.com/us/en/home/life-science/protein-biology/protein-biology-learning-center/protein-biology-resource-library/pierce-protein-methods/overview-elisa/elisa-troubleshooting-guide.html]
- 33. ELISA Comparison [https://www.mesoscale.com/en/technical_resources/our_technology/our_immunoassays/elisa_comparison]
- 34. Multiplex Assay Kits [https://www.mesoscale.com/en/products_and_services/assay_kits/multiplex_assay_kits]
- 35. How to Troubleshoot Sequencing Preparation Errors (NGS ... [https://www.cd-genomics.com/resource-sequencing-preparation-troubleshooting.html]
- 36. Tips & Tricks | Immunoassay Protocols & Troubleshooting [https://www.sigmaaldrich.com/US/en/technical-documents/product-supporting/milliplex/tips-tricks-immunoassay-protocol-troubleshooting-advice?srsltid=AfmBOoqC9wibGSN-4wKFDPnq-CYPIZYfd2E92GVDCT85ArlkKP-bkVxO]
- 37. ProcartaPlex Assays Support – Troubleshooting [https://www.thermofisher.com/us/en/home/technical-resources/technical-reference-library/antibodies-immunoassays-support-center/luminex-assays-support/luminex-assays-support-troubleshooting.html]
- 38. A Guide to Multi-omics Integration Strategies [https://frontlinegenomics.com/a-guide-to-multi-omics-integration-strategies/]
- 39. A Review of Non-Nucleotide Biomarker Discovery Protocols ... [https://pmc.ncbi.nlm.nih.gov/articles/PMC10216598/]
- 40. Batch Processing vs. Continuous Workflow: Optimizing ... [https://www.labmanager.com/batch-processing-vs-continuous-workflow-optimizing-laboratory-throughput-33646]
- 41. Standardized Workflow and Analytical Validation of Cell ... [https://pubmed.ncbi.nlm.nih.gov/40710315/]
- 42. Biomarker Discovery: How Automation and Integration are ... [https://www.moleculardevices.com/lab-notes/microplate-readers/biomarker-discovery-automation-integration]
- 43. Data Validation Automation: A Key to Efficient ... [https://www.functionize.com/ai-agents-automation/data-validation]
- 44. Liquid biopsy in cancer: current status, challenges and ... [https://www.nature.com/articles/s41392-024-02021-w]
- 45. Liquid Biopsy: The Challenges of a Revolutionary ... [https://pmc.ncbi.nlm.nih.gov/articles/PMC12154446/]
- 46. Liquid biopsy: A tool for non-invasive cancer detection and ... [https://www.abcam.com/en-us/knowledge-center/oncology/liquid-biopsy-for-non-invasive-cancer-detection]
- 47. Clinical applications of cell-free DNA-based liquid biopsy ... [https://www.sciencedirect.com/science/article/pii/S1936523325002505]
- 48. Leveraging Liquid Biopsy to Improve Cancer Care | Blog [https://www.aacr.org/blog/2025/05/21/breakthroughs-in-the-blood-leveraging-liquid-biopsy-to-improve-cancer-care/]
- 49. Development and clinical applications of liquid biopsy ... [https://pmc.ncbi.nlm.nih.gov/articles/PMC12268391/]
- 50. Cancer Biomarkers: Reflection on Recent Progress, Emerging ... [https://pmc.ncbi.nlm.nih.gov/articles/PMC12468363/]
- 51. Identification of Clinical Biomarkers for Pre-Analytical ... [https://pmc.ncbi.nlm.nih.gov/articles/PMC3629782/]
- 52. Why Pre-Analytical Variables Can Make or Break Your Assay [https://mtgroupbio.com/the-hidden-challenge-in-assay-development-why-pre-analytical-variables-can-make-or-break-your-assay/]
- 53. Exploring technical aspects of biomarker assays - NCBI - NIH [https://www.ncbi.nlm.nih.gov/books/NBK513094/]
- 54. Biomarker Program FAQs [https://www.ninds.nih.gov/current-research/focus-tools-topics/biomarkers-research/biomarker-program-faqs]
- 55. Overcoming the challenge of heterogeneity in healthcare [https://www.owkin.com/blogs-case-studies/overcoming-the-challenge-of-heterogeneity-in-healthcare]
- 56. Unlocking the Power of Digital Biomarkers in Clinical Trials [https://acrpnet.org/2025/08/19/unlocking-the-power-of-digital-biomarkers-in-clinical-trials]
- 57. Navigating biomarker validation [https://www.tempus.com/resources/content/articles/navigating-biomarker-validation/?srsltid=AfmBOoqWhH279t_eemb7yFASy9O1Pj4VIPSODyL03e02lNNjWUGZrMUs]
- 58. Clinical Data Integration: Everything You Need to Know [https://www.medidata.com/en/life-science-resources/medidata-blog/clinical-data-integration/]
- 59. Ten quick tips for biomarker discovery and validation analyses ... [https://journals.plos.org/ploscompbiol/article?id=10.1371/journal.pcbi.1010357]
- 60. Artificial intelligence for optimizing recruitment and retention in ... [https://pmc.ncbi.nlm.nih.gov/articles/PMC11491624/]
- 61. Optimizing Patient Recruitment and Engagement Strategies [https://www.appliedclinicaltrialsonline.com/view/optimizing-patient-recruitment-and-engagement-strategies]
- 62. Current practices and challenges in the standardization and ... [https://pmc.ncbi.nlm.nih.gov/articles/PMC5004491/]
- 63. What is Laboratory Test Standardization? | CSP [https://www.cdc.gov/clinical-standardization-programs/about/what-is-standardization.html]
- 64. Harmonization of Clinical Laboratory Test Results - PMC [https://pmc.ncbi.nlm.nih.gov/articles/PMC4975212/]
- 65. Meeting Regulatory Standards Assay Development [https://www.infinixbio.com/how-to-meet-the-regulatory-requirements-for-preclinical-assay-development/]
- 66. Holistic Approach to Sample Management and ... [https://www.precisionformedicine.com/blog/taking-a-holistic-approach-to-sample-management-and-sample-processing-for-your-clinical-trial/]
- 67. Clinical Trial Site Selection: Key Challenges & Solutions ... [https://www.precisionformedicine.com/blog/clinical-trial-site-selection-key-challenges-solutions-for-phase-3-success]
- 68. How To Budget For Risk And Failure In Early-Stage R&D [https://worldbusinessoutlook.com/how-to-budget-for-risk-and-failure-in-early-stage-rd/]
- 69. Biomarker Validation: Common Data Analysis Concerns [https://pmc.ncbi.nlm.nih.gov/articles/PMC4122484/]
- 70. Biomarker Qualification Program Submission Frequently ... [https://www.fda.gov/drugs/biomarker-qualification-program/biomarker-qualification-program-submission-frequently-asked-questions]
- 71. Analytical and biological variability in biomarker measurement ... [https://pmc.ncbi.nlm.nih.gov/articles/PMC5136507/]
- 72. Ethnicity-based variations in biological reference interval [https://www.sciencedirect.com/science/article/abs/pii/S0009898125004188]
- 73. Influence of ethnicity on biochemical markers of health and ... [https://pmc.ncbi.nlm.nih.gov/articles/PMC8997685/]
- 74. Navigating Biomarker Testing: Frequently Asked Questions [https://www.lung.org/lung-health-diseases/lung-disease-lookup/lung-cancer/symptoms-diagnosis/biomarker-testing/biomarker-faqs]
- 75. Biomarker Guidances and Reference Materials [https://www.fda.gov/drugs/biomarker-qualification-program/biomarker-guidances-and-reference-materials]
- 76. Ten quick tips for biomarker discovery and validation ... [https://pmc.ncbi.nlm.nih.gov/articles/PMC9371329/]
- 77. Statistical Issues in Biomarker Validation for Use in Drug ... [https://www.jscimedcentral.com/jounal-article-info/Annals-of-Biometrics-and-Biostatistics/Statistical-Issues-in-Biomarker-Validation-for-Use-in-Drug-Development-1255]
- 78. An overview of statistical methods for biomarkers relevant ... [https://pmc.ncbi.nlm.nih.gov/articles/PMC11371698/]
- 79. Drug Development Tool (DDT) Qualification Programs [https://www.fda.gov/drugs/development-approval-process-drugs/drug-development-tool-ddt-qualification-programs]
- 80. Table of Pharmacogenomic Biomarkers in Drug Labeling [https://www.fda.gov/drugs/science-and-research-drugs/table-pharmacogenomic-biomarkers-drug-labeling]
- 81. Resources for Biomarker Requestors [https://www.fda.gov/drugs/biomarker-qualification-program/resources-biomarker-requestors]
- 82. AgencyIQ – Sluggish biomarker program offers FDA ... [https://friendsofcancerresearch.org/news/agencyiq-sluggish-biomarker-program-offers-fda-opportunity-for-reform/]
- 83. Harnessing digital health technologies and real-world ... [https://pmc.ncbi.nlm.nih.gov/articles/PMC12290384/]
- 84. Revisiting real-world data studies: Progress, value, and ... [https://www.the-innovation.org/article/doi/10.59717/j.xinn-med.2025.100143]
- 85. Use of Biomarkers in Drug Development for Regulatory ... [https://pmc.ncbi.nlm.nih.gov/articles/PMC12489174/]
- 86. Navigating biomarker validation [https://www.tempus.com/resources/content/articles/navigating-biomarker-validation/?srsltid=AfmBOopt5BMDsd5JnfBtoedhXPOI1hg5tBx6fvUtNSCkDrAfiw-0s3R5]
- 87. Biomarkers of success of anti-PD-(L)1 immunotherapy for non ... [https://pmc.ncbi.nlm.nih.gov/articles/PMC11669362/]
- 88. Tumor Mutational Burden (TMB) as a Predictive Biomarker ... [https://pmc.ncbi.nlm.nih.gov/articles/PMC7710563/]
- 89. Tumor mutational burden for the prediction of PD-(L)1 ... [https://www.sciencedirect.com/science/article/pii/S092375342400084X]
- 90. The Challenges of Tumor Mutational Burden ... [https://pmc.ncbi.nlm.nih.gov/articles/PMC7878292/]
- 91. Emerging Technologies in Biomarker Discovery You ... [https://blog.crownbio.com/emerging-technologies-in-biomarker-discovery-you-should-know-about]
- 92. Methods for Stratification and Validation Cohorts [https://pmc.ncbi.nlm.nih.gov/articles/PMC9144352/]
- 93. Successful Statistical Strategies for Patient Screening and ... [https://cambridgecognition.com/successful-statistical-strategies-for-patient-screening-and-stratification/]
- 94. Patient Stratification [https://www.verisimlife.com/solutions/patient-stratification]